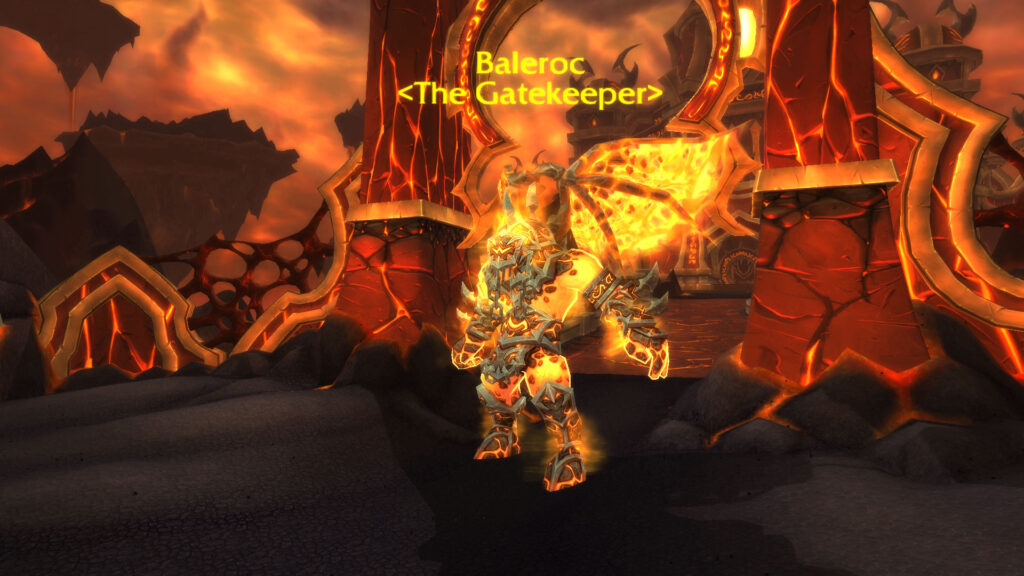
Baleroc, the Gatekeeper is the fifth boss in the Firelands raid, where he guards the bridge that leads across the Sulfuron Span to the final two bosses. He can be fought only after defeating the first four bosses in the instance, and he must be defeated in order to progress further into the Firelands. Baleroc can be faced on either Normal or Heroic difficulty with both 10 and 25 player raid groups.


Almost demonic in nature, Baleroc stands tall at the very gate that leads to Ragnaros’ palace, threatening any who might dare approach him. Little is known about Baleroc other than the fact that he used to be an extremely prominent figure in the ancient Elemental Wars. In his current state, even the Fire Lord’s minions don’t dare approach him, as he has been observed to kill foes and allies alike, with little regard.
However, the demented giant fiery elemental Baleroc displays utmost loyalty to his master, avoiding causing harm to any important figure in the Fire Lord’s domain. Although, neither mortals nor lowly Fire Elementals are so lucky to benefit from his mercy.
The Baleroc, the Gatekeeper Encounter consists only of one stage that harbors some complicated mechanics for both tanks and healers. While the fight might seem confusing at first, the encounter itself can be considered a survival trial for the Tanks and a soaking trial for the DPS, with Baleroc using most of his abilities on the tanks and only one or two abilities on the rest of the group depending on whether the raid is in Normal or Heroic difficulty.
The encounter is also meant as a race against time since Baleroc, the Gatekeeper has a short Enrage Timer!
(You can reference the Baleroc, the Gatekeeper Loot list if you want to see all of the boss drops.)
Role Summaries
- Everyone must complete the Countdown mechanic properly to avoid an instant wipe!
- Players should make sure to soak the Shards of Torment to avoid wipes caused by Wave of Torment!
- Players should make sure that other players are not afflicted with Tormented!
- Abilities such as Heroism/Bloodlust/Time Warp should be used at the beginning of the encounter!
- Tanks must make sure to have defensive abilities ready whenever they swap aggro.
- Tanks must make sure to not be afflicted by Tormented!
- Tanks must make sure to stack Blaze of Glory in case they intend to soak Decimation Blade.
- Healers must make sure to cast Direct Healing Spells on targets afflicted by the Shards of Torment to stack Vital Spark.
- Healers must coordinate strictly to stack Vital Sparks equally among themselves.
- Healers without stacks of Vital Sparks should conserve their mana and allow healers with Vital Sparks to heal the tank which is currently holding Baleroc.
- Healers that accumulated Vital Sparks have to use Direct Healing Spells on the tank which has the Blaze of Glory stacks to benefit from Vital Flame!
- DPS must make sure to soak the Shards of Torment!
- DPS should ensure that Defensive Cooldowns are available whenever Torment reaches 18-20 stacks.
- DPS must make sure to not infect the group with Tormented or trigger Wave of Torment.
- DPS must make sure to time their big Offensive Cooldowns with Heroism/Bloodlust/Time Warp since the encounter against Baleroc is a race against time.
- Raid Leaders should make sure people complete the Countdown mechanic!
- Raid Leaders should call out whenever Shards of Torment spawn in case the raid struggles to properly execute the soaking mechanic.
- Raid Leaders must ensure to split up the Healers into multiple groups and call out the specific order for the Vital Spark & Vital Flame mechanics.
Abilities
Raid Composition & Preparation
Encounter Mechanics & Strategy
Normal vs Heroic Difficulty
The main differences between the Normal Difficulty and the Heroic Difficulty of the Baleroc, the Gatekeeper Encounter are the additions of the Countdown mechanic on both the 10-man version and the 25-man version and the fact that the Tormented effect can be spread to other players through contact. The rest of the differences are strictly tied to the amount of damage dealt by the abilities with no other changes in the mechanics!
The Fight
The Baleroc, the Gatekeeper Encounter is widely regarded as one of the toughest bosses in the Firelands raid, if not, more difficult than Ragnaros, Majordomo Staghelm, and Alysrazor! Just as mentioned previously, the encounter has only one phase but requires a large amount of coordination between players and a showcase of strength as the encounter itself is a race against time.
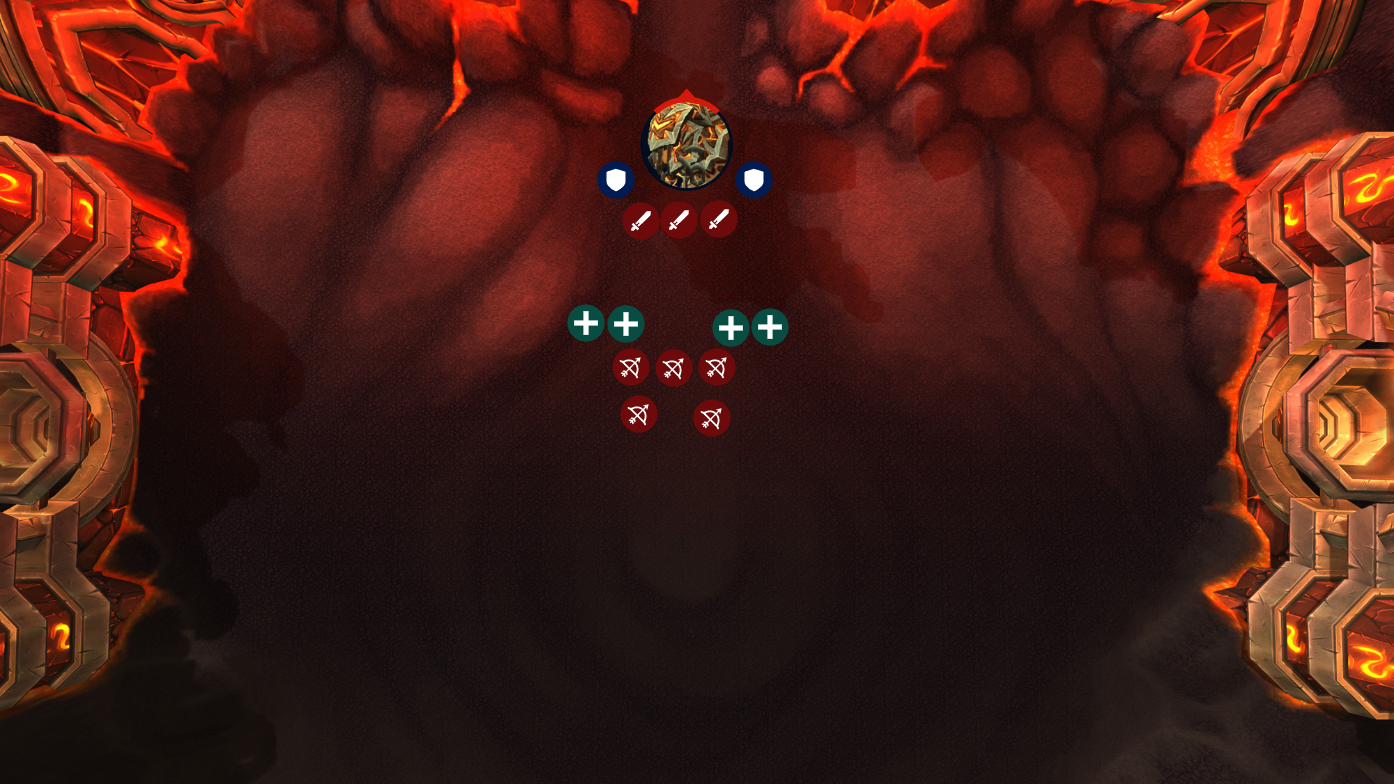
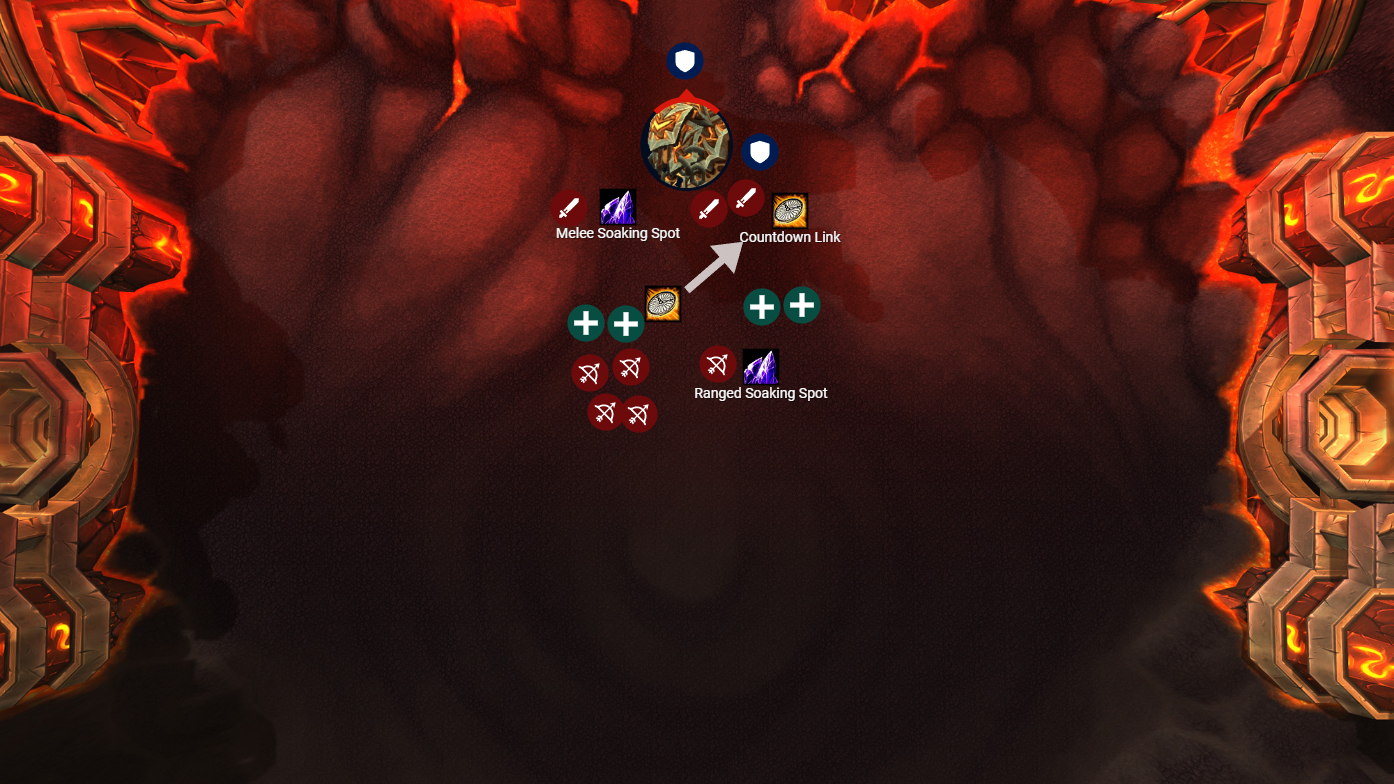
The encounter requires precise positioning, with players having to split into two separate groups: Melee Stack and Ranged Stack! Additionally, raid leaders must make sure to designate specific areas for players to stand isolated from the group whenever they are afflicted by the Tormented effect. This is done specifically to ensure that the debuff doesn’t spread. If the debuff spreads, it will result in a guaranteed wipe as it dampens the effect of Vital Spark.
Baleroc doesn’t have as many individual mechanics as other Firelands bosses. However, each mechanic that Baleroc has is split into multiple individual effects that are tied to the main three mechanics: Blaze of Glory, Shards of Torment, and Blades of Baleroc!
The main mechanic that must be properly performed is Blaze of Glory! While it might seem like a no-brainer since Baleroc automatically places the Blaze of Glory effect on the current target he attacks, you may wonder what specifically must be done about this mechanic. While it is theoretically possible to do this mechanic with only one tank, having Baleroc automatically stack Blaze of Glory, it is important to have another tank gain the effect as well, to act as a “failsafe” for the raid. This means that after breaching the 250-400k HP threshold, tanks must swap to ensure that both of them gain the Blaze of Glory and reach at least 280-300k HP. Tanks must do this because of the Blades of Baleroc mechanic.
Blades of Baleroc is split into two individual effects: Decimation Blade and Inferno Blade. Those effects will be cycled between each other, occurring every 15 seconds! Baleroc will randomly choose one of them, meaning that there is no specific pattern. For this, DBM is highly recommended, as tanks must swap whenever the Decimation Blade effect occurs to prevent a potential death for the Main Tank.
Decimation Blade deals Shadow Damage, inflicting up to 90% of the target’s maximum HP and at least 250000 Shadow Damage. Because this ability can’t be absorbed, evaded, parried, blocked, or resisted, the Off-Tank must stack Blaze of Glory as well and ensure that Decimation Blade is not soaked by the Main Tank. While it is technically possible to have Baleroc tanked by a single tank that soaks both Decimation Blade and Inferno Blade, this puts extreme pressure on the healers and leaves the tank vulnerable to the enhanced Physical Damage dealt by Baleroc due to Blaze of Glory‘s side effect.
Inferno Blade deals flat Fire Damage, scaling based on the encounter’s variant (10-man/25-man) and the encounter’s difficulty. This ability might seem manageable since Blaze of Glory massively empowers the tank, however, Blaze of Glory also grants Baleroc Incendiary Soul. Since Incendiary Soul empowers Baleroc’s overall Fire Damage instead of empowering it against a specific target, letting the Off-Tank stack Blaze of Glory too much will put the Main Tank at risk of getting One-Shot by Inferno Blade if the Main Tank’s HP is not high enough.
Besides the Blades of Baleroc and Blaze of Glory which mainly concern the tanks, the Shards of Torment mechanic is the other main mechanic that concerns the entire raid group and has ties to the Blaze of Glory when we’re specifically talking about the Healer Group.
The Shards of Torment mechanic is split into 5 different specific effects: Torment, Tormented, Wave of Torment, Vital Spark, and Vital Flame!
During the encounter, Shards of Torment will occasionally spawn. On the 10-man difficulty, only 1 x Shards of Torment spawns at a time while on the 25-man difficulty 2 x Shards of Torment spawn at the same time. On the 10-man difficulty, the Shards of Torment will spawn either in between the two groups or in the Ranged Group while on the 25-man difficulty, one will spawn near the Melee Group and one near the Ranged Group!
Shards of Torment can directly cause 3 effects: Torment, Tormented, and Wave of Torment! The Shards of Torment must be soaked by a player from the DPS group, with shards spawning every 30 seconds during the encounter. If they are not soaked, they cause the Wave of Torment effect, inflicting minor Shadow Damage each second, eventually resulting in a raid wipe. Whenever a player soaks Shards of Torment, they will be directly afflicted with Torment. The Torment effect begins dealing low Shadow Damage that ramps up every second, dealing considerable damage by the end of its duration. It is advised to assign classes that have an immunity ability such as Ice Block, Dispersion, or Divine Shield for soaking the effect as Torment deals tremendous damage towards its duration.
After the Torment effect ends or simply after a player walks out of the Shards of Torment radius, players will be afflicted with Tormented. The Tormented effect increases all Shadow Damage taken by players by 250% on the Normal Difficulty and by 500% on the Heroic Difficulty.
On the Heroic Difficulty, spreading Tormented can result in an instant wipe, especially if the effect reaches either the tanks or the healers. As such, Healers are never allowed to soak Shards of Torment, due to the healing reduced effect.
Besides the DPS Group that has to soak the Shards of Torment, the Healer Group also has a very important assignment related to the Shards of Torment mechanic! Healers have to specifically use Direct Healing Spells on targets affected by Torment to trigger the Vital Spark effect. The Vital Spark effect is placed upon a healer whenever they use a Direct Healing spell on a target afflicted by Torment, generating 1 x Vital Spark stack for every 3 x stacks of Torment currently active on the target.
Vital Spark is directly related to the Blaze of Glory mechanic, with healers triggering Vital Flame whenever they heal a target under the effect of Blaze of Glory. The Vital Flame effect increases all healing done by 5% per Vital Spark stack, with the effect lasting 15 seconds. Upon the end of Vital Flame, all the stacks of Vital Spark that were used to empower the effect are returned to the player.
This mechanic can be complicated to manage, especially on the 25-man version of the encounter. To properly execute this mechanic, healers have to be split into separate groups and take turns stacking the Vital Spark effect. It is recommended to allow 2-3 healers to stack the effect first and have the rest of the 2-3 other healers stack it on the next Shards of Torment spawn.
Lastly, the Countdown mechanic is very similar to Lana’thel’s mechanic from ICC back in WotLK. Players affected by Countdown must quickly rush one to another and connect the chain caused by the Countdown mechanic. The chain link lasts for 8 seconds, so players should move as quickly as possible, especially if they are at a considerable distance from each other.
If the raid executes all the mechanics properly, Baleroc, the Gatekeeper, will fall and his reign of terror will finally end! Keep in mind that this encounter requires a massive DPS output, especially considering the short Enrage Timer!
About the Author