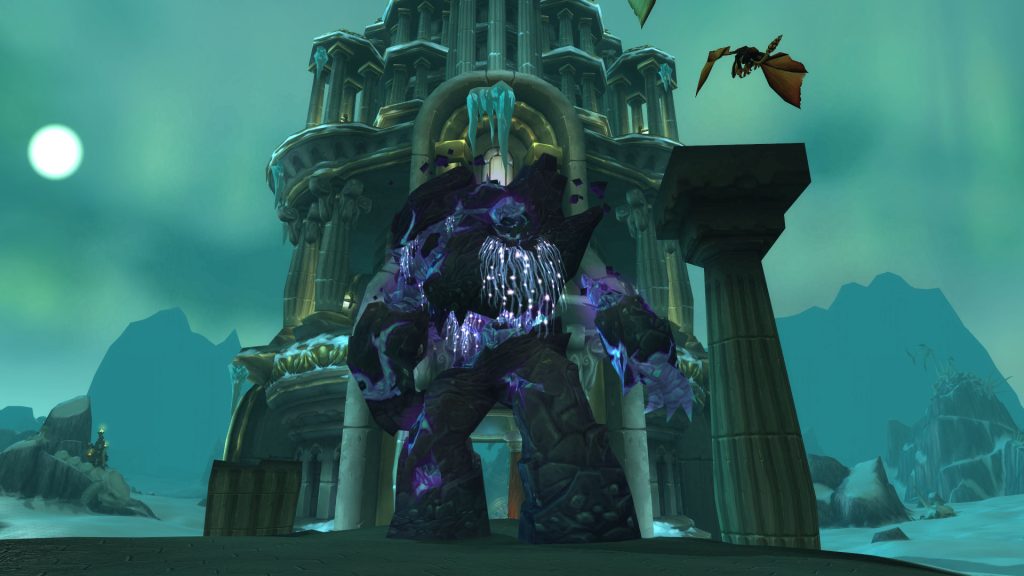
Morchok is the first boss in the Dragon Soul raid, a powerful elemental at the head of the assault on Wyrmrest Temple. He must be defeated to progress further in the raid. This guide will cover all of the mechanics for the Morchok fight as well as the best strategy for success in 10 and 25 player raid groups on both Normal and Heroic modes.
“You seek to halt an avalanche. I will bury you.”
– Morchok
Raid Composition
These are our recommendations for your raid composition for this fight. You should decide how many tanks and healers you need and then fill the other spots with DPS. Keep in mind that this boss has a 7-minute enrage timer and you will need enough damage to beat it in that time.
Role | 10 Normal | 10 Heroic | 25 Normal | 25 Heroic |
|---|---|---|---|---|
1-2 | 2 | 1-2 | 2-4 | |
2-3 | 2-4 | 5-6 | 6-8 | |
5-7 | 4-6 | 17-19 | 15-19 |
Role Summaries
 Everyone
- Don’t be the closest person to the tank unless you are the designated Stomp soaker.
- Stay within 25 yards of Morchok (or Korhcrom, if you’re assigned to him on Heroic) so that you can help soak the damage from Stomp.
- Be ready to run toward Resonating Crystals when they spawn so that you minimize the damage of the explosion.
 Raid Leader
- On Heroic difficulty, assign a DPS to soak Stomp for each tank. In most cases this should be a DPS with high health, armor, and strong defensive cooldowns. Rogues are ideal, but plate wearers and Balance Druids are also good options.
- Assign specific people to soak Resonating Crystals. Factor in the player’s awareness as well as their character’s mobility and how much you can afford to have them moving around during the fight.
- Keep count of how many times Morchok spawns a Resonating Crystal. He’ll switch phases after the third one. (This does not count those that are spawned by Kohcrom instead.)
- Call for Bloodlust when the boss becomes Furious at 20% health, but be sure to use it while he is in his main phase.
 Tanks
Tanks
- On Normal difficulty, be ready to taunt when the other tank starts taking too much damage from Crush Armor.
- Be aware that you may need to move the boss when Resonating Crystal goes out so that your team is within range of Stomp.
- Be ready to use defensives when the boss becomes Furious at 20% health.
 Healers
- You’ll be dealing with heavy raid damage on this fight whenever Stomp goes out. Save your big cooldowns for when Stomp happens close to a Resonating Crystal explosion.
- Tanks and soakers will need extra attention after a Stomp and when the boss becomes Furious at 20% health.
- When Black Blood of the Earth goes out, get to safety and quickly take advantage of the short reprieve to top everyone off before the phase resets.
 DPS
DPS
- If you are a designated Stomp soaker, be sure to stay with your tank so that you are always the closest target for the debuff.
- Be ready to use cooldowns to burn the boss(es) when Furious kicks in at 20% health.
Mechanics & Strategy
Before the fight begins, it’s a good idea to clear all of the trash around the boss to give your group some space, especially on Heroic.
Heroic Only
Summon Kohcrom
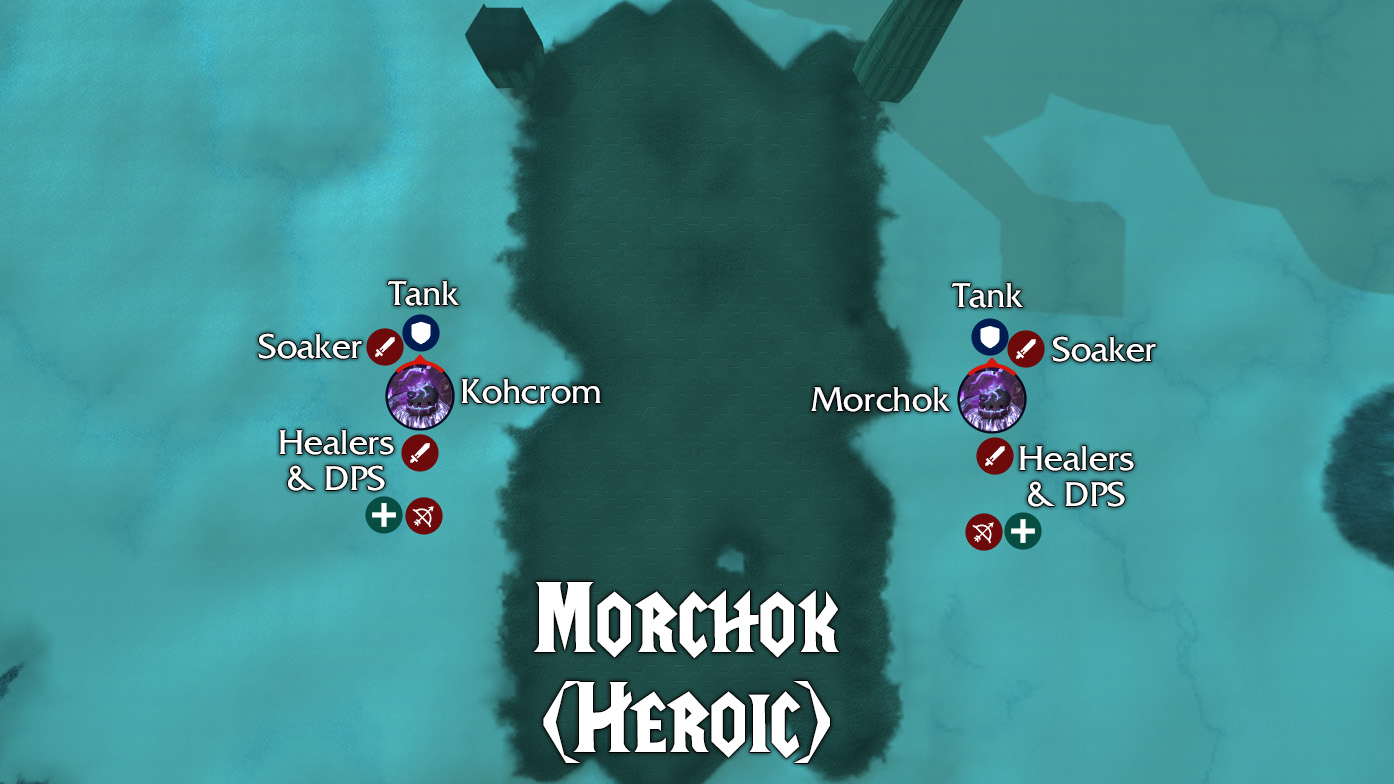
On Heroic mode, Morchok will split in half when his health reaches 90%. He’ll summon a clone, Kohcrom, who has all of the same stats and abilities. They have separate health pools, but any damage that you deal to one will be split with the other.
Your group should form two teams and separate the bosses so that no one takes damage from both. One tank should pull each boss to either side of the road. Half of your healers and half of your damage dealers should go with each tank. The other mechanics of the fight are largely the same, but multiplied by two due to the presence of Kohcrom.
Main Phase
Morchok will spend most of the fight in this phase, switching to his Black Blood phase every so often and then returning to his standard abilities.
Stomp
Your first concern when dealing with Morchok will be his Stomp ability. He casts it every 15 seconds throughout the fight, and it deals a massive amount of damage that is divided among everyone within 25 yards of him. This damage is doubled for his current target and their closest ally. On Heroic, the ability also leaves an effect on his target that increases their physical damage taken by 100% for 10 seconds.
Everyone will need to stay within 25 yards of the boss in order to divide this AoE as much as possible. You’ll also need to have a dedicated soaker who stands close to your tank for every Stomp with a defensive cooldown ready to mitigate its damage. On the Normal 10-player version, this can be the other tank. On Heroic, you’ll need two soakers, one for each tank. For the Heroic 25-player version, you may even opt to use 4 tanks for this fight. Other good options for soakers are DPS with high health, armor, and/or damage reduction cooldowns, such as Rogues, Balance Druids, and plate wearers.
Crush Armor (Normal Only)
Although you only have to deal with one boss on Normal mode, you’ll have another mechanic to add stress to your tanks in the form of Crush Armor, which adds a stacking armor reduction debuff to his current target. Since there’s no second boss to worry about, you can handle this ability by having the tanks swap whenever the current tank starts taking too much damage.
Resonating Crystal
About every 15 seconds, Morchok will summon a red Resonating Crystal that will explode after 12 seconds, dealing damage to the closest group of players and knocking them back. In a 10-player group, this will be the closest 3 targets, and in 25-player it will be the closest 7. The damage that is dealt by this ability is increased if the targets are further away from it.
The closest players will be marked by a glowing line that connects them to the crystal. You’ll be able to see your proximity by looking at the color of the line, which will match the color of the debuff you have: Danger, Warning, or Safe. If another player moves closer, the line will shift to them.
You can choose to have designated soakers who will move to the crystal whenever it appears. This will allow the rest of your team to ignore the mechanic entirely and continue healing or dealing damage. The alternative is that everyone will need to be aware of whether they are one of the closest people to the crystal, and ready to move so they don’t take lethal damage.
Healers should be aware of when crystals are about to explode and should ensure that the targeted players are healthy before it happens. Healing cooldowns may be necessary if the explosion happens around the same time that a Stomp goes out. Tanks should be aware that they may need to reposition the boss so that crystal soakers are within range when Stomp goes out.
Black Blood Phase
After three Resonating Crystals have exploded, Morchok switches to his second phase, where he cycles through the following three abilities. You will get a break from his main phase abilities during this time.
Earthen Vortex
Morchok pulls everyone to him, dealing 5% of their total health as physical damage every second for 5 seconds (so 25% total). On Heroic difficulty, Kohcrom does the same to players who are closer to him.
Falling Fragments
Right after Earthen Vortex goes out, the boss(es) will channel this ability for 5 seconds, causing Shards of Earth’s Vengeance to appear on the ground nearby. These shards deal physical damage to any player who might be standing right on top of them when they land, and they create a solid obstacle behind which players can hide.
Everyone should immediately start running to get behind a pillar for the next ability. Ranged DPS may be able to continue dealing damage to the boss by standing behind two pillars that are side by side, allowing them to be protected while still having line-of-sight to the boss. On Heroic difficulty, both groups should aim to run toward the middle of the two bosses so that healers can reach as many players as possible.
Black Blood of the Earth
When the boss(es) finish channeling Falling Fragments, they’ll cast Black Blood of the Earth, creating an area of black blood around them that gives a stacking debuff as long as you stand in it. The debuff deals nature damage every second and gains a stack every second, maxing out at 20 stacks. It will be removed as soon as you leave the area of effect.
Once everyone is out of the area of effect, healers will have a brief window to catch up before the phase resets and everyone needs to get into position again for Stomp and Resonating Crystals.
End Phase
Furious
When Morchok reaches 20% remaining health, he’ll gain the Furious buff, increasing his attack speed by 30% and the damage he deals by 20%.
Your group should save Bloodlust for when this happens, although you should only use it when he is in his main phase (and not about to transition into his Black Blood phase).
Enrage Timer
Morchok has a 7-minute enrage timer, so you’ll need to defeat him within that window or he will wipe the raid.
About the Author
