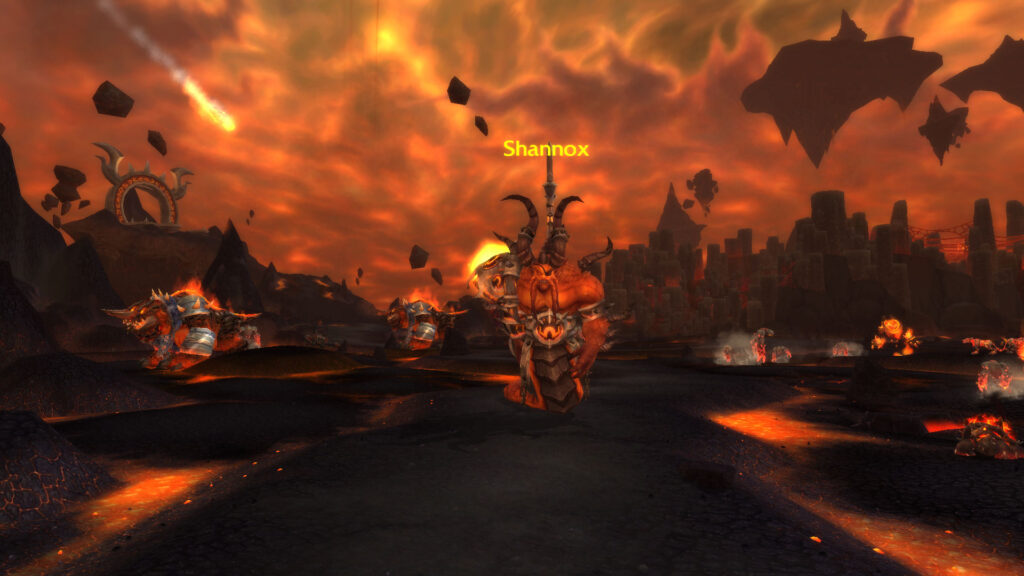
Shannox is one of the first four bosses in the Firelands raid, and players can choose which order to face them in. This flamewalker boss spawns in The Molten Fields in the center of the raid when enough trash has been killed. Like the other bosses in Firelands, Shannox can be faced on either Normal or Heroic difficulty with both 10 and 25 player raid groups.


One of the dreaded Flamewalkers, Shannox acts as the overseer of elemental hounds and one of the guardians of the Fire Lord’s domain. While he is not necessarily the most fearsome Flamewalker, Shannox is certainly a foe that should not be underestimated. He is always accompanied by the most loyal and ferocious hell-hounds: Riplimb and Rageface.
While Shannox is always vigilant, he has his pride, only engaging foes that manage to defeat a considerable number of Fireland’s minions.
The Shannox Encounter can only be started after a large number of adds is killed. The encounter consists of one phase where players will face both Shannox and his deadly hounds, Riplimb and Rageface.
(You can reference the Shannox Loot list if you want to see all of the boss drops.)
Role Summaries
- Everyone should allow the Main Tank to generate enough aggro at the beginning of the encounter since Shannox is immune to taunt!
- Everyone who can use Defensive Cooldowns to soak Immolation Traps should do so as long as they don’t risk an imminent death!
- Everyone should position themselves properly to avoid Arcing Slash.
- Everyone should avoid Magma Rupture and Hurl Spear.
- Everyone should avoid triggering Crystal Prison Trap randomly! Players should prioritize using Crystal Prison Trap to trap Rageface.
- Off-Tank must make sure to tank Riplimb at a safe distance from the raid while also making sure to not trigger Separation Anxiety!
- Off-Tank has to kite Riplimb during Shannox’s Hurl Spear to a more favorable spot to delay the return of the spear as much as possible.
- Main Tank must make sure to tank Shannox away from the raid group to make sure that Arcing Slash doesn’t hit any ally!
- The Main Tank should avoid soaking Immolation Traps, although the tank can choose to do so in case a strong Defensive Cooldown is available.
- Tanks should prioritize saving big Defensive Cooldowns for moments where the Jagged Tear effect reaches a high number of stacks.
- Healers should prioritize topping off players targeted by Rageface
- Healers should prioritize maintaining healthy Mana Pools as the encounter can quickly induce OoM states.
- Healers should prioritize using powerful Healing Spells on the tanks when Jagged Tear stacks too many times.
- Healers must make sure that whoever is targeted by Face Rage survives the ordeal!
- On the Heroic Difficulty, DPS should only focus on killing Shannox, both on the 10-man and 25-man versions of the raid!
- On the Normal Difficulty, DPS should focus on killing both Riplimb and Rageface before Shannox reaches 30% HP!
- DPS can choose to soak Immolation Traps if they have powerful defensive abilities such as Ice Block, Divine Shield, and Anti-Magic Shell.
- DPS must make sure to break Face Rage and kite Rageface to one of the Crystal Prison Trap.
- Raid Leaders must make sure that Separation Anxiety doesn’t trigger!
- Raid Leaders should call out the Hurl Spear animation to allow the Off-Tank to reposition.
- Raid Leaders should make sure that players use slow effects on Riplimb when it goes to retrieve Shannox’s spear and once again when it’s on its way to its master.
- Raid Leaders should make sure to mark Crystal Prison Traps for players to see for them to lead Rageface onto them.
Abilities
Adds
Raid Composition & Preparation
Encounter Mechanics & Strategy
Normal vs Heroic Difficulty
The main difference between the Normal and Heroic difficulty of the Shannox Encounter is found in both Riplimb’s and Rageface’s abilities. On the Normal Difficulty, both of the pets have an ability named Frenzied Devotion, which is similar to the “Enrage Effect” that most raid bosses have. This effect triggers whenever Shannox reaches 30% HP, meaning that both pets have to be killed before Shannox reaches the HP threshold.
On the Heroic Difficulty, neither Riplimb nor Rageface have Frenzied Devotion, meaning that you don’t have to kill the adds on the Heroic Difficulty.
The rest of the differences are strictly tied to the overall damage dealt by the abilities of Shannox, Riplimb, and Rageface, with the Heroic Difficulty featuring far deadlier effects.
Pull
Shannox is the only Boss Fight in Firelands that has a special pull pre-requisite. In order for Shannox to spawn, players must first clear a considerable amount of Trash Mobs from the center part of the raid. As players continue clearing Trash Mobs, they will receive a message that Shannox has been alerted of their presence, with the boss spawning at the gate guarded by Baleroc.
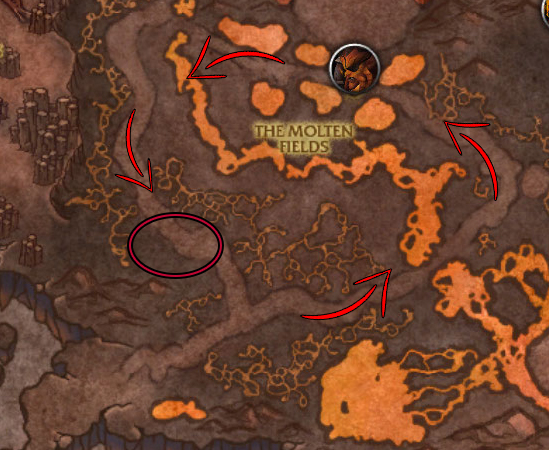
Shannox will start patrolling the center area, following the main road. Players may choose to engage Shannox on any part of the central map, as there is no specific spot for the encounter. One of the ideal locations is close to Beth’tilac’s lair, on the southwest part of the central Firelands Map.
Phase 1 – The Fight
Just as mentioned previously, the Shannox Encounter only has one specific phase! The encounter can be started at any point of his patrol route, although it is indicated to start in a spot where you don’t have to deal with any troublesome environmental issues such as lava.
As soon as you begin the encounter, the raid group should allow the Main Tank to pick up the aggro on Shannox and position the boss properly. At the same time, the Off-Tank is supposed to pick up Riplimb and separate the add from the group and Shannox. Rageface can’t be tanked at all and will attack random players, often changing aggro between targets.
There are multiple mechanics to take into consideration but the main one that forces the raid to split up Shannox and Riplimb is Hurl Spear. Additionally, the raid group should make sure that the distance between Shannox and Riplimb is less than 80 yards at all times to avoid triggering Separation Anxiety!
The following image showcases an ideal setup for this encounter:

Once everyone in the group is in a proper position, players have to prioritize damaging Shannox while watching out for a few important mechanics.
The first mechanic that players have to watch out for is Arcing Slash. The Arcing Slash ability is also another reason why this encounter requires a specific positioning besides the Hurl Spear ability. Shannox will periodically cast Arcing Slash, dealing high Physical Damage in a cone shape to all players caught in its radius. Due to Arcing Slash, the Main Tank must make sure that Shannox is always positioned with the back towards the raid group. Besides the high Physical Damage, Arcing Slash also afflicts each target with Jagged Tear, a DoT effect that can stack multiple times. The Jagged Tear is not only applied by Arcing Slash to the Main Tank but also the Off-Tank through Riplimb’s Limb Rip ability. Both tanks have to be wary of this effect and reserve their big Defensive Cooldowns for whenever the stacks accumulate too many times. Healers should keep a close watch on the tanks as too many applications of Jagged Tear can quickly result in either tank’s death.
Besides the Jagged Tear mechanic, Shannox will use two traps, according to his lore as a master hunter. Shannox will use Immolation Trap much more frequently than Crystal Prison Trap. Immolation Traps deal high Fire Damage over 9 seconds and place a debuff on the target that increases all Fire Damage received by 40%. They can be avoided entirely or simply soaked by players with powerful defensive cooldowns such as Ice Block, Divine Shield, and Anti-Magic Shell. The only tanks that should soak an Immolation Trap are Blood Death Knights as they can either massively heal themselves or use Anti-Magic Shell. All the other tanks should avoid soaking Immolation Traps. Ideally, your group will avoid triggering the traps entirely and bait Rageface into activating the traps instead!
The other trap, Crystal Prison Trap should be entirely ignored by players! The ideal situation for this trap is to bait Rageface into the trap, encasing the mutt in crystal for up to 10 seconds.
The second mechanic that players have to watch out for, and the main reason for which this encounter requires specific positioning besides Arcing Slash is Hurl Spear. The Hurl Spear mechanic will continue happening throughout the entirety of the encounter as long as Riplimb remains alive! Periodically, Shannox will use Hurl Spear, throwing it at a location near Riplimb’s current spot. This ability has a specific animation, meaning that it allows the group to reposition Riplimb during the animation to delay the interaction. Once the spear hits the ground it will deal massive Physical Damage in the exact spot it hits and high Fire Damage in a circular pattern shortly after in a 50-yard radius. However, the pattern allows players to dodge this attack even if they are caught in the radius as long as they don’t sit in the slim fiery pillars that the ability forms.
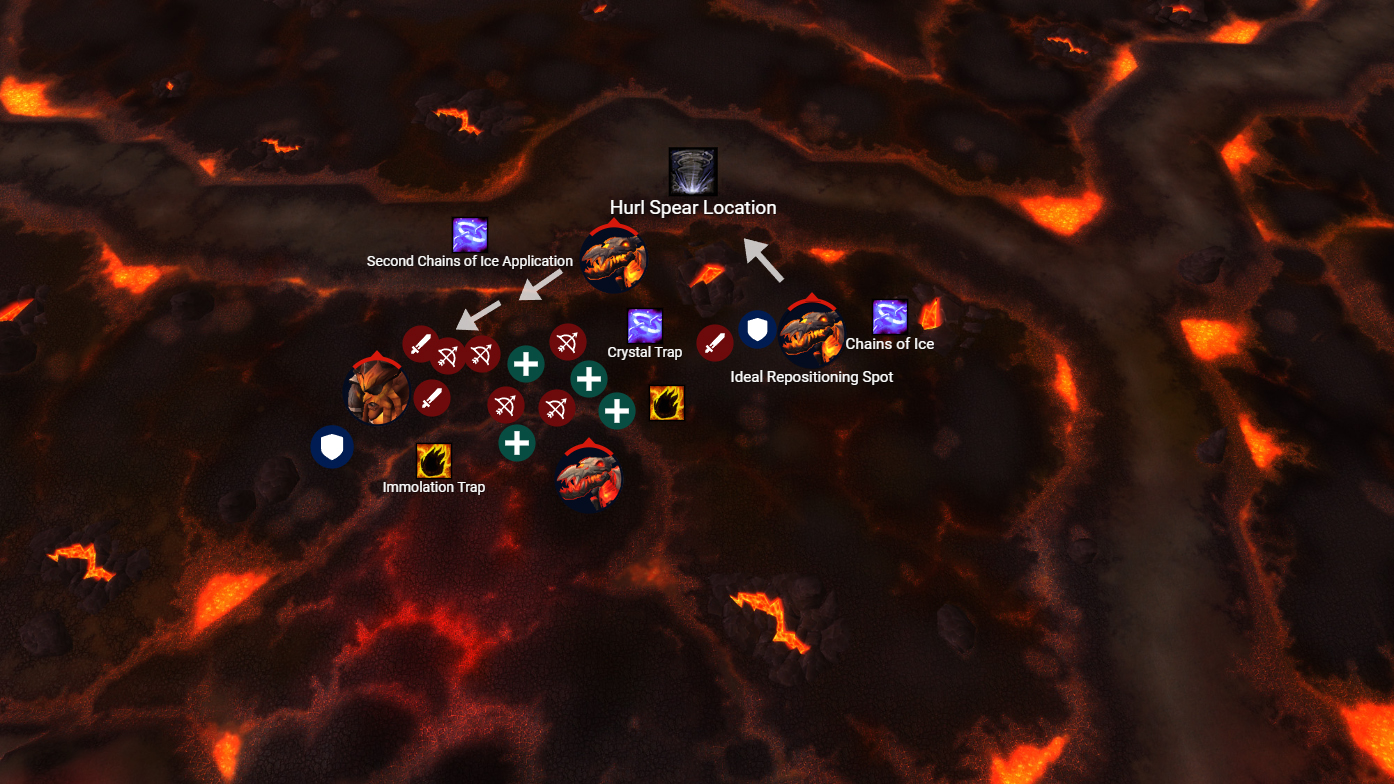
After the Fire Damage explosion occurs, Riplimb will fanatically attempt to retrieve the spear and hand it back to Shannox. The interaction in which the Off-Tank can reposition Riplimb is made with the specific intent to delay Riplimb as much as possible. During this interaction, Riplimb is susceptible to all forms of slow effects, meaning that Chains of Ice will be the best tool against him. Delaying Riplimb as much as possible serves the function of resetting the Jagged Tear stacks, as Shannox won’t use Arcing Slash while he doesn’t have his spear. Players will have to be careful, however, as the ground will be cluttered with traps and the fiery pillars left by Hurl Spear!
Besides Shannox and Riplimb, players will also have to deal with Rageface! Since Rageface can’t be tanked, he will produce plenty of chaos among the raid group. The main ability that players will have to be wary of is Face Rage. Since Face Rage forcefully stuns one target and requires another to break the effect through a specific amount of damage dealt in 1 hit, the mechanic can be quite troublesome. The best way to deal with it is to assign a powerful caster to consistently attack him until they manage to land the necessary hit, with the caster ideally being a Mage. Rageface will need to be kited around and brought to any active Crystal Prison Trap whenever Face Rage ends.
The majority of the encounter will revolve around the mechanics mentioned earlier and will remain so until either Shannox reaches 30% HP or Riplimb and Rageface die. If Shannox reaches 30% HP, both of his pets will activate Frenzied Devotion. If one of Shannox’s pets dies, he will activate Frenzy which will stack up to 2 times.
On both 10-man and 25-man Normal Difficulty, you will always want to kill both adds, even if you incur the Frenzy buff. On the Heroic Difficulty, you will want to leave the adds alive since they won’t have Frenzied Devotion. However, on the Heroic Difficulty, you will deal with Feeding Frenzy, meaning that the Healers will have to go in “overdrive” and spam heals on whichever target is currently attacked by the adds.
If all goes according to plan, Shannox will die quite easily, with only one mechanic left to mention! In case Riplimb dies, Shannox will cast Magma Rupture instead of Hurl Spear! This ability functions similarly to Hurl Spear, only that this time, it deals its damage to all nearby targets while also rebuffing the players with a powerful Fire Damage-increasing debuff. The blast zone of Magma Rupture functions in the same circular pattern as Hurl Spear, meaning that the fiery beams created by the ability can be dodged with skilled positioning. The only issue with this transition is that players can no longer reset the stacks of Jagged Tear, so the encounter should be finished as fast as possible!
About the Author