- Author: Pride
- Date: May 4, 2022
- Updated: May 5, 2022
- Expansion: TBC Classic
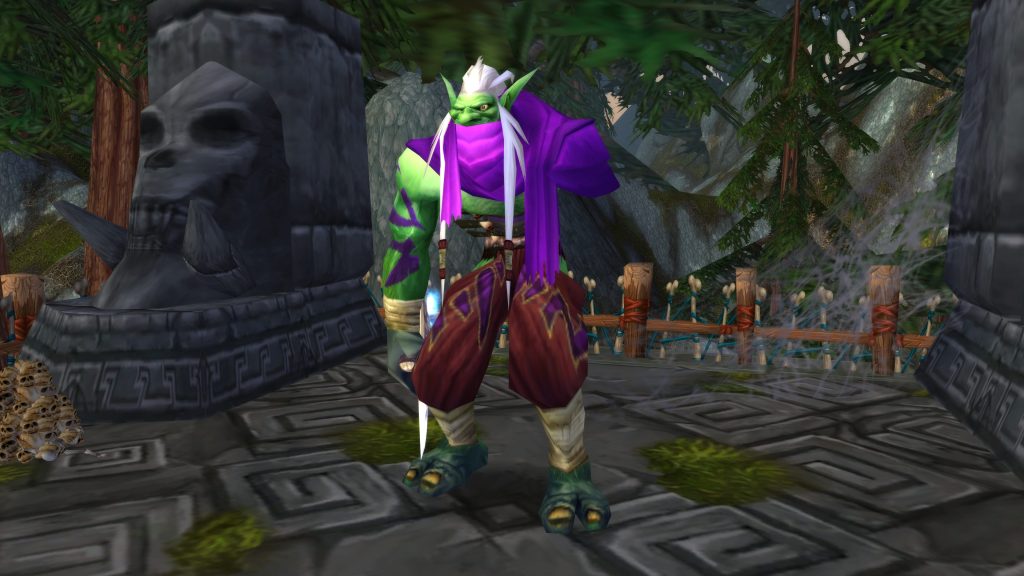
Zul’jin, the Amani Warchief, is the final boss of the Zul’Aman raid. Players can challenge Zul’Jin after defeating Hex Lord Malacrass.
His fight has 5 different phases, making it one of the most complex fights in all of Zul’Aman. However, he will typically not be particularly more difficult than Malacrass, as the main challenge here will be that he deals tons and tons of damage for your healers to deal with, and has certain mechanics that will kill players who do not pay attention.
This guide will offer a detailed, step-by-step tutorial on how to finally bring Zul’jin’s reign of terror to an end once and for all.
Role Summaries
Phase 1 (Troll Form)
- Don’t be close to the boss if you aren’t a tank or melee DPS
Phase 2 (Bear Form)
- Stack up behind the boss if your group has a Priest for Mass Dispel when the boss uses Creeping Paralysis
- Paladins: You will have to Cleanse Creeping Paralysis like crazy if your raid doesn’t have a Priest, prioritize tank > healers > DPS
Phase 3 (Eagle Form)
- Spread out as much as possible to avoid getting hit by Cyclones, your healers’ lives are already difficult in this phase
- Shamans: Use Nature Resistance Totem if your healers aren’t very well geared
Phase 4 (Lynx Form)
- Use defensives (Divine Shield, Blessing of Protection, Ice Block, Evasion, Barkskin, Deterrence etc) to survive if you get targeted by Claw Rage
- Use Master Healthstone to survive if your healers are struggling to keep you alive, Lynx Rush hurts
Phase 5 (Dragonhawk Form)
- Don’t be in front of the boss if you’re not the tank
- Move away from Pillar of Fire ASAP, it looks like a Priest’s Holy Fire, pay attention as it’s very easy to not notice
- Use Master Healthstone to survive if necessary, there’s a lot of AoE damage in this phase
- Shamans, Paladins: Use Fire Resistance Totem & Fire Resistance Aura to help your group survive
Phase 1 (Troll Form)
- Cleave down the adds, but don’t bother chasing after them, their HP is very low
- Quickly move away when the boss uses Whirlwind
Phase 2 (Bear Form)
- Don’t bother using damage cooldowns here if your group doesn’t have a Priest, as you’ll get stunned a lot
Phase 3 (Eagle Form)
- You can afford to be a bit more greedy than casters here with going in to damage the boss, as you don’t take Energy Storm damage
Phase 4 (Lynx Form)
- Nothing special for you for this phase
Phase 5 (Dragonhawk Form)
- Save your damage cooldowns for this phase if your group is struggling to kill the boss before you die to Flame Whirl
- Pillar of Fire can be hard to see as melee, pay close attention & stay away from other melee so you can quickly notice it & move away
Phase 1 (Troll Form)
- It will primarily be your duty to kill the adds, so do so before attacking the boss
Phase 2 (Bear Form)
- Don’t bother using damage cooldowns here if your group doesn’t have a Priest, as you’ll get stunned a lot
Phase 3 (Eagle Form)
- Casters: You’re already taking damage from Energy Storm in this phase, be extra careful of Cyclones
- Shadow Priests, Warlocks: Be careful of your self-damage during this phase
Phase 4 (Lynx Form)
- Shadow Priests, Warlocks: Be careful of your self-damage during this phase
Phase 5 (Dragonhawk Form)
- Save your damage cooldowns for this phase if your group is struggling to kill the boss before you die to Flame Whirl
- Shadow Priests, Warlocks: Be careful of your self-damage during this phase
Phase 1 (Troll Form)
- You have to heal the player targeted by Grievous Throw to full HP in order to remove its constant bleed effect
- The tank won’t take a lot of damage during this phase, so focus on healing melee DPS
- Heal the melee ASAP if they get hit by Whirlwind, else they may die to a surprise Grievous Throw
Phase 2 (Bear Form)
- The tank will take a lot more damage in this phase, so you’ll have to keep an eye on their HP at all times
- If your group doesn’t have a Priest, make sure everyone is topped off before Creeping Paralysis fades, they’ll take ~4.2k damage
Phase 3 (Eagle Form)
- Energy Storm damages you every time you cast a spell, so use longer cast time spells rather than instant casts, they are more efficient
- For instance, Druids should avoid using Lifebloom here, use Regrowth instead, or you’ll take a lot of damage
Phase 4 (Lynx Form)
- The tank will take more damage in this phase, so you’ll have to heal them a good bit more when the boss Zul’jin isn’t using one of his abilities
- The player targeted by Claw Rage will take 16,000 damage over 6 seconds, so be prepared to heal them like crazy
- Heal players damaged by Lynx Rush ASAP, the boss charges repeatedly so they might die if not healed immediately
Phase 5 (Dragonhawk Form)
- Flame Whirl increases your raid’s Fire damage taken by 50% so you take more and more damage, be ware
- After a few stacks of Flame Whirl, your tank will be taking heavy damage from Flame Breath, so make sure you keep them topped off
- Pillar of Fire can be hard to see for melee, so make sure they’re topped off and yell at them on voice chat if they’re taking damage
General
- Zul’jin resets his threat after every phase transition, meaning at 80%, 60%, 40% and 20% HP
- Save some rage / your powerful threat generation abilities when he’s about to transition, so you get threat on him instantly
- You can use Taunt the moment he transforms to ensure he doesn’t attack a random player while you build threat
Phase 1 (Troll Form)
- Keep Zul’jin away from ranged DPS & healers so they don’t have to deal with Whirlwind
Phase 2 (Bear Form)
- Zul’jin deals 15% more damage during this phase & occasionally casts Overpower, so be prepared to use defensive cooldowns
- Don’t bother saving rage when his HP is approaching 60%, as you can’t tank him in the next phase anyway
Phase 3 (Eagle Form)
- You can’t tank Zul’jin in this phase, he spends the entire phase casting Energy Storm, just switch to DPS mode
- You can tank him again in the next phase however, so save rage as his HP approaches 40%
Phase 4 (Lynx Form)
- You need to follow Zul’jin as he charges around and deal threat to him, or you’ll fall behind
Phase 5 (Dragonhawk Form)
- Don’t ever let Zul’jin face the raid, or he will kill players with Flame Breath
- Pay extra attention to your feet and move away if you’re targeted by Pillar of Fire, as it can quickly kill you
Abilities
Phase 1 – Troll Form
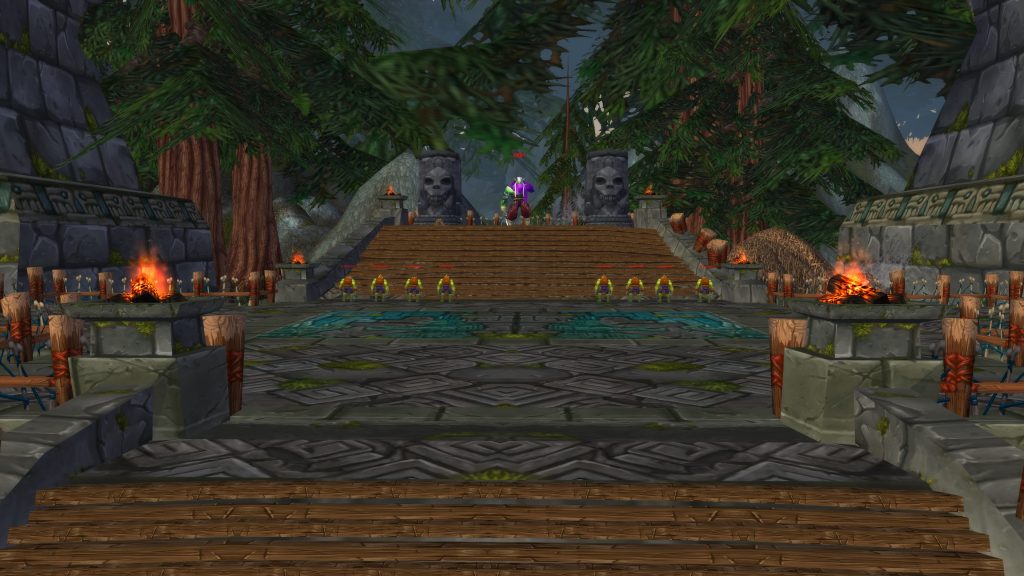
Zul’jin starts the fight in his troll form, accompanied by 8 of his Amani’shi Savage minions.
Phase 2 – Bear Form (Shape of the Bear)
At 80% HP, Zul’jin will move to the center of his platform and transform into a Bear Avatar, increasing his physical damage done by 15%. He will no longer use any of his Troll Form abilities, instead gaining access to 2 new abilities: Creeping Paralysis and Overpower. After he transforms, he will reset all threat.
Phase 3 – Eagle Form (Shape of the Eagle)
At 60% HP, Zul’jin will move to the center of his platform once again, this time transforming into an Eagle Avatar, losing the 15% physical damage bonus his Bear Form afforded him. He will no longer use any of his Bear Form abilities, instead gaining access to 2 new abilities: Energy Storm and Summon Cyclone. After he transforms, he will reset all threat.
This phase is unique because Zul’jin will not do any melee attacking whatsoever — he will simply stand still in the middle of the platform using his spells. Therefore, you don’t really need to tank him in this phase, just DPS and be careful of your health.
Phase 4 – Lynx Form (Shape of the Lynx)
At 40% HP, Zul’jin will move to the center of his platform once more, this time transforming into a Lynx Avatar, gaining 30% increased attack speed. He will no longer use any of his Eagle Form abilities, instead gaining access to 2 new abilities: Claw Rage and Lynx Rush. After he transforms, he will reset all threat.
Phase 5 – Dragonhawk Form (Shape of the Dragonhawk)
At 20% HP, Zul’jin will move to the center of his platform for the final time, transforming into a Dragonhawk Avatar, losing the 30% attack speed bonus his Lynx Form afforded him. He will no longer use any of his Lynx Form abilities, instead gaining access to 3 new abilities: Flame Breath, Flame Whirl and Pillar of Fire. After he transforms, he will reset all threat.
Raid Composition & Preparation
The Pull
After you kill Malacrass and unlock the way to Zul’jin, you’ll be swarmed by Amani’shi Savages. That is the only trash you will encounter before the fight with Zul’jin — after all you are free to buff up and regenerate mana, as you prepare to take on the Amani Warchief himself.
When your group is ready, have your tank initiate the fight by running in, while your Hunters use Misdirection on the tank and attack Zul’jin. This will give your tank initial threat on the adds and thus a little bit more rage if they’re a rage class.
The Fight
Zul’jin starts the fight in his Troll Form, accompanied by 8 of his Amani’shi Savage minions.
He will transform into 4 different spirits based on his remaining HP (Bear at 80%, Eagle at 60%, Lynx at 40% and Dragonhawk at 20%), with each phase having different abilities and threat being reset every time Zul’jin transitions to a new phase, immediately after his transformation animation finishes. It will be a good idea for your tank to save rage / their threat abilities like Mangle (Bear) and Judgement of Righteousness when Zul’jin’s HP is approaching a transition threshold, allowing them to instantly generate threat the moment he transforms and preventing threat-related accidents.
Phase 1 – Troll Form
At this point your tank should focus on moving Zul’jin to the correct position, while DPS players nuke down the Amani’shi Savages. If your tank is a Protection Paladin, they could pick up the adds with Consecration, but it’s no big deal even if they don’t, the adds do little damage and die very easily. Zul’jin will typically not use any abilities for the first 10 seconds, so you have enough time to position and kill the Amani’shi Savages.
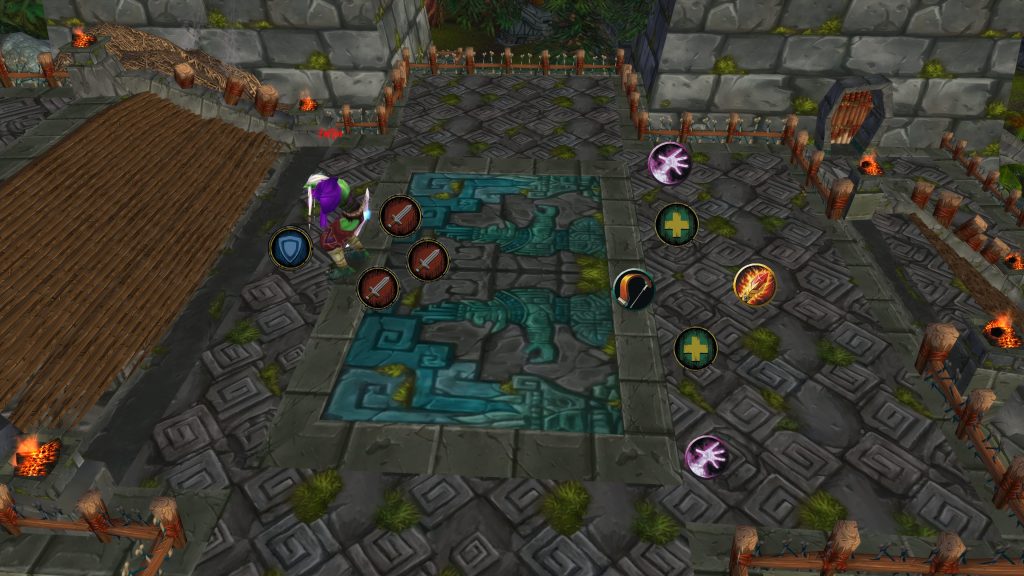
The idea in this phase is simple: the tank keeps Zul’jin away from the ranged DPS and healers, so only the only players who need to deal with Whirlwind are the melee DPS, who have to run away when he starts spinning (or stay in if they really trust your healers!). Besides Whirlwind, Zul’jin will occasionally use his other, scarier ability: Grievous Throw. Healers will have to heal the target to full HP to remove its constant damage-over-time debuff, which will be a lot easier if your melee aren’t getting hit by Whirlwind and thus they have no other damage to heal at this point.
This phase is a very simple tank and spank as Zul’jin’s abilities simply deal damage for your healers to heal off here and do nothing else. Your group could use Heroism / Bloodlust and personal DPS cooldowns in Phase 1, but that’s only recommended for stronger groups, as weaker groups may need cooldowns to push through the later, more difficult phases.
Phase 2 – Bear Form
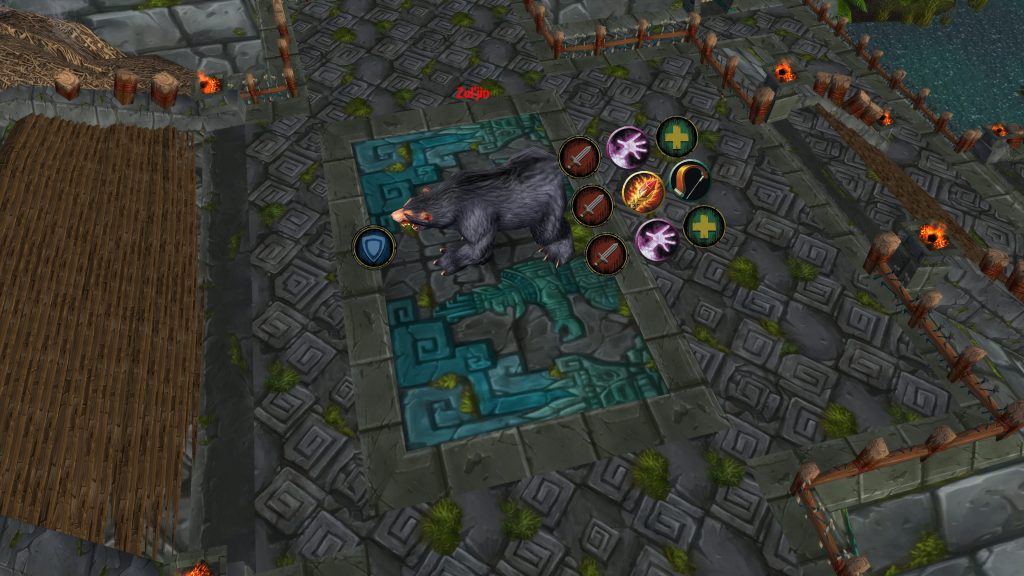
When Zul’jin’s HP reaches 80%, he will run to the middle of his platform and transform into the Bear Avatar (Shape of the Bear). He also deals 15% increased physical damage in this form and has access to Overpower, which causes Zul’jin to occasionally attack again with an un-avoidable attack, after your main tank dodges, meaning your healers will have to pay a good deal more attention to the tank in this phase.
If your group doesn’t have a Priest, Phase 2 will have the same positions as Phase 1. If you do have a Priest, assume the following positions. This goal of this positioning is to counter Zul’jin’s Creeping Paralysis, a powerful ability which applies a magic debuff to your entire raid for 6 seconds. After those 6 seconds are over, your entire raid will take ~4250 Nature damage and be stunned for 4 seconds. By stacking up behind the boss, a Priest can dispel your entire raid with just 1 cast of Mass Dispel — otherwise your Paladins will have to go crazy spamming Cleanse on the raid, prioritizing the tank and healers.
Phase 3 – Eagle Form
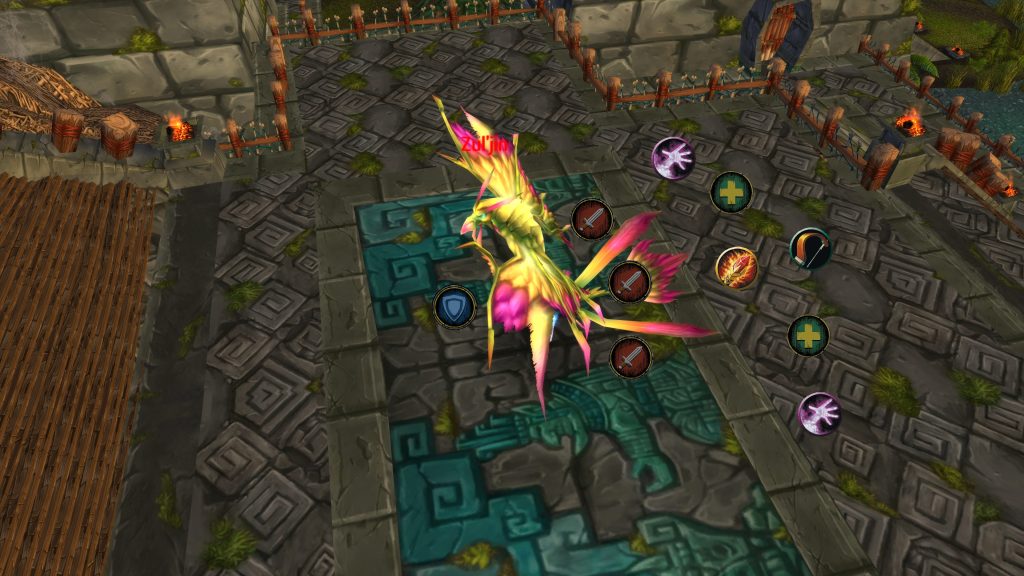
When Zul’jin’s HP reaches 60%, he will once again run to the middle of his platform and transform into the Eagle Avatar (Shape of the Eagle). Zul’jin cannot use melee attacks in this form, so unlike other phases, your DPS players and the tank don’t really need to do anything special during the transition. He also loses the 15% physical damage bonus of his Bear Form — not that it matters, as he doesn’t use melee attacks.
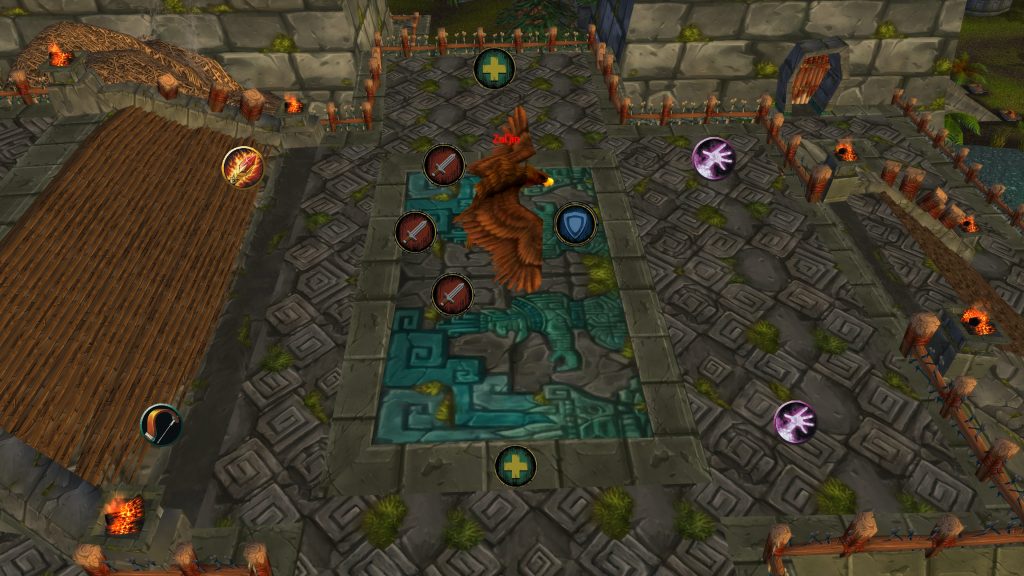
Your raid should spread out as much as possible for this phase, with 1 healer on each side so no players are out of healing range.
Instead of melee attacking, Zul’jin will spend this entire phase casting Energy Storm, which applies a debuff to every player in the raid. When any player casts a spell, they will get Zapped, instantly taking 1250 Nature damage. Depending on how many casters you have in your group, this can range from manageable to very difficult to heal with. Your healers should switch to using long cast-time heals over instant spells during this phase, such as Regrowth instead of Lifebloom, as that will be a lot more efficient in the long run.
The reason you’re spreading out is to avoid Zul’jin’s Summon Cyclone, which summons 4 blue cyclones that pursue random players. Any player who touches the cyclone will get pushed back and take ~1000 Nature damage, which isn’t a lot, but you really don’t want to make your healers’ lives worse than it already is thanks to the Energy Storm. It can be incredibly beneficial if your Shamans use Nature Resistance Totem during this phase, as it’ll reduce the damage of both Energy Storm and the cyclones.
Groups that have a lot of casters may want to use Heroism / Bloodlust during this phase, as it allow them to get more casts in in-between moving away from Cyclones and make the phase shorter, thus reducing the annoyance and the load on your healers.
Phase 4 – Lynx Form
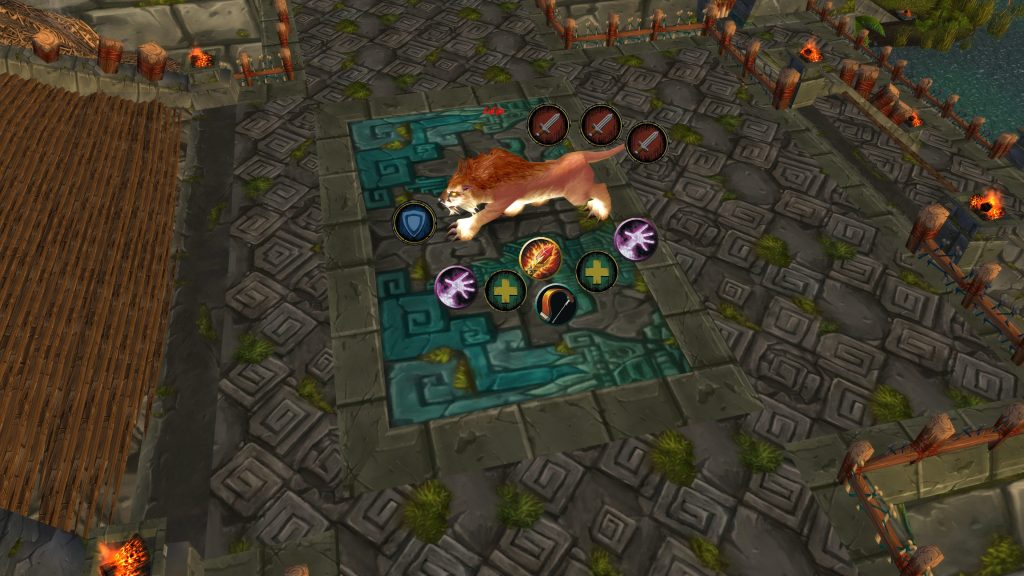
When Zul’jin’s HP reaches 40%, he will once again run to the middle of his platform and transform into the Lynx Avatar (Shape of the Lynx). Zul’jin attacks 30% faster in this form, meaning your tanks will need more focus on them.
For this phase, your raid will want to stack up next to the boss on one side, while melee DPS are behind the boss on the opposite side. Zul’jin’s abilities both cause him to charge a random player in this phase, so this positioning minimizes the amount of time your melee DPS will have to spend chasing after him, while stacking up allows your healers to more easily heal raid damage.
The first of Zul’jin’s abilities, and the most lethal one, is Claw Rage. He charges a random player in the raid and unleashes a torrent of attacks on them, dealing damage every 0.5 second and increasing their Physical damage taken by 150, stacking up to 12 times. This spell deals ~16,000 damage to the target over its 6 second duration, so your healers will have to heal them like crazy. Thankfully, spells that grant immunity to physical damage, such as Divine Shield, Blessing of Protection and Ice Block will force Zul’jin to change target, which in return significantly lowers this ability’s damage, as the new target will not have any stacks. Other classes can use abilities like Evasion, Barkskin, Deterrence etc to have a better chance of surviving.
His 2nd ability is Lynx Rush, which is also fairly painful but not as scary. Zul’jin targets a random player, dealing ~2200 damage to them and applying a bleed effect which deals 7500 damage to them over 10 seconds. He will repeat this spell up to 8 times, so your healers will have their hands full healing the raid, but as most of the damage comes from the bleed, it’s only really scary of Zul’jin charges somebody who already had low HP.
Phase 4 – Lynx Form
When Zul’jin’s HP reaches 20%, he will run to the middle of his platform and transform one last time, this time into the Dragonhawk Avatar (Shape of the Dragonhawk).
Positioning for this phase will be similar to Phase 1, with one small difference: every player should aim to be at least ~5 yards away from other players, while staying close enough to each other (and healers) for AoE healing spells like Chain Heal to be effective, as there is high raid damage in this phase.
Zul’jin has 3 abilities in this form, rather than the normal 2. The first you’ll likely see is Flame Breath, which does ~2250 Fire damage to every player in front of Zul’jin — which should only be the main tank if you’re positioned correctly. The second will likely be Pillar of Fire, which summons a pillar of fire (as its name implies) on top of a random player, with the pillar dealing ~1000 Fire damage to every player within 4 yards every second. This ability is extremely easy to avoid, but there’s always one DPS player that is too focused on dealing damage to notice their surroundings, so make sure to yell at them to move.
The final ability Zul’jin will use in this phase, and the reason why it’s one of the more lethal phases, is Flame Whirl, which deals ~1000 Fire damage to your entire raid and increases everyone’s Fire damage taken by 50% for 35 seconds, stacking up to 10 times. To put the numbers into perspective, after 4 stacks (~80 seconds into this phase) your main tank will be taking ~6750 Fire damage by each Flame Breath, Pillar of Fire will deal 3000 Fire damage per second thus killing just about anyone in 3 seconds, while Flame Whirl itself deals 30,000 Fire damage total damage to your raid for your healers to deal with.
For this reason, groups with weaker DPS will want to pop Heroism / Bloodlust and personal DPS cooldowns during this phase, to make sure you can kill Zul’jin before he burns you all to death. It can also be incredibly beneficial for your Shamans to use Fire Resistance Totem & Paladins to use Fire Resistance Aura, giving your healers a better chance of keeping everyone alive.
If you have made it this far without losing a lot of players though, there’s a decent chance you can pass the Flame Whirl and thus defeat Zul’jin, as this was the last of his tricks! Congratulations on a well-deserved victory, and here’s hoping you got some amazing loot!

