- Author: Luxrah
- Date: July 20, 2024
- Updated: December 13, 2024
- Expansion: WoW Classic
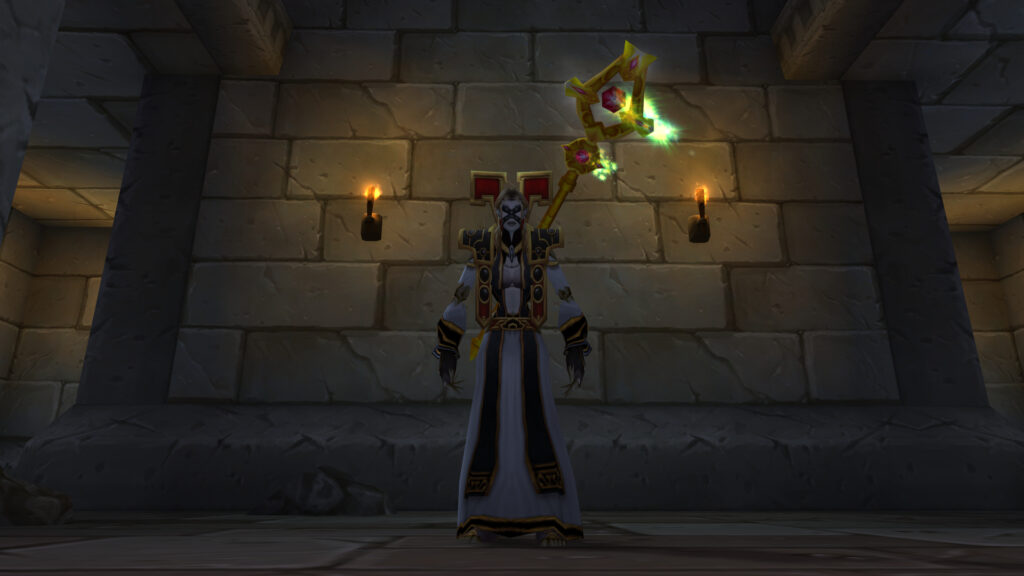
Welcome to our WoW Classic Benediction Guide! This guide will give you the lowdown on this iconic Priest weapon and walk you through how to get your hands on one of your very own. You’ll face some difficult challenges, but the reward is well worth the effort!
Benediction/Anathema in Season of Discovery
In Season of Discovery, Benediction and its counterpart Anathema have both been tweaked to improve their effectiveness and make it easier to swap between them. Where calling the weapon’s alternate version previously had a 30 minute cooldown, you can now do it every minute, so you won’t be stuck with the wrong weapon for half an hour if you accidentally click it!
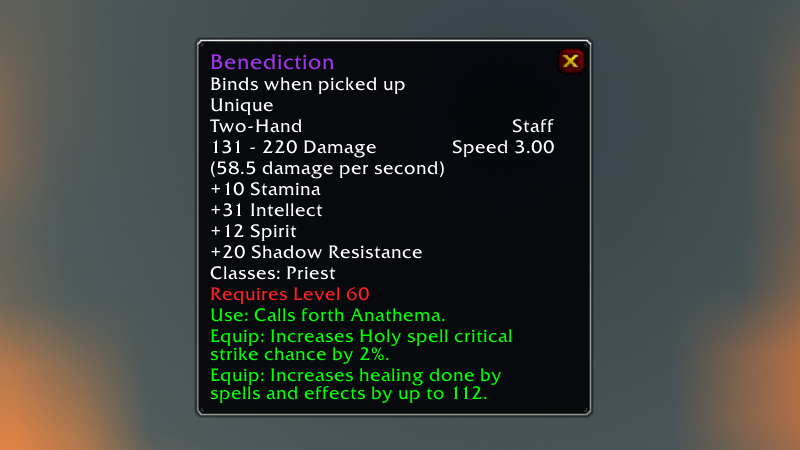
Benediction grants a little extra healing power:

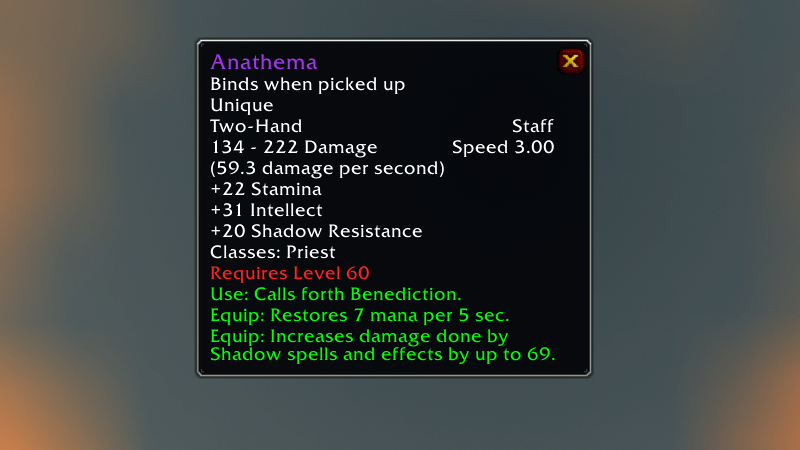
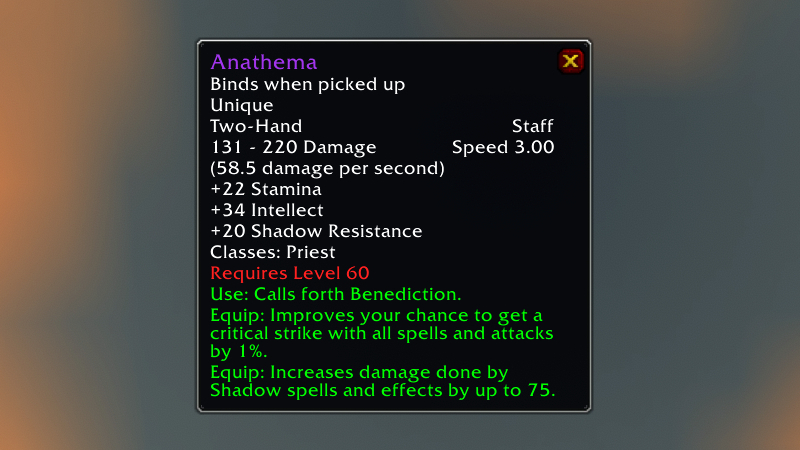
Anathema saw bigger changes: a few more points of Intellect, some extra Shadow damage, and dropping the MP5 for some extra crit.
The Eye of Divinity Questline
There are three major steps to obtaining Benediction/Anathema. The first step in the list can be completed at any time, but the other two must be done in order:
- Obtain The Eye of Shadow from Lord Kazzak or high-level elite demons
- Obtain The Eye of Divinity from Majordomo Executus in Molten Core
- Complete the grueling The Balance of Light and Shadow quest in Eastern Plaguelands
Obtaining the Eye of Shadow
You can wait to do this part until you have completed the other steps, but most Priests choose to do this first, while they are waiting to get the other item from Molten Core. This Eye can be a little tedious to farm, so getting it out of the way ensures that once you have the other Eye, you can knock out the quest and get your staff without any further delay!
First, note that The Eye of Shadow is bind-on-equip, so you can buy it from the Auction House or farm it on an alt. This item tends to be very pricy early on, so farming it yourself is recommended unless you have gold to burn or you’re late to the party.
The best way to get this item is from Lord Kazzak, a world boss in the Blasted Lands who has a very high chance to drop it. There are a few possible hitches with this plan, however: world bosses can be difficult to claim due to their long and random spawn timers, and you’ll need a raid group for it, which might also include other Priests who are after the Eye.
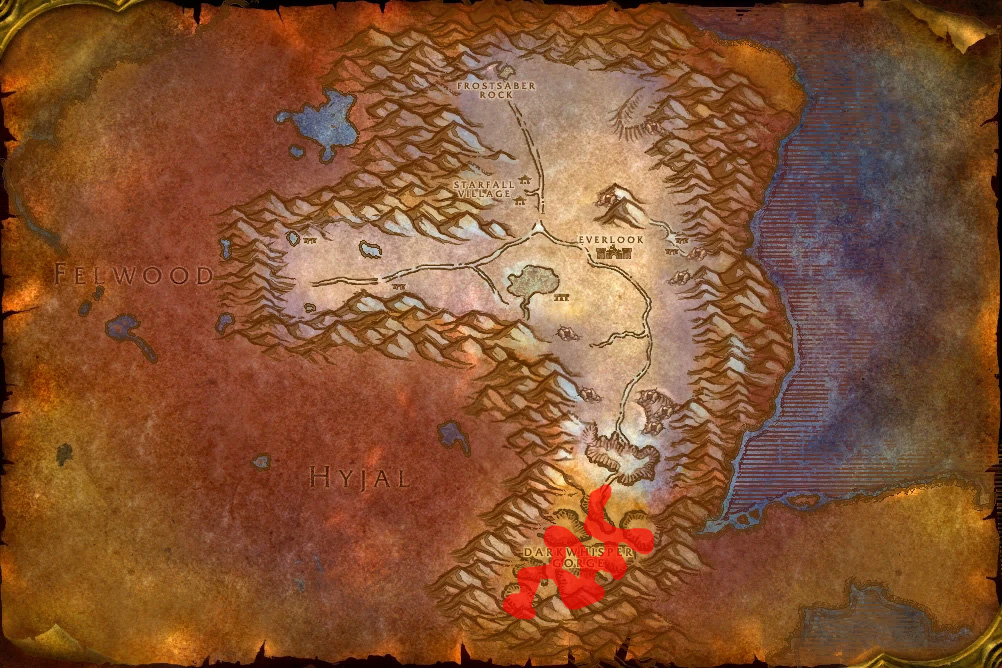
If you want to farm this item outside of a raid group, you can do so by killing specific level 59+ elite demons at either The Tainted Scar in Blasted Lands or Darkwhisper Gorge in Winterspring. The level 62 elites in Blasted Lands (Felguard Elite and Doomguard Commander) have the best drop rate, but the mobs in Winterspring are easier to kill. Both locations are densely packed with high level elites and you will have a much easier time if you bring a friend. Here are all of the demons that can drop the Eye:
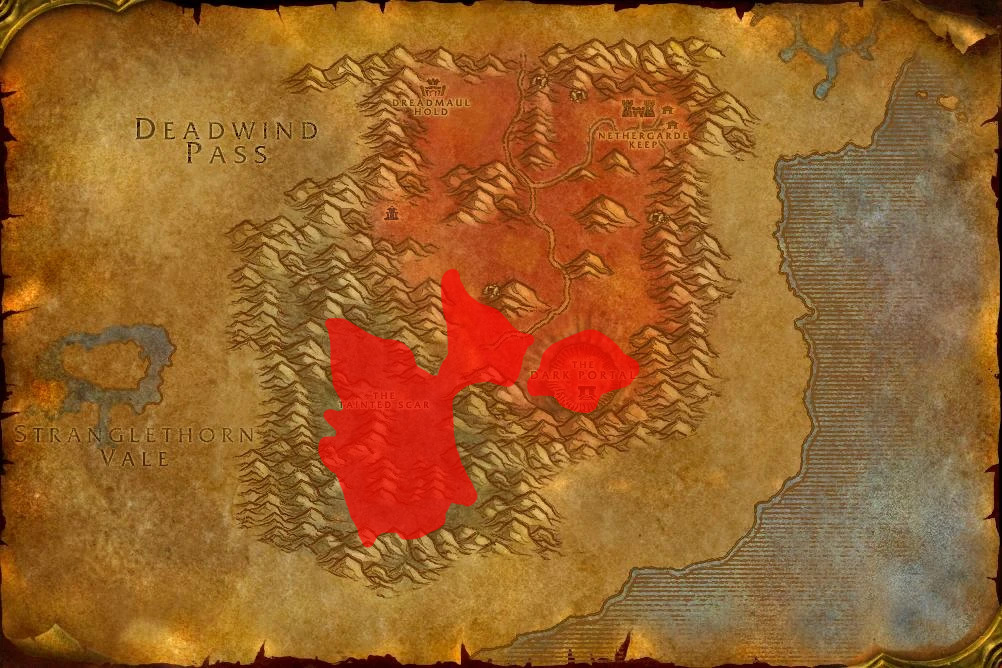
- The Tainted Scar in Blasted Lands:
- Lord Kazzak (raid boss)
- Felguard Elite (level 61-62 elite)
- Doomguard Commander (level 61-62 elite)
- Dreadlord (level 62 elite)
- Manahound (level 60 elite)
- Darkwhisper Gorge in Winterspring:
- Hederine Slayer (level 59-60 elite)
- Hederine Initiate (Level 59-60 elite)
Season of Discovery
In Season of Discovery, The Eye of Shadow also has a low chance to drop from both of the demon bosses in the Demon Fall Canyon dungeon: The Destructor’s Wraith and Diathorus the Seeker.
Obtaining the Eye of Divinity
As mentioned previously, you can actually complete this step first – you don’t need to have the other Eye in order to loot this one. This Eye is trickier to farm, however, since it only drops inside a raid from a boss who can only be killed once per week. This Eye is also bind-on-pickup, so you can’t buy it from the Auction House or loot it on an alt, and you may be rolling against other Priests who also need it.
To get your hands on The Eye of Divinity, you must head into Molten Core with a raid group and face Majordomo Executus, the second to last boss in the instance. Once defeated, he will give you access to his Cache of the Firelord, which will always contain either the Ancient Petrified Leaf that is required for the Rhok’delar quest for Hunters, or The Eye of Divinity. The latter item is what you need in order to proceed, so cross your fingers that it wins the coin flip! (Sorry, Hunters.)
The Eye of Divinity will not give you a quest, but equipping it will allow you to see an NPC who will. Before you go to pick up this quest, however, you should spend some time preparing for it. Accepting the quest will start a challenging event that will test your skills as a Priest, and if you fail there is a cooldown on trying again (though luckily, this cooldown has been reduced from two hours to 15 minutes in WoW Classic).
How to Prepare for The Balance of Light and Shadow
There are a couple of important things to note about the quest that will help you prepare. First, you will need to be able to do some healing, cast Abolish Disease, and deal AoE damage. Given these requirements, you should choose a healing talent build and put a point into Holy Nova. Be sure to visit your Priest Trainer after you learn Holy Nova and train it up to at least rank 4.
Another important thing to note is that you will be casting virtually nonstop for several minutes, which will require really stretching your mana. Any consumables, gear, or talents that can help your mana pool/regeneration are advisable. The exception is the Spirit Tap talent, which you should skip since it can’t proc from any of the enemies in the event. You don’t need to be able to do a huge amount of healing or damage; this quest is more about doing the right thing at the right time and making sure you have the mana to get through the entire thing. You will not have any co-healers to pick up the slack like you would in a raid.
Finally, you can’t have anyone help you during the event, or an elite demon named The Cleaner will show up and kill everyone involved. That means you’ll be on your own as far as actually completing the quest. This can be used to your advantage, however, if you want to reset the event without triggering the 15-minute cooldown.
It is possible for two Priests to complete this quest at the same time. For this to work, the first Priest starts the quest, and the second Priest accepts it as a pop-up. The second Priest must not move after accepting, and the two Priests cannot heal each other. Otherwise, it should work just fine. You can also have help from other classes in the form of buffs, as long as they are applied before the event begins. This even includes Shaman totems and Paladin auras.
Recommended Talent Build
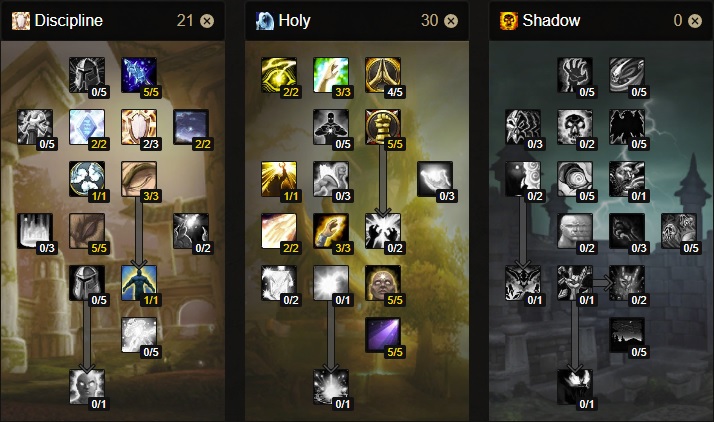
This build grabs Holy Nova, which you will need for this event, as well as the most beneficial healing and mana talents. Notably, we’ve skipped Inspiration, since its armor buff is not as useful here as some of the other talents we’ve chosen.
Recommended Consumables
The following consumables are recommended to use during this quest. You may not need all of them, but it’s good to be prepared! Be sure to bring several of each.
- Major Mana Potion
- Dark Rune or Demonic Rune
- Heavy Runecloth Bandage
- Stratholme Holy Water
- Oil of Immolation
- Thornling Seed
The consumables below can be used to buff your character before you start the event. Remember that you can also use world buffs and even a flask! Other classes can also give you buffs as long as they do so before you start the quest.
- Nightfin Soup
- Elixir of Greater Intellect
- Elixir of Fortitude
- Mighty Troll’s Blood Potion
- Elixir of Superior Defense
- Mana Oil, if available
The Balance of Light and Shadow Quest
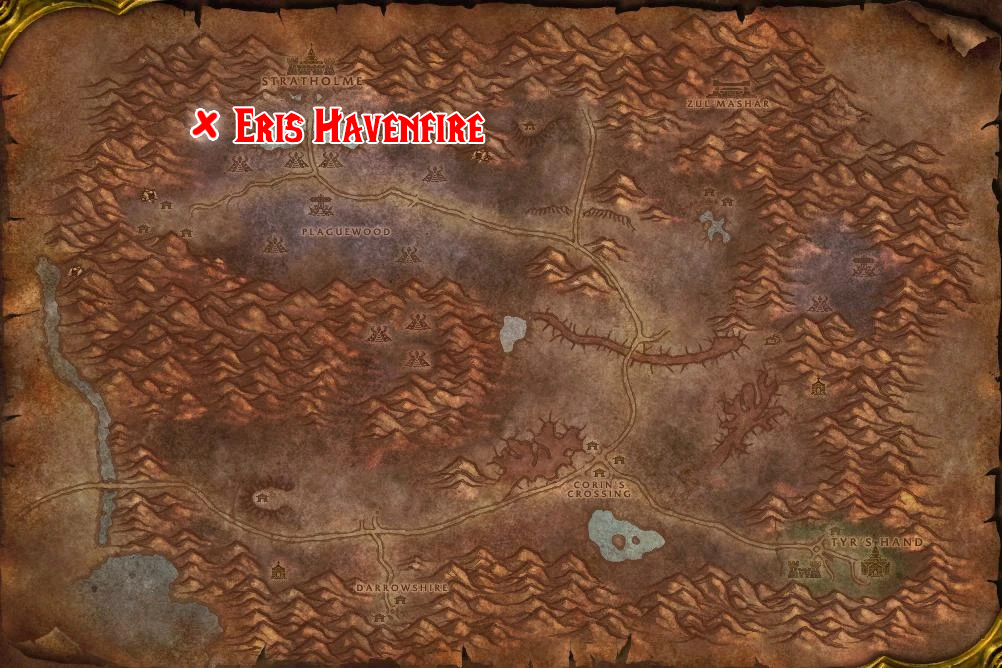
Eris Havenfire is invisible to anyone who doesn’t have The Eye of Divinity equipped in their trinket slot. She can be found in the hills in the northwest corner of the Eastern Plaguelands (20.8, 18.4).
Before you speak with her, be sure that you have nameplates enabled in the game for both enemies and friendly NPCs. You won’t have any unit frames for this event since you will be healing and fighting NPCs, not players. So nameplates will be the only way you can tell who needs healing or which enemies are close to death. You should also be sure that you have all of the spells and consumables that you will need for the encounter on your bars and keybound. Make note of the spell ranks that are recommended below as you will want to downrank some of them for mana conservation.
When you’re ready to begin, equip The Eye of Divinity and speak with Eris Havenfire to pick up the quest The Balance of Light and Shadow. This will immediately start the event, causing the first wave of friendly NPCs to spawn at the cave entrance just to the north.
Your job here is to save as many of these friendly NPCs as possible. If 15 Peasants die before the event ends, you will fail the quest and have to try again. Success is a matter of triage and prioritization. You’ll be using Abolish Disease on diseased Peasants, Flash Heal and Renew on wounded Peasants, and fending off Scourge Footsoldiers with Holy Nova, consumables, and your wand.
Each wave of Peasants will travel from the cave entrance to a point down the path where they will disappear into a beam of light. Each wave will spawn before the last one has reached safety, so you will need to do your best to heal up each group enough that they can survive the last portion of the journey alone. The most dangerous time for the Peasants is right after they spawn, as they will have low health, dangerous debuffs, and hostile skeletons on their heels. Here’s the order in which you should prioritize your actions in order to save as many Peasants as possible:
Priority #1: Keep Yourself Healed
You don’t want to neglect your own health only to die and fail the event that way! Be sure to keep your own health up at all times. A rank 1 Greater Heal is ideal if your health is low enough. You can also use bandages to save some mana, if you can spare the time. As long as you’re paying attention, this shouldn’t be too big of a concern.
Priority #2: Defeat Scourge Footsoldiers
You will want to kill the packs of Scourge Footsoldiers as soon as they appear. You have a few options for dealing with them:
- Use Holy Nova (rank 4), which should kill them all in one shot. (Remember to use Inner Focus first if it’s off cooldown since this spell uses a lot of mana.)
- Stratholme Holy Water is also very effective here, but you will need to aim it.
- Oil of Immolation, Retribution Aura, and/or Thorns can whittle them down if you want to save your mana, but they won’t be as quick as the above two methods.
- Thornling Seeds can be useful as a temporary distraction if needed.
- Use your wand to finish off any stragglers.
Priority #3: Heal Dangerously Wounded Peasants
The Peasants will be taking constant damage from Scourge Archers along the path, so you want to be sure they can survive a couple of hits. Use Flash Heal (rank 4) on any Peasants who are below 50% health. Your other direct heals are slow and the Peasants only have about 1600 maximum health, so downranking Flash Heal will give you a good balance of mana efficiency and speed so you can quickly heal one target and move on to the next.
Priority #4: Cure Plagued Peasants
Use Abolish Disease on Plagued Peasants who are afflicted with Seething Plague, which you can immediately spot by the purple cloud it creates around the target. This debuff ticks for 20% every 4 seconds, but it will only be cast on the Plagued Peasants. Abolish Disease has the same mana cost as Cure Disease and also has the chance of curing another disease if the same Peasant is infected again, so it’s well worth casting the upgraded version of this spell.
Priority #5: Regenerate Mana
Use Major Mana Potion and Dark Rune or Demonic Rune early and often to keep your mana up. You can also use a mana regeneration trinket. Don’t wait until your mana is gone to use your consumables – use them as soon as you are missing as much mana as they restore, so they will be off cooldown sooner and you can use them again.
Priority #6: Heal Moderately Wounded Peasants
If you’ve handled the more urgent tasks listed above, you should throw Renew (max rank) on any Peasants who are below 90% health until they pass the point in the path where Eris Havenfire is standing. The healing from this HoT will hopefully sustain them until they reach the end of the path and disappear, since you will need to run back to the cave to catch the next wave. Go ahead and use the highest rank for this to give them the best possible chance of reaching the light. Just be sure that you’re not casting it on Peasants who are already at full health.
Priority #7: Cure Injured Peasants
Your lowest priority if everything else is covered is to use Abolish Disease on Injured Peasants who are afflicted with Death’s Door, which you can spot by the green cloud around the target. This debuff ticks for 5% every 3 seconds and will only be cast on Injured Peasants. Be sure to clear this debuff from any Peasants before you run back to catch the next wave, but don’t waste time sticking around to keep cleansing it at the cost of protecting the next group. Despite the nasty looking cloud, this debuff is not as urgent as everything else in this list.
Ignore Scourge Archers
Scourge Archers have a lot of health and are not worth trying to kill. They will be steadily shooting Peasants, but only for about 4-5% of their health per shot, which you can easily keep up with through healing.
Assembling the Staff
When you have successfully completed the quest, return to Eris Havenfire to turn it in and receive the Splinter of Nordrassil. If you haven’t acquired The Eye of Shadow, you’ll need to complete that step now.
Once you have all three items, all you have to do is right-click on the Splinter of Nordrassil to combine it with The Eye of Shadow and The Eye of Divinity. All 3 items will disappear and your Benediction will appear in their place. To swap to Anathema, you can right-click on Benediction (and vice-versa to swap back). Congratulations or your epic staff!
About the Author
