- Author: Luxrah
- Date: January 20, 2025
- Updated: January 23, 2025
- Expansion: WoW Classic
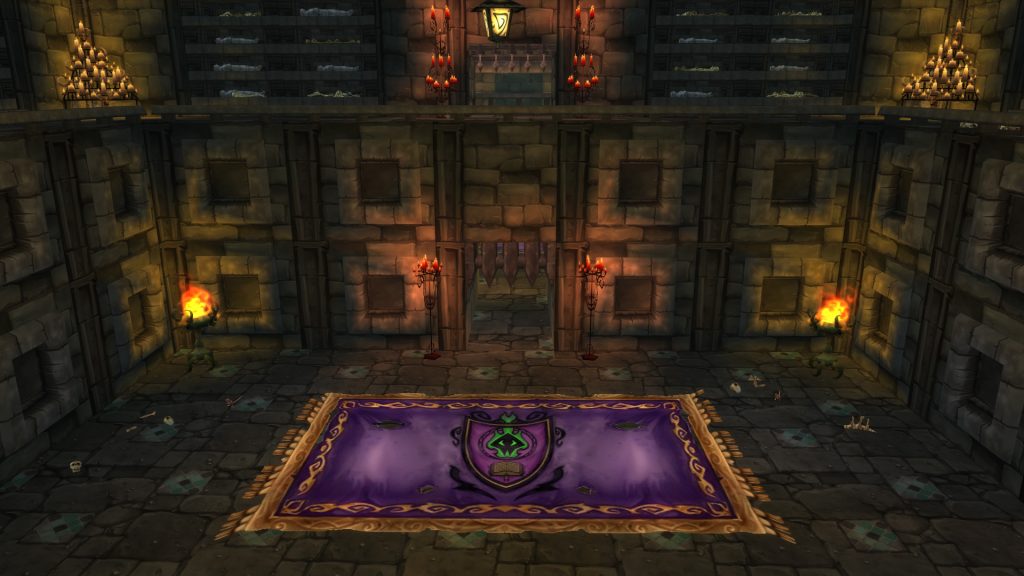
Scholomance is what’s left of Caer Darrow, once owned by Lord Alexei Barov and his family. Barov was betrayed by the nefarious wizard Kel’thuzad who tricked him into handing the crypts over to the Lich King to prove his loyalty. For Barov’s efforts, his family was slaughtered and the crypts are now dedicated to necromancy. Among what’s left of the ruins, you’ll find crazed cultists as you fight your way to the school’s headmaster, Darkmaster Gandling.
- Level Requirement: 48
- Recommended Level: 58+
- Location: Western Plaguelands
- Boss Encounters: Kirtonos the Herald (Summoned), Jandice Barov, Rattlegore, Marduk Blackpool, Doctor Theolen Krastinov, Lorekeeper Polkelt, Instructor Malicia, Vectus, Ras Frostwhisper, Lady Illucia Barov, Lord Alexei Barov, The Ravenian, Darkmaster Gandling, Death Knight Darkreaver (Summoned for Paladin epic mount quest), Kormok (Quest), Lord Blackwood (Scourge Invasion)
- Loot Drops:
- Headmaster’s Charge, Alanna’s Embrace, Frightalon, Barovian Family Sword, Staff of Metanoia, Iceblade Hacker, Ancient Bone Bow, Intricately Runed Shield, Shadowy Mail Greaves, Ghoul Skin Leggings, Libram of Divinity, Totem of Sustaining
- All Tier 0 Helms, Boots of Valor, Dreadmist Mantle, Shadowcraft Boots, Magister’s Mantle
- Bloodmail Regalia: Bloodmail Belt, Bloodmail Boots, Bloodmail Gauntlets, Bloodmail Hauberk, Bloodmail Legguards
- Cadaverous Garb: Cadaverous Armor, Cadaverous Belt, Cadaverous Gloves, Cadaverous Leggings, Cadaverous Walkers
- Deathbone Guardian: Deathbone Chestplate, Deathbone Gauntlets, Deathbone Girdle, Deathbone Legguards, Deathbone Sabatons
- Necropile Raiment: Necropile Boots, Necropile Cuffs, Necropile Leggings, Necropile Mantle, Necropile Robe
- Pattern: Robe of the Void, Recipe: Flask of Supreme Power
Location & Map
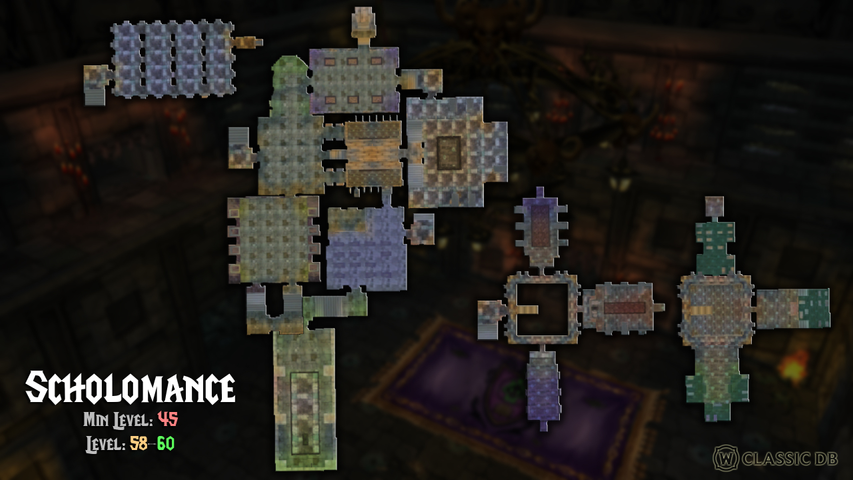
The entrance to the Scholomance dungeon is on the island of Caer Darrow in the southeastern part of the Western Plaguelands zone. Alliance can head east from Chillwind Camp while Horde will need to run from Tirisfal Glades. The door that blocks the dungeon portal must be opened with the Skeleton Key, which is acquired from a lengthy quest chain in Western Plaguelands.
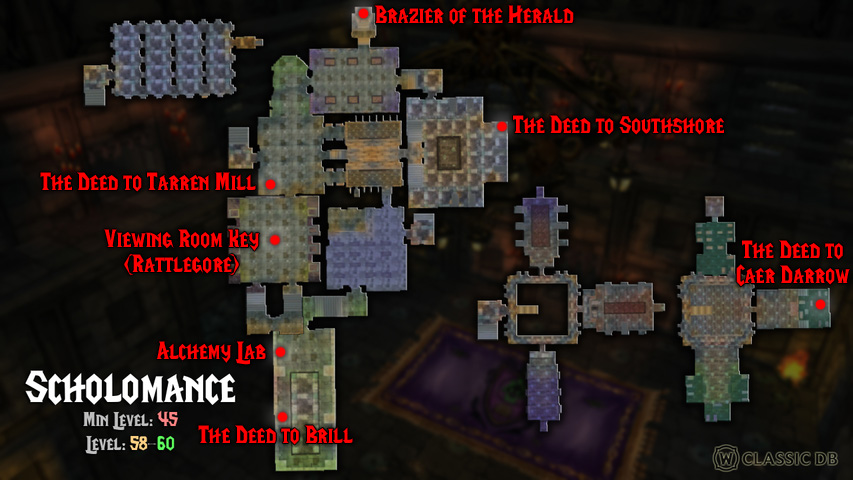
There is also one key required to progress through the dungeon, the Viewing Room Key, which must be looted from Rattlegore.
Quests
There are several quests in the Scholomance dungeon, some of which require completing a long chain first.
Quest Name | Acquired From | Shareable |
|---|---|---|
Alchemist Arbington (Western Plaguelands) | No | |
Weldon Barov (Western Plaguelands) | Yes | |
Apothecary Dithers (Tirisfal Glades) | No | |
Alexi Barov (Tirisfal Glades) | Yes | |
Betina Bigglezink (Eastern Plaguelands) | Yes | |
Betina Bigglezink (Eastern Plaguelands) | No | |
Eva Sarkhoff (Western Plaguelands) | Yes | |
Eva Sarkhoff (Western Plaguelands) | No | |
Eva Sarkhoff (Western Plaguelands) | No | |
Magistrate Marduke (Western Plaguelands) | No |
 Alliance Quests
The Key to Scholomance
- Shareable: No
- Level Required: 55
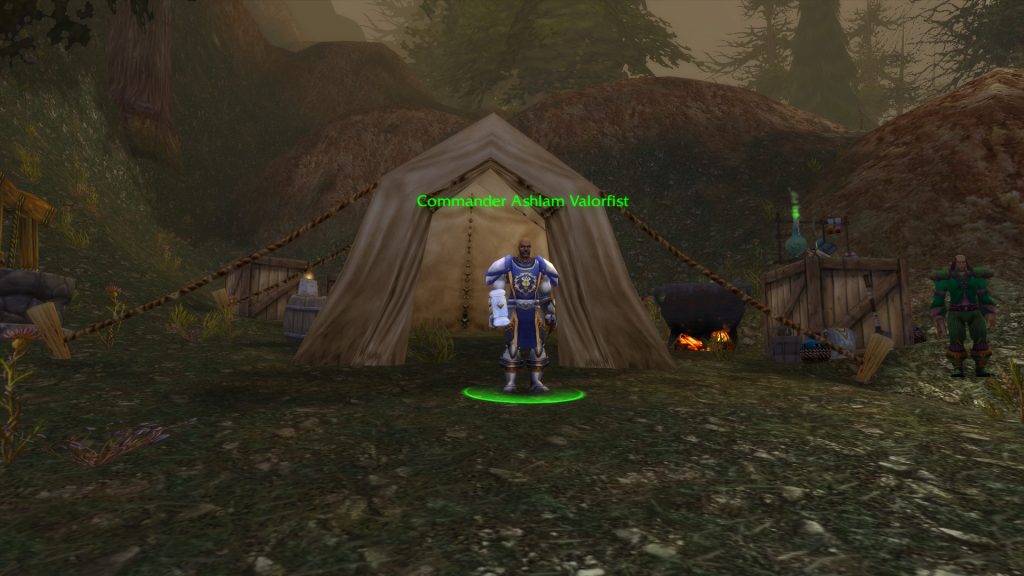
- Chain Start: Commander Ashlam Valorfist at Chillwind Camp in Western Plaguelands
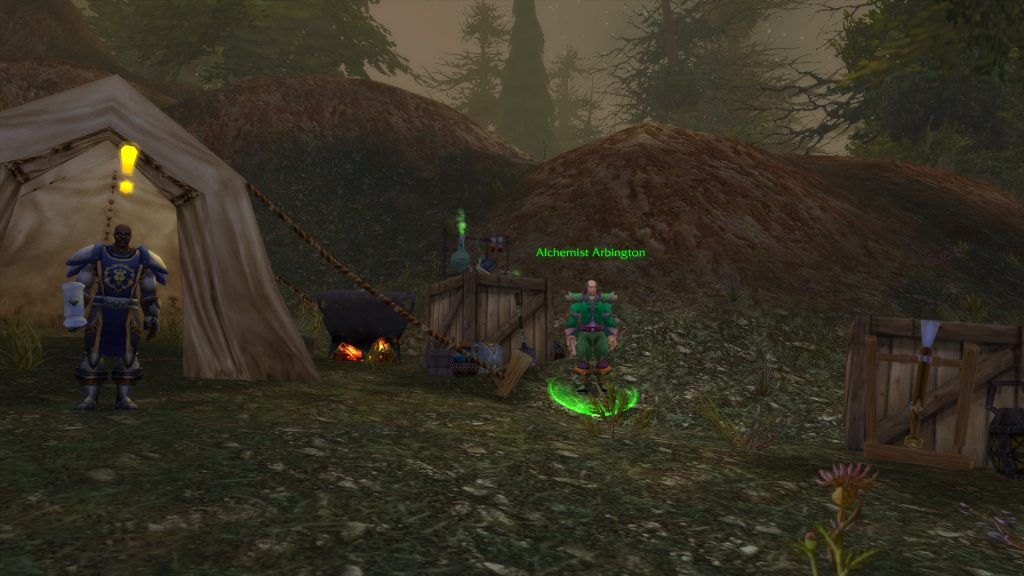
- Quest Start: Alchemist Arbington at Chillwind Camp in Western Plaguelands
- Finish: Alchemist Arbington at Chillwind Camp in Western Plaguelands
- Objectives: Speak with Alchemist Arbington
- Rewards:
- 9950 experience
- Skeleton Key
This quest chain does not take you inside the dungeon, but it does require a group and gives you the key you’ll need to open the door.
There are three possible breadcrumb quests that can lead you to Chillwind Camp, but which are not required to start this chain:
- A Call to Arms: The Plaguelands! from Crier Goodman in Stormwind City
- A Call to Arms: The Plaguelands! from Courier Hammerfall in Ironforge
- A Call to Arms: The Plaguelands! from Herald Moonstalker in Darnassus
After locating Commander Ashlam Valorfist at Chillwind Camp in Western Plaguelands (which you can reach by running north from Hillsbrad Foothills through Alterac Mountains), pick up the quest Clear the Way, which starts this chain. You’ll need to kill 10 Skeletal Flayers and 10 Slavering Ghouls at Sorrow Hill across the road. Return to Ashlam and he’ll offer All Along the Watchtowers. You’ll need to head north into the Ruins of Andorhal, a town that has been overrun with the Scourge and which is densely packed with high level undead. Look for each of the four towers in the corners of town and stand in the doorway to use the Beacon Torch you were given. Then return to Ashlam to pick up Scholomance. That quest simply points you to Alchemist Arbington right next to Ashlam. Speak with him to move on to Skeletal Fragments. Then go kill some Skeletal mobs, which you can find at Sorrow Hill, Andorhal, or the farms to the north, to loot 15 Skeletal Fragments. Bring these back to Alchemist Arbington to proceed to Mold Rhymes With…
Now you’ll need to do a bit of running around and spend some gold. You must bring 15 gold to Krinkle Goodsteel at Gadgetzan in Tanaris. He’ll give you the quest Fire Plume Forged, for which you will need to bring 2 Thorium Bars to Fire Plume Ridge in the center of Un’Goro Crater. Head all the way up to the lava lake at the top (the liquid lava, not the red ground you’ll see elsewhere). Stand beside it and use the Unfinished Skeleton Key.
Head back to Alchemist Arbington at Chillwind Camp in Western Plaguelands to progress to the quest Araj’s Scarab. You’ll need to make your way north into the Ruins of Andorhal again, and this time you’ll definitely need a group. You must defeat Araj the Summoner, a level 61 elite in the center of town who is surrounded by other undead mobs (some of whom are also elites). Once he’s dead, right-click on Araj’s Phylactery to loot Araj’s Scarab. Then return to Alchemist Arbington and wait for him to finish talking. You can then complete the quest The Key to Scholomance, which will grant you the Skeleton Key that is required to open the door to the dungeon.
Barov Family Fortune
- Shareable: Yes
- Level Required: 52
- Start: Weldon Barov at Chillwind Camp in Western Plaguelands
- Finish: Weldon Barov at Chillwind Camp in Western Plaguelands
- Objectives: Collect the 4 deeds that make up the family fortune inside Scholomance
- Rewards:
- 6600 experience
- 1 gold 80 silver
This quest requires you to collect 4 deeds that can be found as clickable scrolls in specific places throughout the Scholomance dungeon:
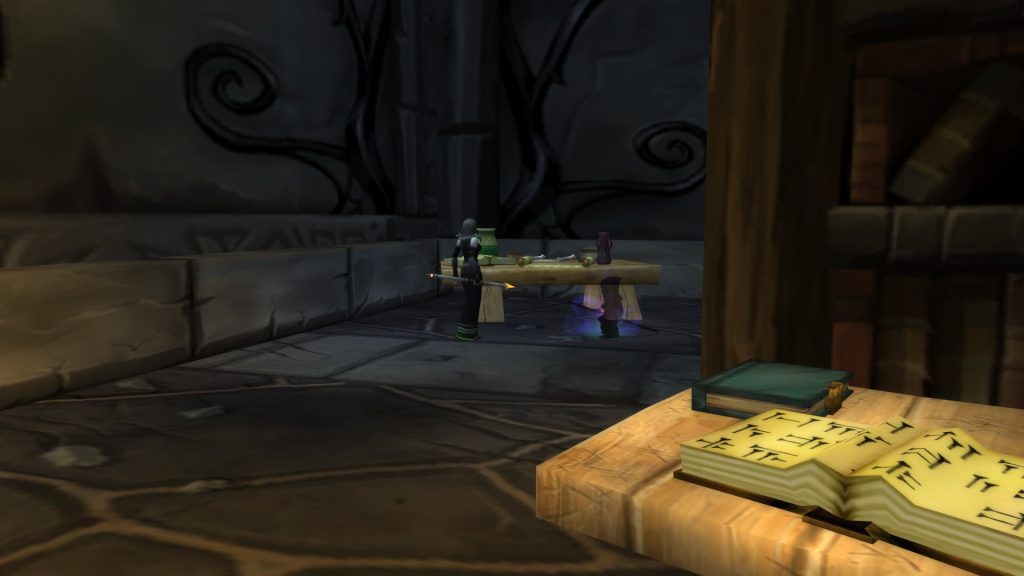
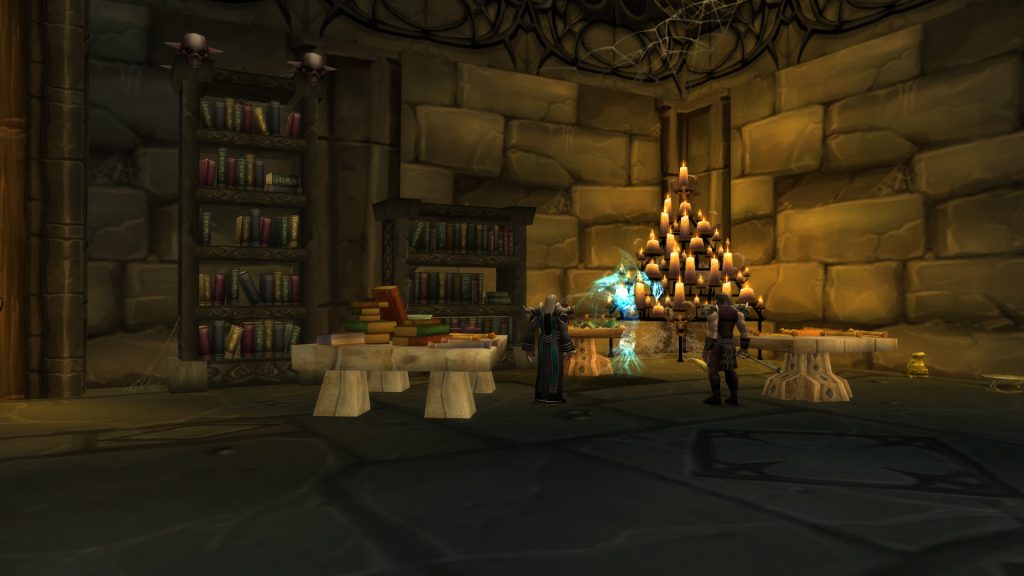
- The Deed to Southshore is in the first large room of the dungeon, The Reliquary, on a table in the back left corner from the entrance (northeast on the minimap).
- The Deed to Tarren Mill is in the large room you enter after passing through the Chamber of Summoning. It’s once again on a table in the opposite corner from where you enter (southwest this time).
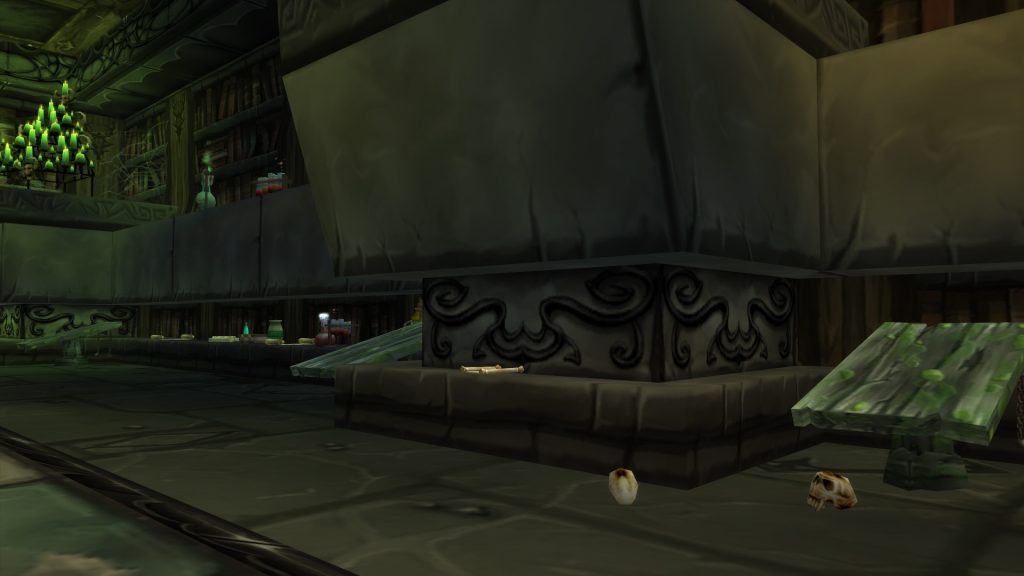
- The Deed to Brill is in the Laboratory near Ras Frostwhisper, on the western wall further toward the back of the room from the Alchemy Lab.
- The Deed to Caer Darrow is in the Barov Family Vault at the very end of the dungeon, on a slab beside Lord Alexei Barov.
After you hand in the deeds, you’ll have the opportunity to complete another quest, The Last Barov, which requires you to enter Horde territory and awards you with a Barov Peasant Caller.
 Horde Quests
The Key to Scholomance
- Shareable: No
- Level Required: 55
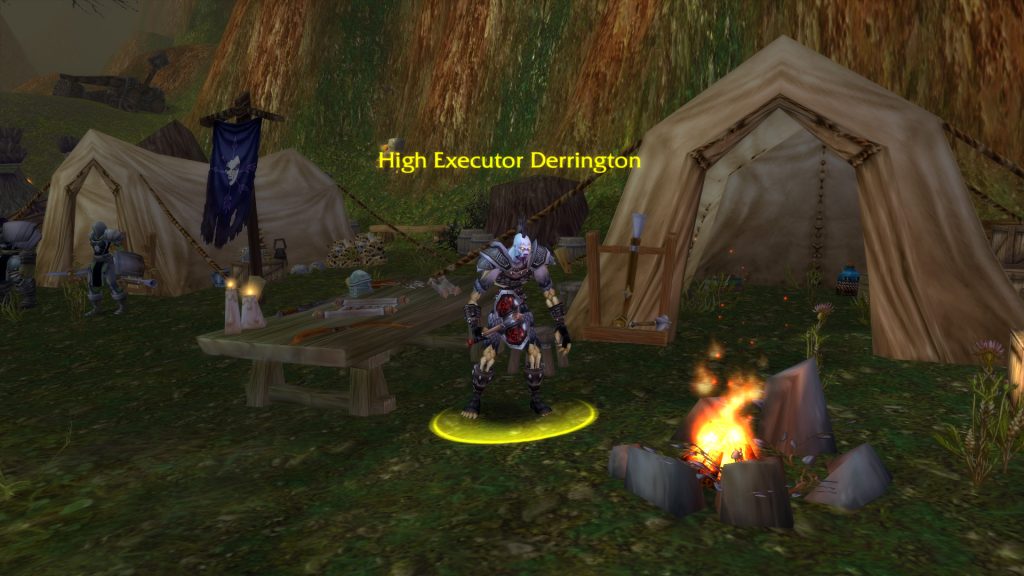
- Chain Start: High Executor Derrington at The Bulwark in Tirisfal Glades
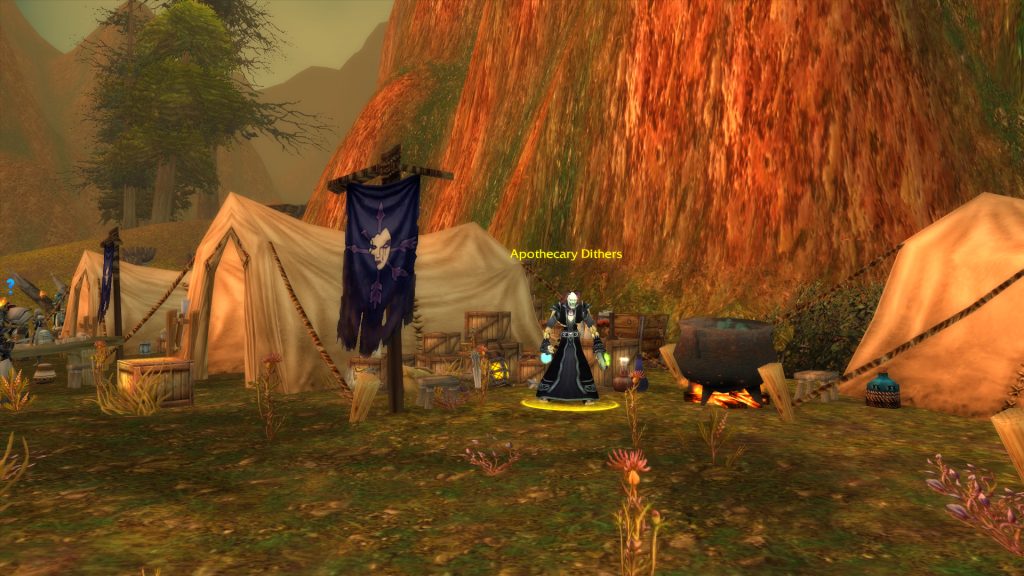
- Quest Start: Apothecary Dithers at The Bulwark in Tirisfal Glades
- Finish: Apothecary Dithers at The Bulwark in Tirisfal Glades
- Objectives: Speak with High Executor Derrington
- Rewards:
- 9950 experience
- Skeleton Key
This quest chain does not take you inside the dungeon, but it does require a group and gives you the key you’ll need to open the door.
There are three possible breadcrumb quests that can lead you to The Bulwark, but which are not required to start this chain:
- A Call to Arms: The Plaguelands! from Bluff Runner Windstrider in Thunder Bluff
- A Call to Arms: The Plaguelands! from Harbinger Balthazad in Undercity
- A Call to Arms: The Plaguelands! from Warcaller Gorlach in Orgrimmar
After locating High Executor Derrington at The Bulwark in Tirisfal Glades (easily reached by running east along the road from Undercity), pick up the quest Scarlet Diversions, which starts this chain. Before you leave, loot the Box of Incendiaries next to him to get a Flame in a Bottle. Then head east into Western Plaguelands and look for a small Scarlet Crusade camp northeast of Felstone Field, the first farm you come across. The camp is likely to be crawling with Scarlet mobs, which you’ll have to deal with in order to reach the tent. Right-click on the tent to burn it, and then right-click on the Scourge Banner in your bags to plant it. Then return to Derrington at The Bulwark to pick up All Along the Watchtowers.
Now you’ll need to head back into Western Plaguelands and find the Ruins of Andorhal, a town south of the main road that has been overrun with Scourge. This area is densely packed with high level undead. Look for each of the four towers in the corners of town and stand in the doorway to use the Beacon Torch you were given. Then return to Derrington to pick up Scholomance. This quest simply points you to Apothecary Dithers a few meters away. Speak with him to move on to Skeletal Fragments. Then go kill some Skeletal mobs in Western Plaguelands, which you can find at the farms north of the road or in the Ruins of Andorhal, to loot 15 Skeletal Fragments. Bring these back to Apothecary Dithers to proceed to Mold Rhymes With…
Now you’ll need to do a bit of running around and spend some gold. You must bring 15 gold to Krinkle Goodsteel at Gadgetzan in Tanaris. He’ll give you the quest Fire Plume Forged, for which you will need to bring 2 Thorium Bars to Fire Plume Ridge in the center of Un’Goro Crater. Head all the way up to the lava lake at the top (the liquid lava, not the red ground you’ll see elsewhere). Stand beside it and use the Unfinished Skeleton Key.
Head back to Apothecary Dithers at The Bulwark in Tirisfal Glades to progress the quest to Araj’s Scarab. You’ll need to make your way north into the Ruins of Andorhal again, and this time you’ll definitely need a group. You must defeat Araj the Summoner, a level 61 elite in the center of town who is surrounded by other undead mobs (some of whom are also elites). Once he’s dead, right-click on Araj’s Phylactery to loot Araj’s Scarab. Then return to Apothecary Dithers and wait for him to finish talking. You can then complete the quest The Key to Scholomance, which will grant you the Skeleton Key that is required to open the door to the dungeon.
Barov Family Fortune
- Shareable: Yes
- Level Required: 52
- Start: Alexi Barov at The Bulwark in Tirisfal Glades
- Finish: Alexi Barov at The Bulwark in Tirisfal Glades
- Objectives: Collect the 4 deeds inside Scholomance
- Rewards:
- 6600 experience
- 1 gold 80 silver
This quest requires you to collect 4 deeds that can be found as clickable scrolls in specific places throughout the Scholomance dungeon:
- The Deed to Southshore is in the first large room of the dungeon, The Reliquary, on a table in the back left corner from the entrance (northeast on the minimap).
- The Deed to Tarren Mill is in the large room you enter after passing through the Chamber of Summoning. It’s once again on a table in the opposite corner from where you enter (southwest this time).
- The Deed to Brill is in the Laboratory near Ras Frostwhisper, on the western wall further toward the back of the room from the Alchemy Lab.
- The Deed to Caer Darrow is in the Barov Family Vault at the very end of the dungeon, on a slab beside Lord Alexei Barov.
After you hand in the deeds, you’ll have the opportunity to complete another quest, The Last Barov, which requires you to enter Alliance territory and awards you with a Barov Peasant Caller.


Neutral Quests
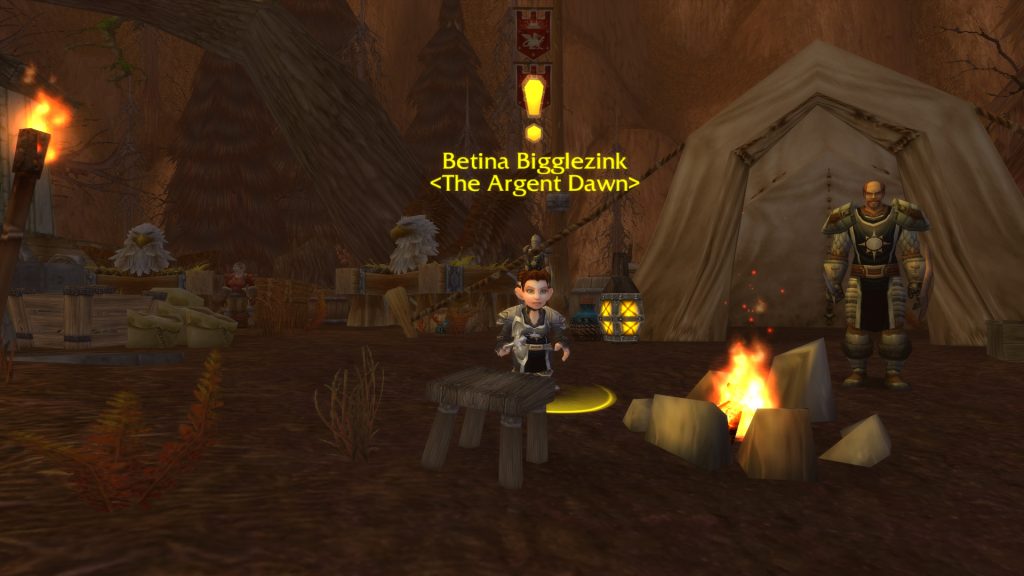
Plagued Hatchlings
- Shareable: Yes
- Level Required: 55
- Start: Betina Bigglezink at Light’s Hope Chapel in Eastern Plaguelands
- Finish: Betina Bigglezink at Light’s Hope Chapel in Eastern Plaguelands
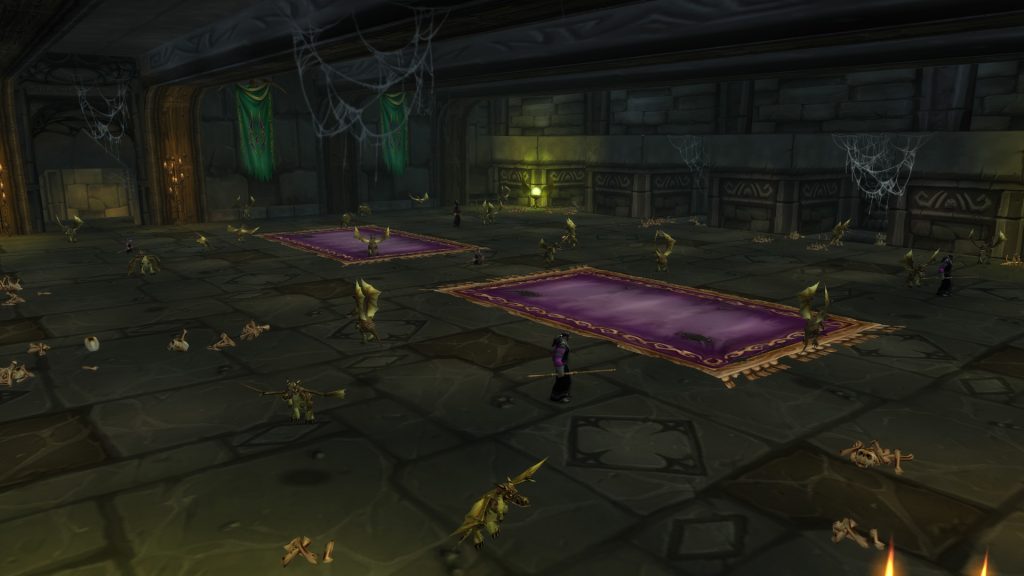
- Objectives: Kill 20 Plagued Hatchlings inside Scholomance
- Rewards:
- 6200 experience
- 90 silver
- 250 reputation with Argent Dawn
This quest requires you to kill 20 Plagued Hatchlings, the dragonkin whelps found in The Great Ossuary. There should be a little more than 20 there, allowing you to complete this quest in a single run.
Dawn’s Gambit
- Shareable: No
- Level Required: 57
- Chain Start: Tinkee Steamboil at Flame Crest in Burning Steppes
- Quest Start: Betina Bigglezink at Light’s Hope Chapel in Eastern Plaguelands
- Finish: Betina Bigglezink at Light’s Hope Chapel in Eastern Plaguelands
- Objectives: Defeat the boss Vectus inside Scholomance
- Rewards:
- 9950 experience
- 2 gold 70 silver
- 500 reputation with Argent Dawn
- Pick one of:
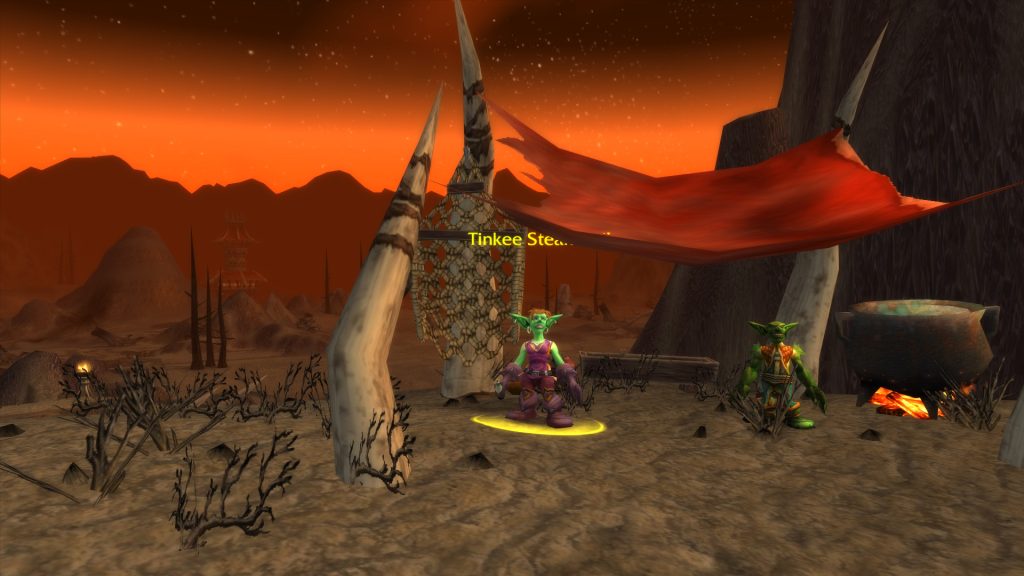
This lengthy chain begins at Flame Crest in Burning Steppes, a Horde flight location that has neutral NPCs. Tinkee Steamboil offers the quest Egg Freezing, which requires entering the Upper Blackrock Spire dungeon. When you get to The Rookery, the room full of dragon eggs, carefully approach the eggs and right-click the Eggscilloscope Prototype, and then you’ll be able to click on a Rookery Egg and freeze it. You don’t need to get super close to reach them, so stay back so you don’t accidentally hatch them and summon a bunch of whelps. Return to Tinkee at Flame Crest and she’ll give you another quest that must be done in The Rookery (if you have a patient group, you can knock both out in one run). Egg Collection requires you to use the Eggscilloscope Prototype again to freeze eggs, and then collect them with the Collectronic Module. Collect 8 eggs this way and head back to Tinkee once more.
She’ll give you the quest Leonid Barthalomew, for which you must locate Leonid Barthalomew the Revered at Light’s Hope Chapel in Eastern Plaguelands. He’ll give you the quest Betina Bigglezink, pointing you to the NPC of that name (Betina Bigglezink) outside. She offers the final quest, Dawn’s Gambit, which sends you to Scholomance at last. Head there and make your way to The Viewing Room, the large room where all of the neutral Scholomance Students are standing around. Use the Dawn’s Gambit in your bag to place it on the ground and then defeat the boss Vectus. Return to Betina at Light’s Hope Chapel to receive your reward.

Doctor Theolen Krastinov, the Butcher
- Shareable: Yes
- Level Required: 55
- Start: Eva Sarkhoff at Caer Darrow in Western Plaguelands
- Finish: Eva Sarkhoff at Caer Darrow in Western Plaguelands
- Objectives: Defeat Doctor Theolen Krastinov inside Scholomance
- Rewards:
- 6600 experience
This quest begins another lengthy chain that will take you through Scholomance three times, then Stratholme and the Plaguelands zones, and finally back to Scholomance for the final quest.
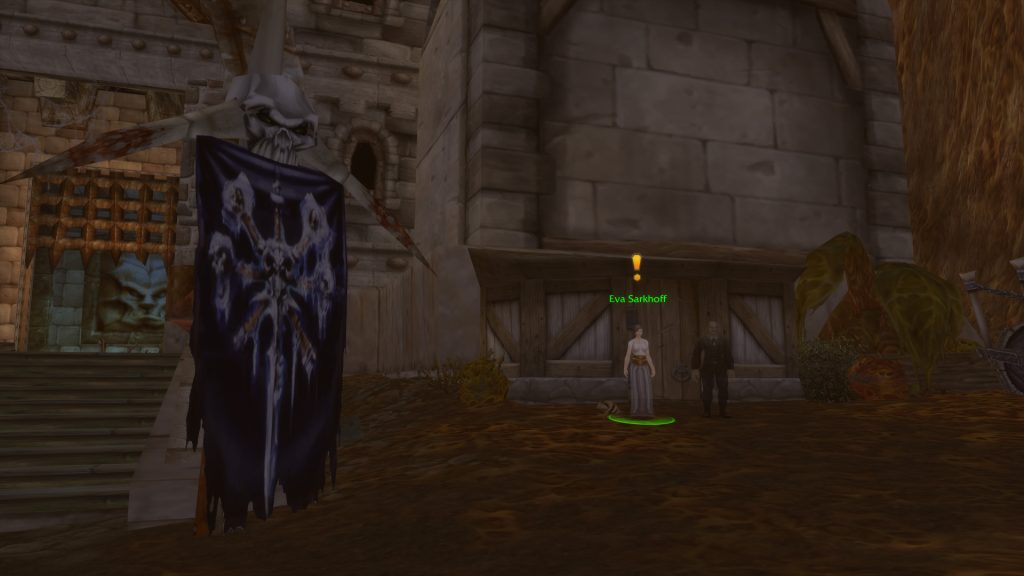
Start by heading to Caer Darrow, the island in the middle of the lake in Western Plaguelands. Eva Sarkhoff is a ghost standing outside the entrance to Scholomance. She offers this quest, which requires you to enter the dungeon. Don’t kill Kirtonos the Herald or Jandice Barov yet if you wish to continue the quest chain without starting a new dungeon run. Kill Doctor Theolen Krastinov, one of the last bosses in the instance. Before you leave, look for the Remains of Eva Sarkhoff and Remains of Lucien Sarkhoff on either side of the same room and click on them to destroy them. Then you can return to Eva to turn in this quest and continue to the quests below.
Krastinov’s Bag of Horrors
- Shareable: No
- Level Required: 55
- Chain Start: Eva Sarkhoff at Caer Darrow in Western Plaguelands
- Quest Start: Eva Sarkhoff at Caer Darrow in Western Plaguelands
- Finish: Eva Sarkhoff at Caer Darrow in Western Plaguelands
- Objectives: Obtain Krastinov’s Bag of Horrors from Jandice Barov inside Scholomance
- Rewards:
- 6600 experience
Continuing the chain from the quest above, head back into Scholomance and defeat Jandice Barov to loot Krastinov’s Bag of Horrors. Return to Eva outside the instance to turn in the quest and continue to the one below.
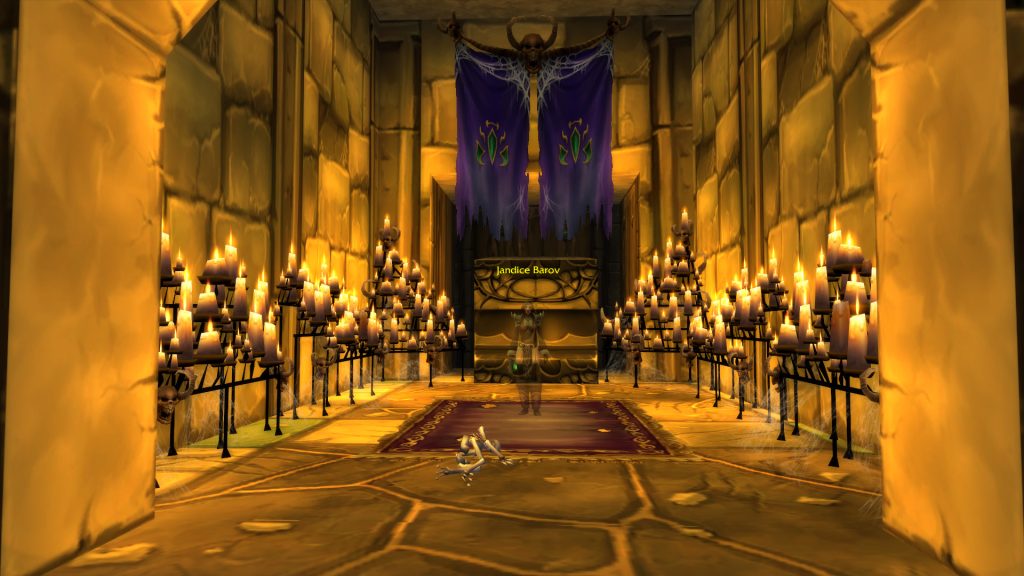
Kirtonos the Herald
- Shareable: No
- Level Required: 55
- Chain Start: Eva Sarkhoff at Caer Darrow in Western Plaguelands
- Quest Start: Eva Sarkhoff at Caer Darrow in Western Plaguelands
- Finish: Eva Sarkhoff at Caer Darrow in Western Plaguelands
- Objectives: Defeat Kirtonos the Herald inside Scholomance
- Rewards:
- 8300 experience
- Spectral Essence
- Pick one of:
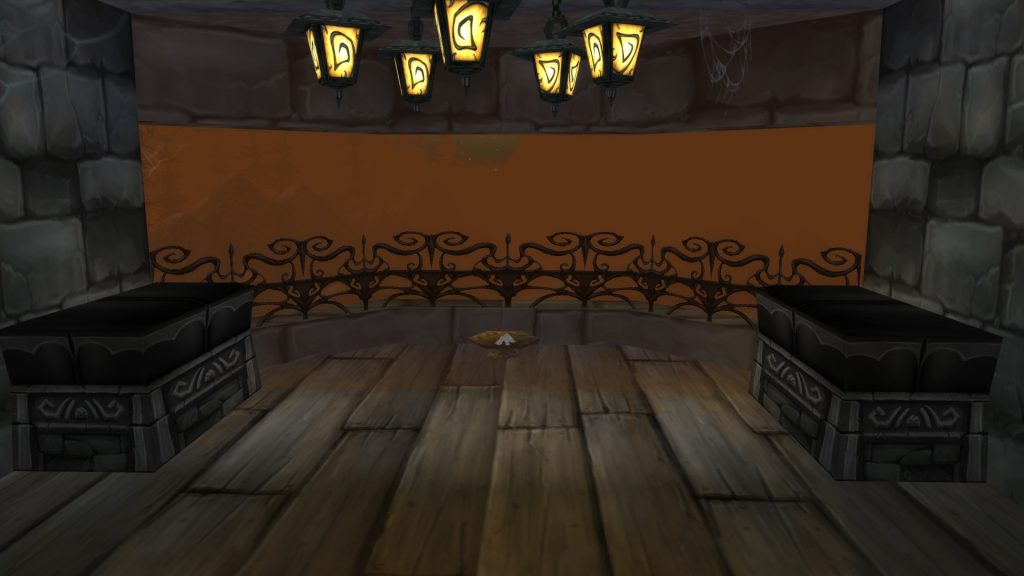
Following the quest above, head back inside Scholomance and look for the balcony on the north side of the Chamber of Summoning. You’ll see the Brazier of the Herald near the railing. Click on it with the Blood of Innocents that Eva gave you in your bags, and you’ll summon the boss Kirtonos the Herald. Defeat him and return to Eva to turn in the quest and continue below.
The Lich, Ras Frostwhisper
- Shareable: No
- Level Required: 57
- Chain Start: Eva Sarkhoff at Caer Darrow in Western Plaguelands
- Quest Start: Magistrate Marduke at Caer Darrrow in Western Plaguelands
- Finish: Magistrate Marduke at Caer Darrrow in Western Plaguelands
- Objectives: Obtain the Human Head of Ras Frostwhisper from Ras Frostwhisper inside Scholomance
- Rewards:
- 9950 experience
- Darrowshire Strongguard
- Pick one of:
After completing the quest above, you’ll need to complete a few more before you will reach this last quest in the chain, one of which must be completed inside the Stratholme (Undead) dungeon.
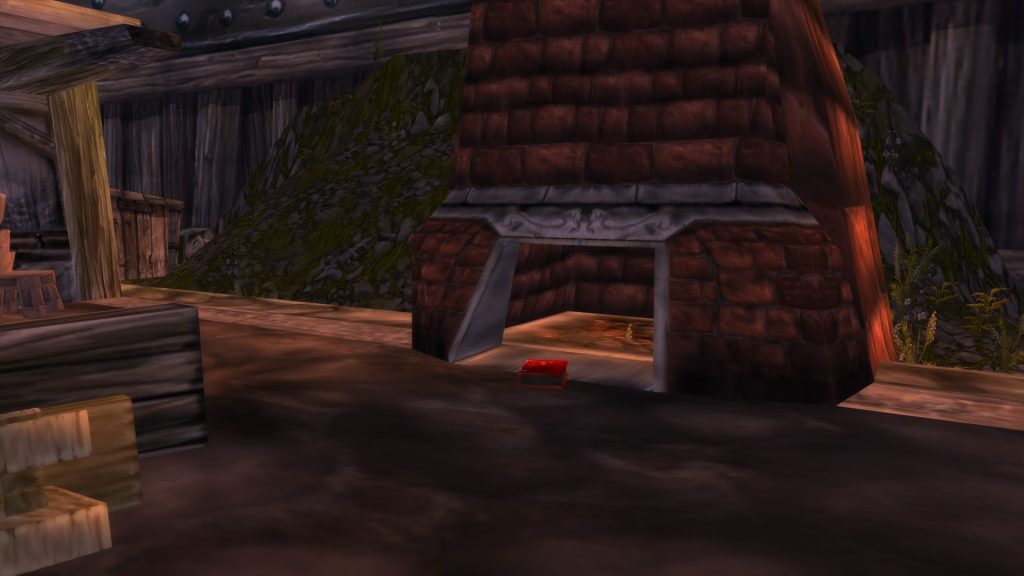
You must now equip the Spectral Essence you just obtained from the last quest in order to see Magistrate Marduke, who is standing close to the Sarkhoffs right outside Scholomance. Talk to him to start the next quest, The Human, Ras Frostwhisper. Then head to the Arathi Highlands zone, to Stromgarde Keep in the southwest. You’re looking for a red book, Keepsake of Remembrance, which will be found in front of a fireplace in one of the ruined buildings. Its location is random, so you may have to do a bit of exploring before you find it.
Bring the book back to Magistrate Marduke to progress to the next quest, The Dying, Ras Frostwhisper. Now locate Leonid Barthalomew the Revered inside Light’s Hope Chapel in Eastern Plaguelands. He offers the next quest, Menethil’s Gift. This quest requires you to enter the Stratholme (Undead) dungeon and make your way to Baron Rivendare, the last boss. There you can click on Menethil’s Gift, the glowing symbol on the ground in front of the boss, to get the next quest (also called Menethil’s Gift). Return to Leonid Barthalomew at Light’s Hope Chapel to turn this in and move on to Soulbound Keepsake. Then head back to Magistrate Marduke outside Scholomance to pick up the final quest of the chain, The Lich, Ras Frostwhisper.
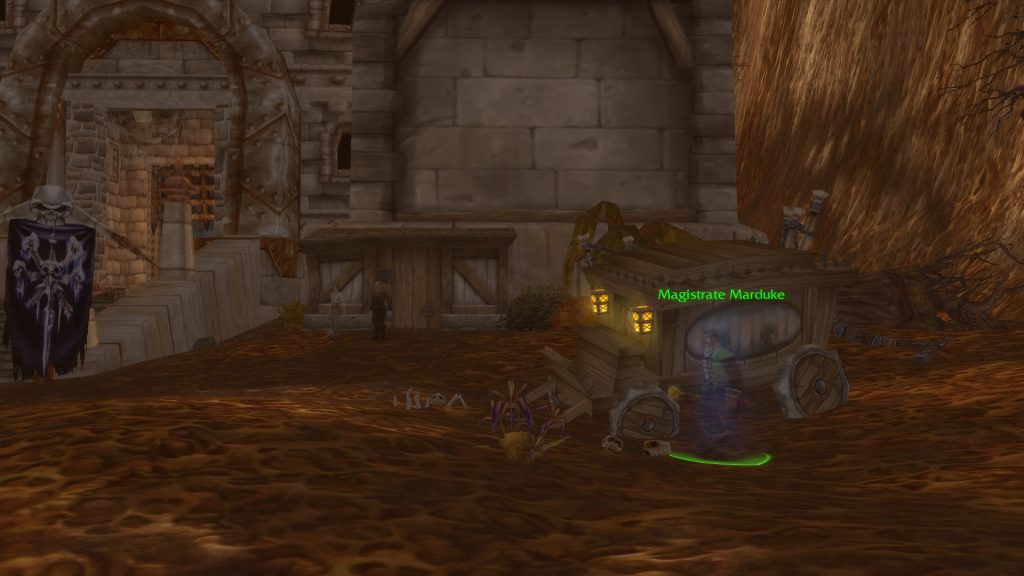
Enter Scholomance again and make your way to The Laboratory, where you’ll find the boss Ras Frostwhisper. Don’t just kill him in his lich form or you will be unable to complete the quest. Use the Soulbound Keepsake in your bag to transform him into a human. This requires a 10-second channel, which can be tricky to complete since he casts both a fear and a knockback. It also means that your group will need to be able to manage without you for the duration of the channel. Once the channel has been completed, he’ll transform and fully heal himself. You can then kill him in his human form. He still has all of the same abilities and mechanics. Kill him to loot the Human Head of Ras Frostwhisper and return to Magistrate Marduke for your reward.
Bosses
There are 16 bosses in Scholomance, including one that is summoned from another boss’s drop, two that are part of quests, and one that is part of the Scourge Invasion.
- Kirtonos the Herald (Summoned)
- Jandice Barov
- Rattlegore
- Death Knight Darkreaver (Summoned for paladin epic mount quest)
- Marduk Blackpool
- Vectus
- Ras Frostwhisper
- Kormok (Quest)
- Lady Illucia Barov
- Lord Alexei Barov
- The Ravenian
- Lorekeeper Polkelt
- Doctor Theolen Krastinov
- Instructor Malicia
- Darkmaster Gandling
- Lord Blackwood (Scourge Invasion)
Kirtonos the Herald
Kirtonos the Herald is a level 60 elite boss who can be summoned on the patio using the Blood of Innocents, looted from the Blood Steward of Kirtonos. The boss transforms between Gargoyle and Human forms during the fight. While in human form he will cast curses on the group, while in gargoyle form the fight is a tank and spank.
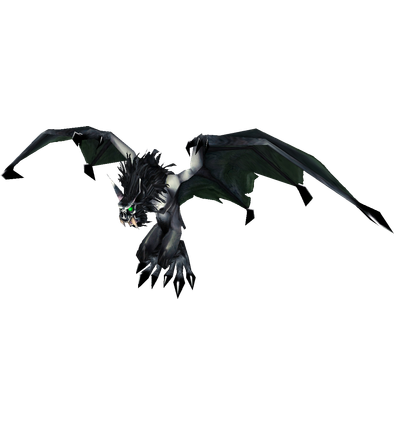
Strategy
- Tank: Tank the boss with your back to a wall to avoid being thrown around by his knockback abilities, and to keep your other party members out of Swoop range. Whenever the boss changes form, makes sure to initiate and establish threat to keep the boss focused on you.
- Healer: Healing this fight should not require you to take your attention away from the tank, unless DPS are being affected by positional abilities. Always try to keep everyone topped off.
- Damage Dealers: During this fight, DPS should avoid being in front of Kirtonos in Gargoyle phase to avoid the Wing Flap knockback and the stun from Swoop. Mages and Druids should decurse any cursed party members.
Loot
- Boots of Valor
- Clutch of Andros
- Frightalon
- Gargoyle Slashers
- Gravestone War Axe
- Heart of the Fiend
- Loomguard Armbraces
- Stoneform Shoulders
- Windreaver Greaves
Jandice Barov
Jandice is an optional, level 61 elite, boss located below the Plagued Whelpling room in Scholomance. Use the torch on the south wall to open up access to her chamber. The encounter with Jandice can be tricky, so make sure to clear the area around her of all adds to keep your focus on the boss. Jandice summons illusions of herself during the fight, so mark the boss to keep a sense of which copy is actually her. Make sure to click on the torch on the side wall to access extra secret loot later in the dungeon.
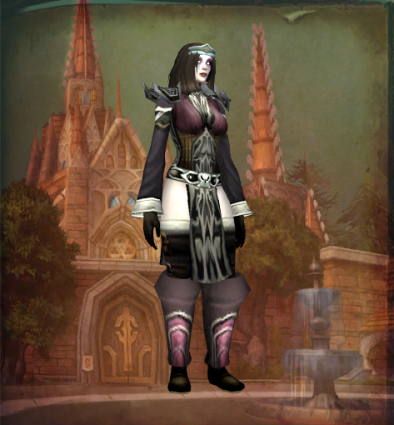
Strategy
- Tank: Mark the boss with an icon so that you can easily pick up the real version of her when she summons her illusions. Maintain threat especially when the illusions are summoned.
- Healer: Be sure to cleanse Dark Plague and decurse Curse of Blood whenever possible. Stay in the back of the room during the fight as to avoid being involved with any of the illusions when they are summoned.
- Damage Dealers: Allow for your tank to establish threat, and begin dealing damage to the boss. When she summons illusory images of herself, spread out and hold DPS until the true version of her is clearly identified. Then focus your output on the boss.
Loot
- Barovian Family Sword
- Darkshade Gloves
- Dreadmist Mantle
- Ghostloom Leggings
- Phantasmal Cloak
- Royal Cap Spaulders
- Staff of Metanoia
- Wraithplate Leggings
Rattlegore
Rattlegore is a mandatory, level 61 elite boss located in the basement of the Great Ossuary. The boss hits hard compared to others in Scholomance, and comes with one add. Be sure to clear aroung the boss before pulling Rattlegore in order to avoid getting more than the one add. Rattlegore drops the Viewing Room Key, which is needed to progress deeper into Scholomance.
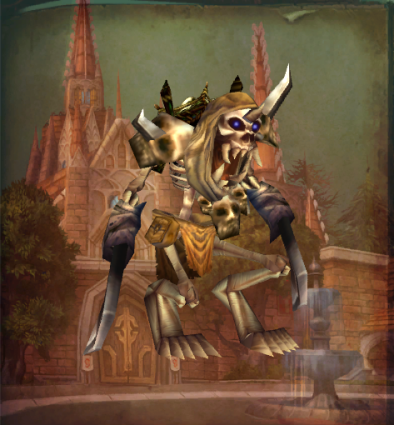
Strategy
- Tank: Mark the add as the primary target, and focus on Rattlegore second. Pull both of them out of their room and to the bottom of the stairs. Keep your back to a wall to avoid being thrown around by Knock Away.
- Healer: Focus your healing on the tank, as they will be taking significant damage especially at the beginning of the encounter when the add is still alive. Keep your distance to avoid being hit by War Stomp.
- Damage Dealers: Focus your DPS output on the add before switching over to the boss. Be extra aware of your threat level, as Rattlegore can easily deal significant damage to players with low armor class. If you are a ranged DPS, keep your distance to avoid being hit by War Stomp.
Loot
- Bone Golem Shoulders
- Bone Ring Helm
- Corpselight Greaves
- Deadwalker Mantle
- Frightskull Shaft
- Rattlecage Buckler
- Shadowcraft Boots
- Top Half of Advanced Armorsmithing: Volume II
- Viewing Room Key
Death Knight Darkreaver
Death Knight Darkreaver is a summoned boss in Rattlegore’s room, the Great Ossuary, of Scholomance. He is summoned by Paladins who are working on the quest for their epic mount. The encounter entails waves of different spirits who must be defeated. Using different Judgements on the spirits will result in an AoE stun and reduced damage. For Banal Spirits, judge Seal of Wisdom. For Malicious Spirits, judge Seal of Justice. For Corrupted Spirits, Judge Seal of Righteousness. For Shadowed Spirits, Judge Seal of Light. After these waves of spirits, Death Knight Darkreaver will spawn. This encounter is part of the questline for the Alliance Paladin Epic Mount and for the Horde Shaman Epic Helm.
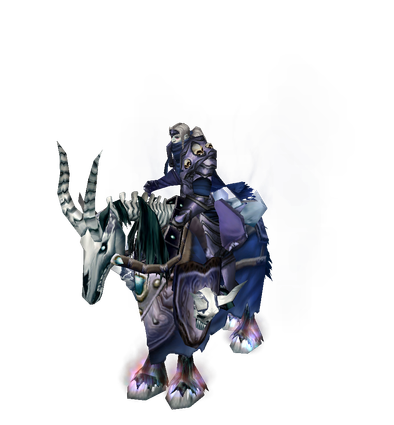
Strategy
- Tank: Pick up the adds in each wave as best you can and allow DPS to burn them down. Darkreaver himself is a Tank and Spank. Just hold threat on the boss.
- Healer: Keep you Tank topped off, while keeping an eye on any of your party members who are also taking damage.
- Damage Dealers: This is a Tank and Spank. Focus damage output on the boss without overtaking the primary threat position.
Loot
Marduk Blackpool
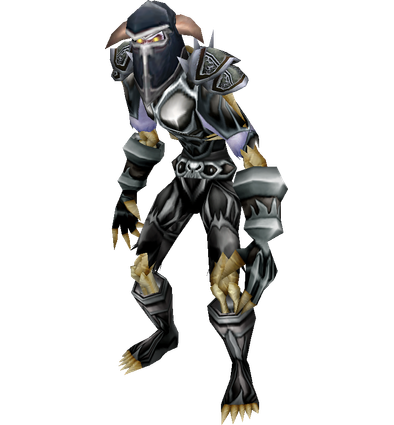
Marduk is a level 58 undead elite found in the NE corner of the Viewing Room. He is unable to be engaged unless someone in the party has worked on a long questline which involves killing this boss.
Strategy
- Tank: Tank the boss facing away from the group, keeping distance between Marduk and your Ranged DPS and Healer.
- Healer: Be aware of how much damage your DPS are taking from Shadow Shield and Shadow Bolt Volley. Keep your primary attention on the Tank.
- Damage Dealers: Ranged DPS need to stand away from the boss to be out of range of Defiling Aura. Melee should be careful not to damage the boss while Shadow Shield is active, as it deals damage to the attacker while active. Stand behind the boss to avoid damage from Cleave.
Loot
Vectus
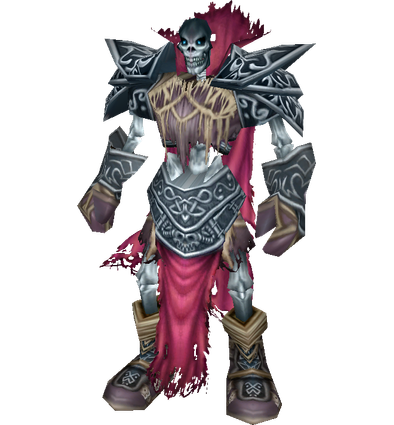
Vectus is a Neutral, level 60 undead elite who is to be found in the Viewing Room. He is one of the necromancy instructors for the school. He is unable to be engaged unless someone in the party has worked on a long questline which involves killing this boss.
Strategy
- Tank: Tank the boss away from your Ranged DPS and Healer while avoiding standing in fire or being hit by Flamestrike.
- Healer: While healing the group and focusing on your tank, avoid fire on the ground and stay out of range of Blast Wave.
- Damage Dealers: Spread out from one another to avoid taking damage from a Flamestrike targeted at one of your party members. Ranged should stand away from the boss, out of range of Blast Wave.
Loot
Ras Frostwhisper
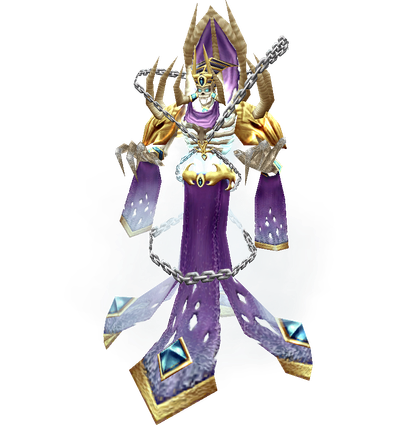
Ras Frostwhisper is a level 60 elite Lich, located in the Alchemy Lab room in Scholomance. Other than Blackwing Lair, this is the only other Alchemy Lab in Classic where you are able to craft flasks.
Strategy
- Tank: After clearing all the adds in the room, tank the boss near the back but not behind any obstacles which will put you out of line of sight from the healer, especially when affected by Fear. Coordinate with melee DPS on an interrupt rotation to keep Ras from using his abilities too often.
- Healer: Stay at maximum range from the boss and focus on healing the tank. DPS will be taking damage from the boss’ abilities fairly consistency, so plan on spreading out your healing and using HoT effects and shields. Dispel Fear if possible.
- Damage Dealers: Ranged DPS should stay at maximum range to avoid Chill Nova. Interrupt as many of Ras’s abilities as possible.
Loot
- Alanna’s Embrace
- Bonechill Hammer
- Boneclenched Gauntlets
- Death’s Clutch
- Freezing Lich Robes
- Frostbite Girdle
- Iceblade Hacker
- Intricately Runed Shield
- Maelstrom Leggings
- Magister’s Mantle
- Recipe: Flask of Supreme Power
- Shadowy Mail Greaves
- Shivery Handwraps
- Spellbound Tome
Kormok
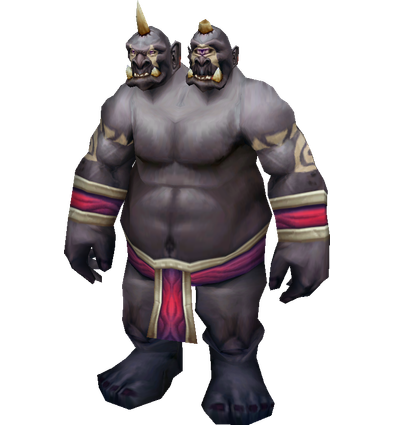
Kormok is a level 60 elite boss can be summoned in Ras Frostwhisper’s room using the Brazier of Beckoning for the Tier 0.5 questline. The fight is a tank and spank that requires you to manage the adds that he summons.
Strategy
- Tank: Tank the boss in the middle of the room, and be prepared to pick up the skeleton adds as they are summoned.
- Healer: Especially when the skeleton adds are summoned, keep your distance and allow for the tank and DPS to handle them. Keep everyone topped off as best you can!
- Damage Dealers: Use AoE effects to manage the skeleton adds that are summoned throughout the fight. When the boss uses Bone Shield, melee DPS should hold off as damage will be reflected back to the attacker.
Loot
- Amalgam’s Band
- Band of the Steadfast Hero
- Blade of Necromancy
- Hammer of Divine Might
- Ironweave Pants
Lady Illucia Barov
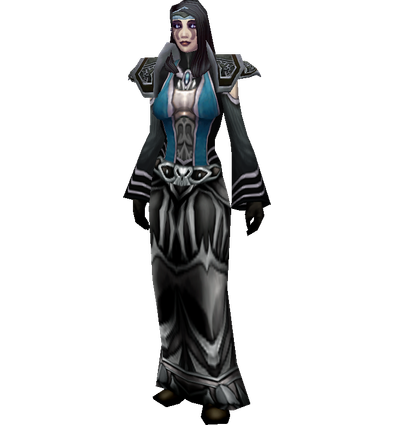
Lady Illucia Barov is located on the lower left wing of the last room. She is a simple straightforward fight who’s only complication is she will cast Dominate Mind on players.
Strategy
- Tank: Tank the boss and maximize threat so the damage dealers can output maximum DPS.
- Healer: This fight doesn’t have a lot of damage. Watch and call out if a player affected by Dominate Mind is attacking you so that they can be CC’d.
- Damage Dealers: Lady Barov is a simple fight. Interrupt where possible and maximize DPS without overtaking the Tank on threat.
Loot
- Ancient Bone Bow
- Burial Shawl
- Dimly Opalescent Ring
- Ghoul Skin Leggings
- Hammer of the Vesper
- Libram of Divinity
- Totem of Sustaining
- Bloodmail Belt
- Bloodmail Boots
- Bloodmail Gauntlets
- Bloodmail Hauberk
- Bloodmail Legguards
- Cadaverous Armor
- Cadaverous Belt
- Cadaverous Gloves
- Cadaverous Leggings
- Cadaverous Walkers
- Deathbone Chestplate
- Deathbone Gauntlets
- Deathbone Girdle
- Deathbone Legguards
- Deathbone Sabatons
- Necropile Boots
- Necropile Cuffs
- Necropile Leggings
- Necropile Mantle
- Necropile Robe
- Dark Rune
- Skin of Shadow
Lord Alexei Barov
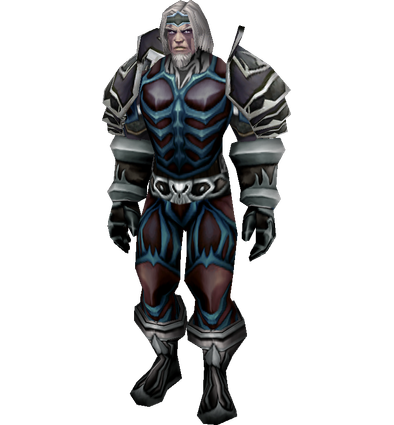
Lord Alexei Barov is located on the lower center wing of the last room. He is arguably the hardest, if not the second hardest fight in Scholomance. The combination of his Unholy Aura and Veil of Shadow in addition to two linked adds can quickly overwhelm a healer, leading to deaths. If at all possible, adds should be CC’d and decursing of Veil of Shadow should be a priority. Burn Barov and then finish up the adds.
Strategy
- Tank: Make sure that crowd controls plans are finalized before the pull. Controlling the adds makes the fight much easier. Keep aggro on all mobs but focus on Barov first to stem the party wide damage from Unholy Aura.
- Healer: This is a challenging fight to heal. The constant effect of Unholy Aura caused a lot of party damage and slows cast speed. Priests can Shackle Undead one of the adds and should keep it controlled until Barov is dead. Druids should be decursing Veil of Shadow throughout the fight.
- Damage Dealers: This is a challenging fight and if able to use CC to control the adds, they should be managed throughout the fight until Barov is dead. Focus on Barov first to minimize the nasty effect of Unholy Aura. Druids and mages need to decurse Veil of Shadow throughout the fight.
Loot
- Ancient Bone Bow
- Burial Shawl
- Dimly Opalescent Ring
- Ghoul Skin Leggings
- Hammer of the Vesper
- Libram of Divinity
- Totem of Sustaining
- Bloodmail Belt
- Bloodmail Boots
- Bloodmail Gauntlets
- Bloodmail Hauberk
- Bloodmail Legguards
- Cadaverous Armor
- Cadaverous Belt
- Cadaverous Gloves
- Cadaverous Leggings
- Cadaverous Walkers
- Deathbone Chestplate
- Deathbone Gauntlets
- Deathbone Girdle
- Deathbone Legguards
- Deathbone Sabatons
- Necropile Boots
- Necropile Cuffs
- Necropile Leggings
- Necropile Mantle
- Necropile Robe
- Lightforge Bracers
The Ravenian
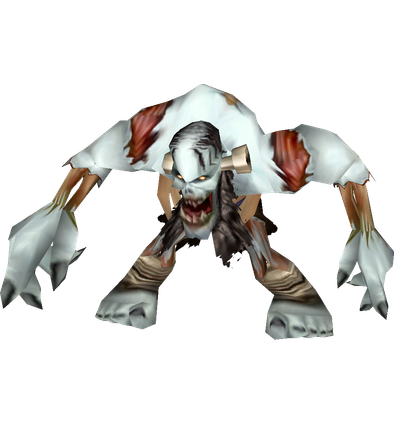
The Ravenian is located on the lower right wing of the last room. This is a very simple tank and spank fight with the only complication is if you don’t fully clear the room, you may get adds due to his Knock Away.
Strategy
- Tank: Be aware of positioning because you will be flung around by Knock Away. If you don’t clear the room it’s easy to accidentally get adds.
- Healer: Keep your distance to not be affected by Knock Away. Make sure the tank stays up on health but it’s a simple fight.
- Damage Dealers: This is a very simple fight. Be aware of positioning because you can easily be flung into adds from Knock Away.
Loot
- Ancient Bone Bow
- Burial Shawl
- Dimly Opalescent Ring
- Ghoul Skin Leggings
- Hammer of the Vesper
- Libram of Divinity
- Totem of Sustaining
- Bloodmail Belt
- Bloodmail Boots
- Bloodmail Gauntlets
- Bloodmail Hauberk
- Bloodmail Legguards
- Cadaverous Armor
- Cadaverous Belt
- Cadaverous Gloves
- Cadaverous Leggings
- Cadaverous Walkers
- Deathbone Chestplate
- Deathbone Gauntlets
- Deathbone Girdle
- Deathbone Legguards
- Deathbone Sabatons
- Necropile Boots
- Necropile Cuffs
- Necropile Leggings
- Necropile Mantle
- Necropile Robe
- Dark Rune
- Skin of Shadow
Lorekeeper Polkelt
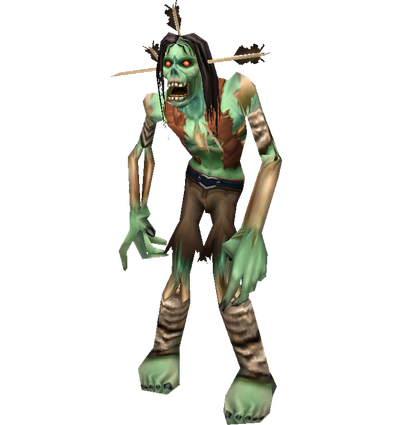
Lorekeeper Polkelt is located on the upper left wing of the last room. He is a very squishy boss but the complication is that he almost certainly won’t be able to be pulled alone. There are many zombie mobs in this room and you usually get a few when pulling Polkelt. As long as you treat them the same way as other pulls it is easy to down him.
Strategy
- Tank: Polkelt will almost certainly come with multiple adds. Keep threat on all mobs and be prepared to absorb or avoid the exploding corpses.
- Healer: Keep your distance on the fight so that adds that die and explode don’t hurt you.
- Damage Dealers: Polkelt has very low health for a boss. He almost always comes with multiple adds though. Treat this pull similarly to the other pulls in this room. Keep your distance when mobs die to minimize explosion damage.
Loot
- Ancient Bone Bow
- Burial Shawl
- Dimly Opalescent Ring
- Ghoul Skin Leggings
- Hammer of the Vesper
- Libram of Divinity
- Totem of Sustaining
- Bloodmail Belt
- Bloodmail Boots
- Bloodmail Gauntlets
- Bloodmail Hauberk
- Bloodmail Legguards
- Cadaverous Armor
- Cadaverous Belt
- Cadaverous Gloves
- Cadaverous Leggings
- Cadaverous Walkers
- Deathbone Chestplate
- Deathbone Gauntlets
- Deathbone Girdle
- Deathbone Legguards
- Deathbone Sabatons
- Necropile Boots
- Necropile Cuffs
- Necropile Leggings
- Necropile Mantle
- Necropile Robe
- Dark Rune
- Skin of Shadow
- Dreadmist Wraps
Doctor Theolen Krastinov
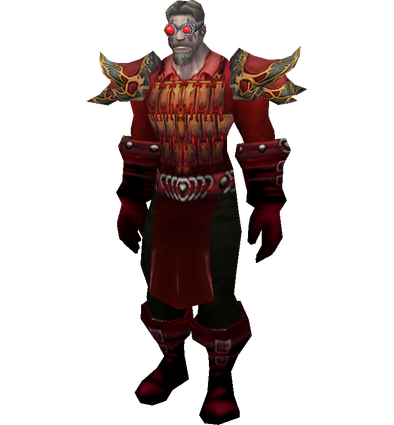
Doctor Theolen Krastinov is located on the upper center wing of the last room. This boss can be especially lethal to lesser armored party members. At 50% health he will Enrage and will easily start one or two shotting those near him. Try to burn him down fast before too many party members die.
Strategy
- Tank: Be prepared to take extra damage in this fight. Krastinov hits very hard. At 50% he hits even harder so to help out plan on using some defensive cooldowns later into the fight.
- Healer: Absolutely always keep distance away from the boss. He can easily one shot cloth armored players. Watch the tank’s health as they will take a lot of damage. Damage dealers can be sacrified if they pull threat but if the tank dies it’ll probably be a wipe.
- Damage Dealers: Krastinov hits very hard. Make sure to not get aggro or you could easily be one shotted, especially if your armor is low. At 50% health he increases his attack speed, making him even more lethal.
Loot
- Ancient Bone Bow
- Burial Shawl
- Dimly Opalescent Ring
- Ghoul Skin Leggings
- Hammer of the Vesper
- Libram of Divinity
- Totem of Sustaining
- Bloodmail Belt
- Bloodmail Boots
- Bloodmail Gauntlets
- Bloodmail Hauberk
- Bloodmail Legguards
- Cadaverous Armor
- Cadaverous Belt
- Cadaverous Gloves
- Cadaverous Leggings
- Cadaverous Walkers
- Deathbone Chestplate
- Deathbone Gauntlets
- Deathbone Girdle
- Deathbone Legguards
- Deathbone Sabatons
- Necropile Boots
- Necropile Cuffs
- Necropile Leggings
- Necropile Mantle
- Necropile Robe
- Magister’s Gloves
Instructor Malicia
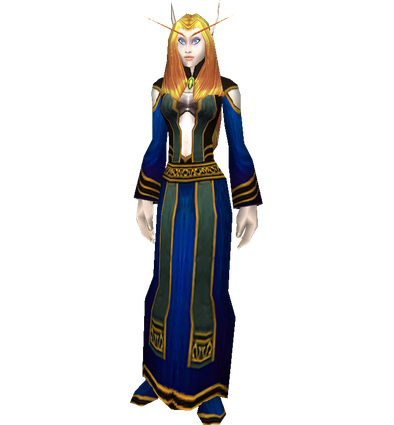
Instructor Malicia is located on the upper right wing of the last room. She is an easy fight after dealing with the annoying adds before her. She is a heavy magic user and interrupts make the fight extremely simple.
Strategy
- Tank: This is a tank and spank fight. Interrupt spells if possible.
- Healer: If the party is interrupting Malicia’s spells there’s very little damage that goes out on this fight.
- Damage Dealers: Malicia casts a lot of spells so interrupt as many as you can. Without casting spells she is very easy to kill and does little damage.
Loot
- Ancient Bone Bow
- Burial Shawl
- Dimly Opalescent Ring
- Ghoul Skin Leggings
- Hammer of the Vesper
- Libram of Divinity
- Totem of Sustaining
- Bloodmail Belt
- Bloodmail Boots
- Bloodmail Gauntlets
- Bloodmail Hauberk
- Bloodmail Legguards
- Cadaverous Armor
- Cadaverous Belt
- Cadaverous Gloves
- Cadaverous Leggings
- Cadaverous Walkers
- Deathbone Chestplate
- Deathbone Gauntlets
- Deathbone Girdle
- Deathbone Legguards
- Deathbone Sabatons
- Necropile Boots
- Necropile Cuffs
- Necropile Leggings
- Necropile Mantle
- Necropile Robe
- Dark Rune
- Skin of Shadow
- Shadowcraft Bracers
Darkmaster Gandling
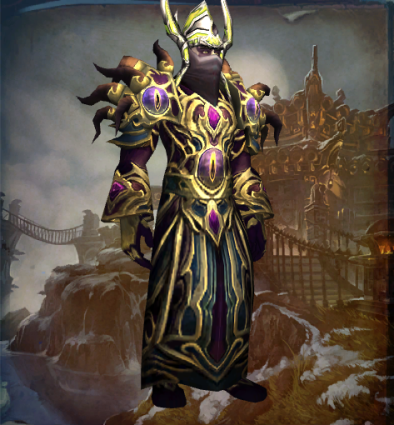
Darkmaster Gandling is the final boss of Scholomance, who spawns in the center of the Barov Family Vault upon the defeat of the 6 chamber bosses. He is the headmaster of Necromancy at Scholomance. Be aware that he enters the room soon after the final of the 6 bosses is defeated and will be engaged immediately upon exiting the wing. Gandling will periodically teleport a player into one of the surrounding chambers where they will need to fight a few non-elite mobs to make their way back to the group. Plan for the event that your Tank or Healer may be the one teleported.
Strategy
- Tank: Hold the boss in the middle of the room where he spawns. If you are teleported into one of the previous rooms, kill the adds present and rejoin the encounter.
- Healer: Focus healing output on your Tank. If you are teleported into one of the previous rooms, kill the adds present and rejoin the encounter.
- Damage Dealers: Melee DPS should focus their damage output on the boss without overtaking the primary threat position. Ranged DPS should stand on the stairs and damage the boss from maximum range. If you are teleported into one of the previous rooms, kill the adds present as quickly as possible and rejoin the encounter.
Loot
- Ace of Portals
- Beaststalker’s Cap
- Bonecreeper Stylus
- Boots of the Shrieker
- Coif of Elements
- Detention Strap
- Devour Crown
- Don Mauricio’s Band of Domination
- Dreadmist Mask
- Headmaster’s Charge
- Helm of Valor
- Lightforge Helm
- Magister’s Crown
- Pattern: Robe of the Void
- Shadowcraft Cap
- Silent Fang
- Tombstone Breastplate
- Vigorsteel Vambraces
- Wildheart Cowl
- Witchblade
Lord Blackwood (Scourge Invasion)
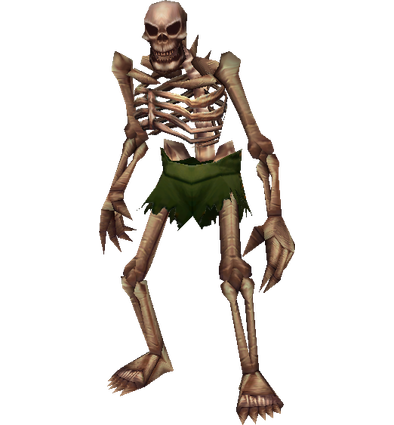
Lord Blackwood is a boss that appears during the Scourge Invasion. He is a simple tank and spank boss but make sure to get any loot off of him before he becomes unavailable.
Strategy
- Tank: Maximize threat so that the damage dealers can DPS. This is straight forward for strategy.
- Healer: Keep the tank up and watch damage dealer’s health. This is a simple tank and spank.
- Damage Dealers: This is a simple fight. Stay below the tank for threat and maximize DPS.
Loot
Quest Rewards & Loot
Quest Rewards
 The Key to Scholomance/
 The Key to Scholomance
- Dawn’s Gambit
- Kirtonos the Herald
- The Lich, Ras Frostwhisper
Boss Drops
- Kirtonos the Herald (Summoned)
- Jandice Barov
- Rattlegore
- Death Knight Darkreaver (Summoned for paladin epic mount quest)
- Marduk Blackpool
- Vectus
- Ras Frostwhisper
- Kormok (Quest)
- Lady Illucia Barov
- Ancient Bone Bow
- Burial Shawl
- Dimly Opalescent Ring
- Ghoul Skin Leggings
- Hammer of the Vesper
- Libram of Divinity
- Totem of Sustaining
- Bloodmail Belt
- Bloodmail Boots
- Bloodmail Gauntlets
- Bloodmail Hauberk
- Bloodmail Legguards
- Cadaverous Armor
- Cadaverous Belt
- Cadaverous Gloves
- Cadaverous Leggings
- Cadaverous Walkers
- Deathbone Chestplate
- Deathbone Gauntlets
- Deathbone Girdle
- Deathbone Legguards
- Deathbone Sabatons
- Necropile Boots
- Necropile Cuffs
- Necropile Leggings
- Necropile Mantle
- Necropile Robe
- Dark Rune
- Skin of Shadow
- Lord Alexei Barov
- Ancient Bone Bow
- Burial Shawl
- Dimly Opalescent Ring
- Ghoul Skin Leggings
- Hammer of the Vesper
- Libram of Divinity
- Totem of Sustaining
- Bloodmail Belt
- Bloodmail Boots
- Bloodmail Gauntlets
- Bloodmail Hauberk
- Bloodmail Legguards
- Cadaverous Armor
- Cadaverous Belt
- Cadaverous Gloves
- Cadaverous Leggings
- Cadaverous Walkers
- Deathbone Chestplate
- Deathbone Gauntlets
- Deathbone Girdle
- Deathbone Legguards
- Deathbone Sabatons
- Necropile Boots
- Necropile Cuffs
- Necropile Leggings
- Necropile Mantle
- Necropile Robe
- Lightforge Bracers
- The Ravenian
- Ancient Bone Bow
- Burial Shawl
- Dimly Opalescent Ring
- Ghoul Skin Leggings
- Hammer of the Vesper
- Libram of Divinity
- Totem of Sustaining
- Bloodmail Belt
- Bloodmail Boots
- Bloodmail Gauntlets
- Bloodmail Hauberk
- Bloodmail Legguards
- Cadaverous Armor
- Cadaverous Belt
- Cadaverous Gloves
- Cadaverous Leggings
- Cadaverous Walkers
- Deathbone Chestplate
- Deathbone Gauntlets
- Deathbone Girdle
- Deathbone Legguards
- Deathbone Sabatons
- Necropile Boots
- Necropile Cuffs
- Necropile Leggings
- Necropile Mantle
- Necropile Robe
- Dark Rune
- Skin of Shadow
- Lorekeeper Polkelt
- Ancient Bone Bow
- Burial Shawl
- Dimly Opalescent Ring
- Ghoul Skin Leggings
- Hammer of the Vesper
- Libram of Divinity
- Totem of Sustaining
- Bloodmail Belt
- Bloodmail Boots
- Bloodmail Gauntlets
- Bloodmail Hauberk
- Bloodmail Legguards
- Cadaverous Armor
- Cadaverous Belt
- Cadaverous Gloves
- Cadaverous Leggings
- Cadaverous Walkers
- Deathbone Chestplate
- Deathbone Gauntlets
- Deathbone Girdle
- Deathbone Legguards
- Deathbone Sabatons
- Necropile Boots
- Necropile Cuffs
- Necropile Leggings
- Necropile Mantle
- Necropile Robe
- Dark Rune
- Skin of Shadow
- Dreadmist Wraps
- Doctor Theolen Krastinov
- Ancient Bone Bow
- Burial Shawl
- Dimly Opalescent Ring
- Ghoul Skin Leggings
- Hammer of the Vesper
- Libram of Divinity
- Totem of Sustaining
- Bloodmail Belt
- Bloodmail Boots
- Bloodmail Gauntlets
- Bloodmail Hauberk
- Bloodmail Legguards
- Cadaverous Armor
- Cadaverous Belt
- Cadaverous Gloves
- Cadaverous Leggings
- Cadaverous Walkers
- Deathbone Chestplate
- Deathbone Gauntlets
- Deathbone Girdle
- Deathbone Legguards
- Deathbone Sabatons
- Necropile Boots
- Necropile Cuffs
- Necropile Leggings
- Necropile Mantle
- Necropile Robe
- Magister’s Gloves
- Instructor Malicia
- Ancient Bone Bow
- Burial Shawl
- Dimly Opalescent Ring
- Ghoul Skin Leggings
- Hammer of the Vesper
- Libram of Divinity
- Totem of Sustaining
- Bloodmail Belt
- Bloodmail Boots
- Bloodmail Gauntlets
- Bloodmail Hauberk
- Bloodmail Legguards
- Cadaverous Armor
- Cadaverous Belt
- Cadaverous Gloves
- Cadaverous Leggings
- Cadaverous Walkers
- Deathbone Chestplate
- Deathbone Gauntlets
- Deathbone Girdle
- Deathbone Legguards
- Deathbone Sabatons
- Necropile Boots
- Necropile Cuffs
- Necropile Leggings
- Necropile Mantle
- Necropile Robe
- Dark Rune
- Skin of Shadow
- Shadowcraft Bracers
- Darkmaster Gandling
- Ace of Portals
- Beaststalker’s Cap
- Bonecreeper Stylus
- Boots of the Shrieker
- Coif of Elements
- Detention Strap
- Devour Crown
- Don Mauricio’s Band of Domination
- Dreadmist Mask
- Headmaster’s Charge
- Helm of Valor
- Lightforge Helm
- Magister’s Crown
- Pattern: Robe of the Void
- Shadowcraft Cap
- Silent Fang
- Tombstone Breastplate
- Vigorsteel Vambraces
- Wildheart Cowl
- Witchblade
- Lord Blackwood (Scourge Invasion)

