- Author: Furious
- Date: November 3, 2019
- Updated: December 20, 2024
- Expansion: WoW Classic
Welcome to our Temple of Ahn’Qiraj (AQ40) raiding guide for WoW Classic! The Temple of Ahn’Qiraj is definitely the tougher raid found in Ahn’Qiraj, requiring twice the number of players compared to the nearby Ruins of Ahn’Qiraj (AQ20). Not only that, it is home to two resistance-dependant bosses and houses one of the game’s toughest bosses, C’Thun.
AQ40 is definitely a raid that quickly scales in difficulty, with the initial bosses on par with Molten Core bosses and the end bosses comparable to Naxxramas difficulty. Because of this, AQ40 serves as the natural point of progression after completing Blackwing Lair. It will likely take your raid group several lockouts just to reach C’Thun, and several more to fully finish the Temple with all side bosses.
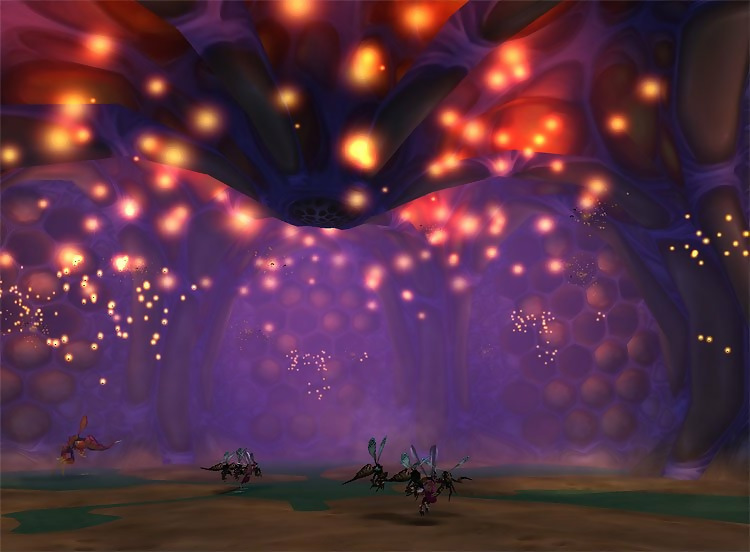
Much like the Ruins of Ahn’Qiraj, the Temple also uses a token loot system and provides reputation for killing bosses. One of the coolest features of the raid includes the Qiraji mounts, which can only be used inside the raid. You’ll need to use them to travel around and especially for the pull of C’Thun.
In this guide, we’ll do our best to provide simple strategies for every boss encounter found within the Temple. There will also be sections for how to prepare for the raid, how to access the entrance, and clearing routes that you can use. We’ll also cover the token loot system and how you too can acquire your fancy T2.5 class gear set! AQ40 definitely won’t be a cakewalk for any guild, so any boss kill your guild does achieve is well worth the effort. Best of luck and let’s get started!
For a full list of items that can be acquired please see our WoW Classic AQ40 Loot List!
Raid Preparation
- Just like with AQ20, before anyone on your server can enter the raid, a massive server-wide event known as The Gates of Ahn’Qiraj must be completed. This will require thousands of supplies and consumables from both factions and will likely take several weeks, if not months, to complete.
- The Scepter of the Shifting Sands must also be completed, which requires completion of an extremely long questline and will send players into Blackwing Lair multiple times, including the requirement of killing Nefarian.
- 40 raid members, preferably with an even distribution (5) of each class. Having at least 100 nature resistance is highly recommended.
- 4 tanks (warrior and/or druids) with at least 200 nature resistance (250 or more for Princess Huhuran.
- You will need 2 warlock “tanks” with at least 150 shadow resistance and upwards of 8,000 health to kill Twin Emperors.
- To kill Princess Huhuran, you will need another 11 players with more than 200 nature resistance. Melee members are preferable.
- Raid members should have primarily rare and epic quality gear. Consumables like potions, flasks, and food should be used.
- Greater Nature Protection Potions are highly recommended.
Reaching the Entrance to the Temple of Ahn’qiraj
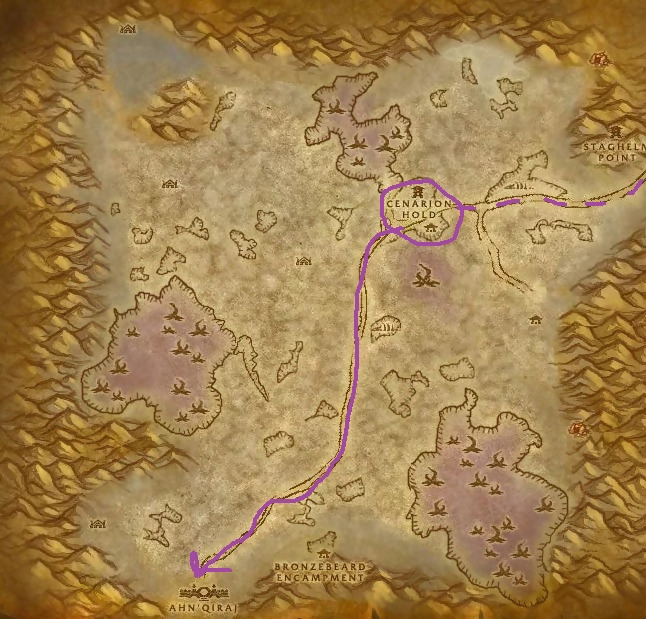
Much like the Ruins of Ahn’Qiraj (AQ20), the Temple of Ahn’Qiraj (AQ40) is very easy to locate. Just follow the main road going south through Silithus to reach Ahn’Qiraj. Take the flight path to Cenarion Hold for the easiest route. If you don’t have that flight hub yet, get to Silithus by the northwest path leading out of Un’Goro Crater at 29,22. On the off chance you haven’t been to Un’Goro, leave Tanaris to the west to find it.
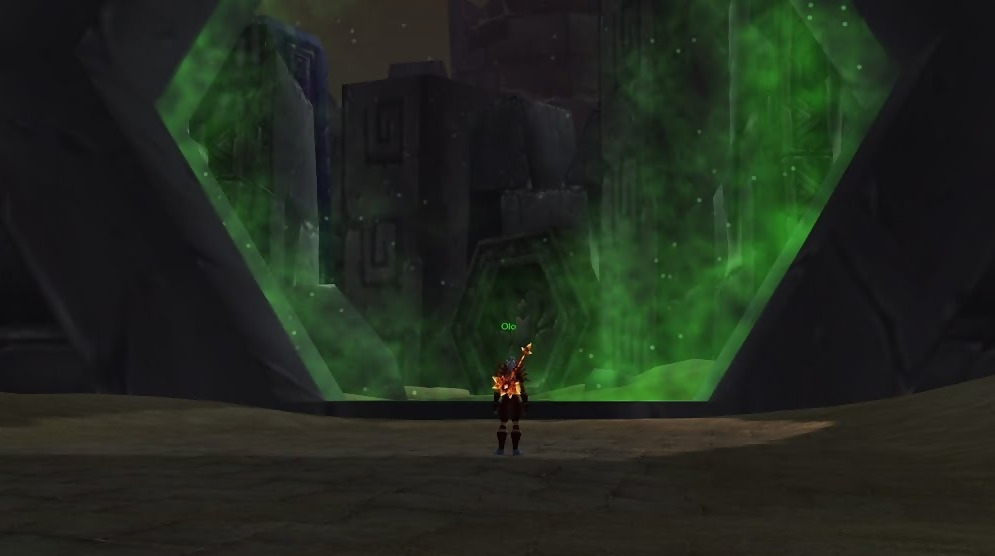
After following the road south, you will reach Ahn’Qiraj. Make sure to ignore the first entrance you see because this will lead to AQ20. Instead, you’ll want to follow the path to the right and follow it all the way up until you find another raid entrance. This is where your journey into AQ40 begins! Take a look at the photos below for a better idea.
Navigating the Temple
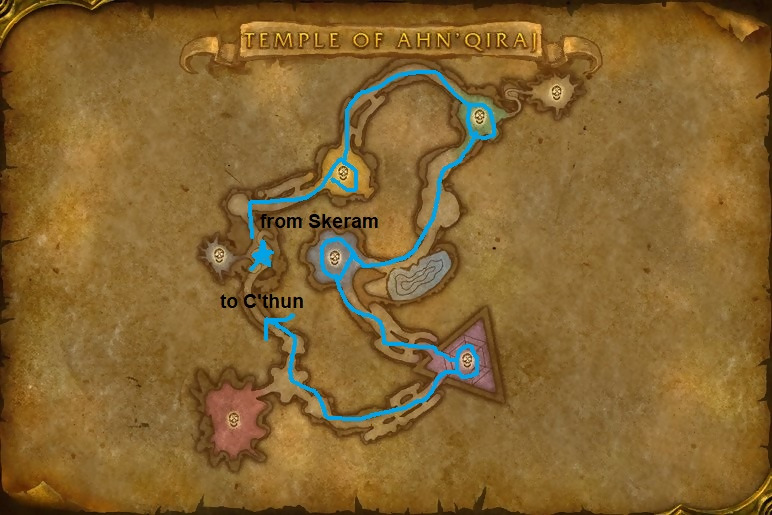
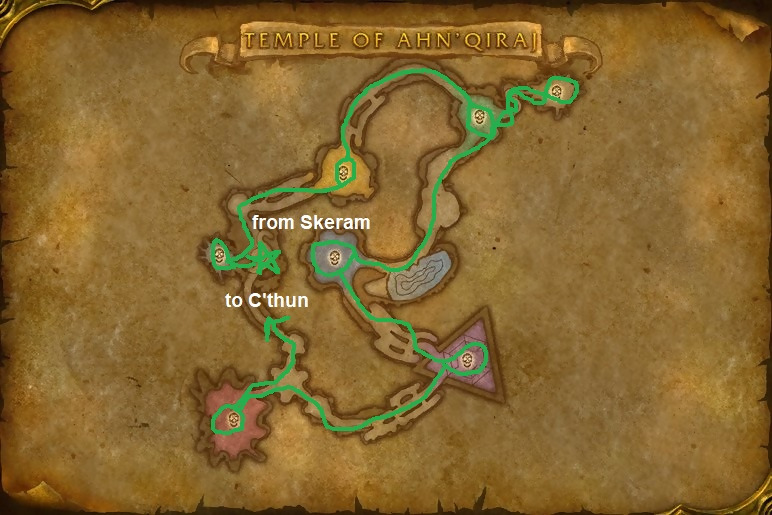
Once you enter AQ40, there is really only one way to go. You’ll encounter Skeram first, then go behind him to enter the main hive found below. From the entrance to the underground (marked with a star), you’ll need to follow one of the two clearing routes indicated below. If you want the efficient clear, you can skip three bosses (The Bug Trio, Viscidus, and Ouro). Only five bosses are required to reach C’Thun at the other end of the hive.
Efficient
Skeram > Sartura > Fankriss > Huhuran > Twin Emperors > C’Thun
Full Clear
Skeram > Bug Trio > Sartura > Fankriss > Viscidus > Huhuran > Twin Emperors > Ouro > C’Thun
Token Loot System
The token system of AQ40 is very similar to AQ20’s token loot system. For each piece of Brood of Nozdormu gear you wish to acquire, you will need two sets of 5 scarabs, two idols, and a special token item dropped only by bosses within the raid. Just like the Ruins, the Temple of Ahn’Qiraj uses 8 scarabs and 8 idols, but there are actually 8 armor token items here as opposed to just 6.
It is important to note that the scarabs used for AQ20 are the same that you will use for the class quests correlating to AQ40. If you have any saved up, you can feel free to use them or just find more within the Temple. The idols of AQ40 are actually different though, although the way you collect them is the same. They are rarely dropped from trash mobs throughout the zone, or you can also use Greater Scarab Coffer Keys to open up Large Scarab Coffers. Coffers are definitely more reliable for collecting the necessary idols for your armor pieces.
The Brood of Nozdormu armor set (T2.5) features boots, shoulders, a helm, legs, and a chest piece. All of these will require 10 scarabs (two sets of 5), 2 idols, and an armor token piece. One particularly nice different from the Ruins is that the armor tokens are guaranteed drops from specific bosses within the Temple of Ahn’Qiraj. This means that collecting T2.5 gear is much more reliable for multiple members of your raid group rather than waiting for lucky drops.
Reputation: Brood of Nozdormu
The main faction associated with AQ40 is the Brood of Nozdormu. These are a faction of the Bronze Dragonflight, with their main leader found within the Caverns of Time. This reputation is one of the hardest to deal with considering that you begin fully hated with them, requiring 36,000 reputation just to reach neutral.
The effort will be well worth it though because it will give you access to the powerful 5-piece Brood of Nozdormu armor set, also known as T2.5. Unlike the Cenarion Circle armor set associated with AQ20, you do not need to reach exalted to acquire the full set. You will only need to reach honored, which may sound daunting considering that you start at hated.
The final piece of the Brood of Nozdormu set is the chest piece, which requires you to kill C’Thun. When you put this into perspective, you’ll quickly realize that it will be a long time before you even have the required item to acquire the chest piece, by which point you will likely already be honored. You can collect 4 of the 5 pieces just by reaching friendly, which makes this much more achievable.
Earning reputation with the Brood of Nozdormu is fairly straightforward. All of the bosses and trash packs within the Temple of Ahn’Qiraj will grant reputation with them. You’ll also earn a small amount from the Ruins of Ahn’Qiraj (AQ20) bosses. Trash packs within AQ40 will give you reputation all the way up to 1 point away from being friendly with the brood.
Additionally, you can turn in Qiraji Lord’s Insignias for 500 rep, but it is smarter to save these until you are Friendly with the faction because this is when earning reputation with them becomes much tougher. The insignias drop from all bosses in AQ40 besides C’Thun.
The same logic applies to any Ancient Qiraji Artifacts you find as loot from trash packs, which will grant 1,000 reputation when handed in. Both the insignias and artifacts can be turned in with the Brood of Nozdormu dragons hanging out just outside the temple.
Scarabs
- Bone Scarab
- Bronze Scarab
- Clay Scarab
- Crystal Scarab
- Gold Scarab
- Ivory Scarab
- Silver Scarab
- Stone Scarab
Idols
- Idol of Death
- Idol of Life
- Idol of Night
- Idol of Rebirth
- Idol of Strife
- Idol of War
- Idol of the Sage
- Idol of the Sun
Qiraji Pieces
- Qiraji Bindings of Command (boots/shoulders) – 100% drop from Viscidus & Princess Huhuran
- Qiraji Bindings of Dominance (boots/shoulders) – 100% drop from Viscidus & Princess Huhuran
- Vek’lor’s Diadem (helm) – 100% drop from Emperor Vek’lor
- Vek’nilash’s Circlet (helm) – 100% drop from Emperor Vek’nilash
- Ouro’s Intact Hide (legs) – 100% drop from Ouro
- Skin of the Great Sandworm (legs) – 100% drop from Ouro
- Carapace of the Old God (chest) – 100% drop from C’Thun
- Husk of the Old God (chest) – 100% drop from C’Thun
Brood of Nozdormu Set Requirements
Druid:
- Boots (Neutral): x5 Silver Scarabs + x5 Stone Scarabs + x2 Idols of Rebirth + Qiraji Bindings of Dominance
- Shoulders (Neutral): x5 Bone Scarabs + x5 Gold Scarabs + x2 Idols of Strife + Qiraji Bindings of Dominance
- Helm (Friendly): x5 Clay Scarabs + x5 Gold Scarabs + x2 Idols of Life + Vek’lor’s Diadem
- Legs (Friendly): x5 Crystal Scarabs + x5 Stone Scarabs + x2 Idols of War + Skin of the Great Sandworm
- Chest (Honored): x5 Bronze Scarabs + x5 Ivory Scarabs + x2 Idols of Rebirth + Husk of the Old God
Hunter:
- Boots (Neutral): x5 Bone Scarabs + x5 Stone Scarabs + x2 Idols of Life + Qiraji Bindings of Command
- Shoulders (Neutral): x5 Crystal Scarabs + x5 Ivory Scarabs + x2 Idols of War + Qiraji Bindings of Command
- Helm (Friendly): x5 Bronze Scarabs + x5 Ivory Scarabs + x2 Idols of Strife + Vek’lor’s Diadem
- Legs (Friendly): x5 Bone Scarabs + x5 Silver Scarabs + x2 Idols of the Sun + Skin of the Great Sandworm
- Chest (Honored): x5 Clay Scarabs + x5 Gold Scarabs + x2 Idols of Life + Carapace of the Old God
Mage:
- Boots (Neutral): x5 Crystal Scarabs + x5 Silver Scarabs + x2 Idols of the Sun + Qiraji Bindings of Dominance
- Shoulders (Neutral): x5 Bronze Scarabs + x5 Stone Scarabs + x2 Idols of Death + Qiraji Bindings of Dominance
- Helm (Friendly): x5 Bronze Scarabs + x5 Ivory Scarabs + x2 Idols of Night + Vek’nilash’s Circlet
- Legs (Friendly): x5 Bone Scarabs + x5 Silver Scarabs + x2 Idols of the Sage + Ouro’s Intact Hide
- Chest (Honored): x5 Clay Scarabs + x5 Gold Scarabs + x2 Idols of the Sun + Husk of the Old God
Paladin:
- Boots (Neutral): x5 Bronze Scarabs + x5 Clay Scarabs + x2 Idols of the Sage + Qiraji Bindings of Dominance
- Shoulders (Neutral): x5 Crystal Scarabs + x5 Gold Scarabs + x2 Idols of Life + Qiraji Bindings of Dominance
- Helm (Friendly): x5 Crystal Scarabs + x5 Stone Scarabs + x2 Idols of Rebirth + Vek’lor’s Diadem
- Legs (Friendly): x5 Bronze Scarabs + x5 Ivory Scarabs + x2 Idols of Strife + Skin of the Great Sandworm
- Chest (Honored): x5 Bone Scarabs + x5 Silver Scarabs + x2 Idols of the Sage + Carapace of the Old God
Priest:
- Boots (Neutral): x5 Bronze Scarabs + x5 Gold Scarabs + x2 Idols of Death + Qiraji Bindings of Command
- Shoulders (Neutral): x5 Ivory Scarabs + x5 Silver Scarabs + x2 Idols of Rebirth + Qiraji Bindings of Command
- Helm (Friendly): x5 Bone Scarabs + x5 Silver Scarabs + x2 Idols of the Sage + Vek’nilash’s Circlet
- Legs (Friendly): x5 Clay Scarabs + x5 Gold Scarabs + x2 Idols of Life + Ouro’s Intact Hide
- Chest (Honored): x5 Crystal Scarabs + x5 Stone Scarabs + x2 Idols of Death + Husk of the Old God
Rogue:
- Boots (Neutral): x5 Bone Scarabs + x5 Crystal Scarabs + x2 Idols of Strife + Qiraji Bindings of Command
- Shoulders (Neutral): x5 Clay Scarabs + x5 Silver Scarabs + x2 Idols of the Sun + Qiraji Bindings of Command
- Helm (Friendly): x5 Clay Scarabs + x5 Gold Scarabs + x2 Idols of War + Vek’lor’s Diadem
- Legs (Friendly): x5 Crystal Scarabs + x5 Stone Scarabs + x2 Idols of Night + Ouro’s Intact Hide
- Chest (Honored): x5 Bronze Scarabs + x5 Ivory Scarabs + x2 Idols of Strife + Carapace of the Old God
Shaman:
- Boots (Neutral): x5 Bronze Scarabs + x5 Clay Scarabs + x2 Idols of the Sage + Qiraji Bindings of Dominance
- Shoulders (Neutral): x5 Crystal Scarabs + x5 Gold Scarabs + x2 Idols of Life + Qiraji Bindings of Dominance
- Helm (Friendly): x5 Crystal Scarabs + x5 Stone Scarabs + x2 Idols of Rebirth + Vek’lor’s Diadem
- Legs (Friendly): x5 Bronze Scarabs + x5 Ivory Scarabs + x2 Idols of Strife + Skin of the Great Sandworm
- Chest (Honored): x5 Bone Scarabs + x5 Silver Scarabs + x2 Idols of the Sage + Carapace of the Old God
Warlock:
- Boots (Neutral): x5 Clay Scarabs + x5 Ivory Scarabs + x2 Idols of Night + Qiraji Bindings of Dominance
- Shoulders (Neutral): x5 Bone Scarabs + x5 Bronze Scarabs + x2 Idols of the Sage + Qiraji Bindings of Dominance
- Helm (Friendly): x5 Bone Scarabs + x5 Silver Scarabs + x2 Idols of Death + Vek’nilash’s Circlet
- Legs (Friendly): x5 Clay Scarabs + x5 Gold Scarabs + x2 Idols of Rebirth + Skin of the Great Sandworm
- Chest (Honored): x5 Crystal Scarabs + x5 Stone Scarabs + x2 Idols of Night + Husk of the Old God
Warrior:
- Boots (Neutral): x5 Gold Scarabs + x5 Ivory Scarabs + x2 Idols of War + Qiraji Bindings of Command
- Shoulders (Neutral): x5 Clay Scarabs + x5 Stone Scarabs + x2 Idols of Night + Qiraji Bindings of Command
- Helm (Friendly): x5 Crystal Scarabs + x5 Stone Scarabs + x2 Idols of the Sun + Vek’nilash’s Circlet
- Legs (Friendly): x5 Bronze Scarabs + x5 Ivory Scarabs + x2 Idols of Death + Ouro’s Intact Hide
- Chest (Honored): x5 Bone Scarabs + x5 Silver Scarabs + x2 Idols of War + Carapace of the Old God
Trash Mobs
The trash mobs that you find within the Temple of Ahn’qiraj can be quite lethal and must be dealt with carefully in order to proceed through the zone. Here are the most important trash enemies to be aware of:
- Obsidian Eradicators – These drain mana from 16 mana users nearby. If they are allowed to reach full mana, they will use Shock Blast on the entire raid group. This will deal around 6,500 damage while also knocking everyone backwards. Make sure to use warlocks and priests to keep them from capping their mana and they aren’t tough to deal with at all.
- Anubisath Sentinels – These guys come in packs of 4. Each member of the pack will have one of the following abilities: Renew, Mortal Strike, Mana Burn, Multi-Target Shadowbolt, Knockback, Thorns, Thunderclap, Fire/Arcane Reflect, Frost/Shadow Reflect. Alone these abilities aren’t too bad, but whenever any of the sentinels die, any that are still alive will gain the ability of the killed member. They will also heal for half of their health. This continues until there is one sentinel left, who will at that point have 4 abilities.
- Qiraji Brainwashers – Brainwashers have the ability to Cause Insanity (mind control) and an enhanced Mind Flay that will also fear their target. They are found in packs with Vekniss Warriors, but focus these guys first.
- Vekniss Warriors – Warriors are found in packs with Brainwashers. These trash mobs themselves aren’t really any issue, but they spawn 10 Vekniss Borers upon death. This is why you should kill Brainwashers first.
- Vekniss Borers – 10 of these will appear whenever you kill a Warrior. They don’t hit too hard individually, but pack a punch in numbers.
- Vekniss Guardians – Guardians tend to come in packs. Whenever you kill one of them, the rest of the guardians will all swarm their fallen ally. They will knock all nearby raid members into the air and apply a stacking bleed.
- Vekniss Soldier Packs – Not necessarily noteworthy, but they have a very quick respawn timer.
- Vekniss Drone – Very weak and also not that important, but you can get knocked into them during the Sartura encounter if not paying attention to positioning.
- Vekniss Hive Crawlers – These buggers can be quite lethal due to their strong poison abilities. Healers must be vigilant about quickly removing Crippling Poison, Mind Numbing Poison, and Poison Bolt.
- Vekniss Wasp Packs – These packs contain 3-4 mobs and none of them can be crowd controlled. Typically there will be a few Vekniss Wasps, and either a Qiraji Lasher and/or a Vekniss Stinger. Focus priority is Lasher > Wasps > Stinger.
Boss Encounters
There are a total of 9 boss encounters found within the Temple of Ahn’Qiraj. The Prophet Skeram is the only boss found above ground, with the other 8 bosses found in the main hive below. To reach C’Thun, you must kill four bosses after entering the hive (and killing Skeram above), two of which have tough requirements for resistances. We’ll split up the boss strategies into two sections, one with the required bosses and C’Thun, and another for the three optional bosses.
Required Bosses
The Prophet Skeram
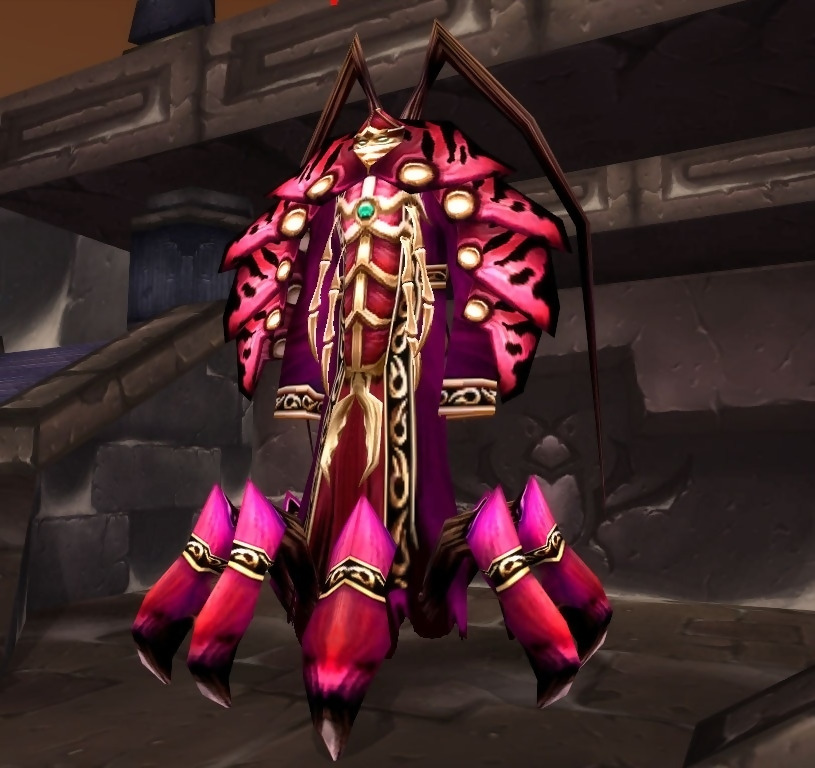
Skeram is not an incredibly difficult fight, but there are a few mechanics to be aware of beforehand. The first of them is his ability to split after losing 25% of his health, will happen three times throughout the fight. He will disappear for a moment, but then will reappear with two clones. His clones are significantly weaker than him and should be focused down before attacking the actual boss. Make sure to interrupt the clones whenever they try to spell cast.
The next mechanic involves a mind control ability. For 20 seconds, the target closest to the boss (that isn’t actively tanking him) will be put under the spell of True Fulfillment. This puts them under Skeram’s control, while also tripling their damage output and making any spell casts instant. They will also grow larger, making them easier to identify. You can easily deal with this by sheeping whoever becomes controlled.
Another ability he will use is Arcane Explosion. Anytime there are at least 5 raid members next to the boss, he will repeatedly cast this spell. You can avoid this by keeping 4 or less raid members in range of him at all times.
While you shouldn’t have 5 raid members near the boss, you also need to make sure that there is always at least 1 player near the boss and his spawned clones at all times. This is because he will cast Earth Shock, which does up to 3,000 damage and is an instant cast.
The last thing you need to look out for is his ability to teleport. There are two platforms in the room, one on the left side and another on the right. Skeram will periodically teleport to one of these two platforms, which can become problematic if there isn’t anyone waiting on the platforms.
He will freely cast Earth Shock if you don’t have any raid members where he teleports to. To combat this, you should place 2 players on both platforms so he doesn’t pick off raid members. Have the main tank drag him back to the center of the room once he does teleport.
The fight sounds daunting, but it is actually fairly straightforward if you focus on clones, sheep whoever becomes mind controlled, keep less than 5 raid members near the boss, and have 2 players on each platform. Keep it up and you’ll quickly dispatch the first encounter of AQ40.
Battleguard Sartura
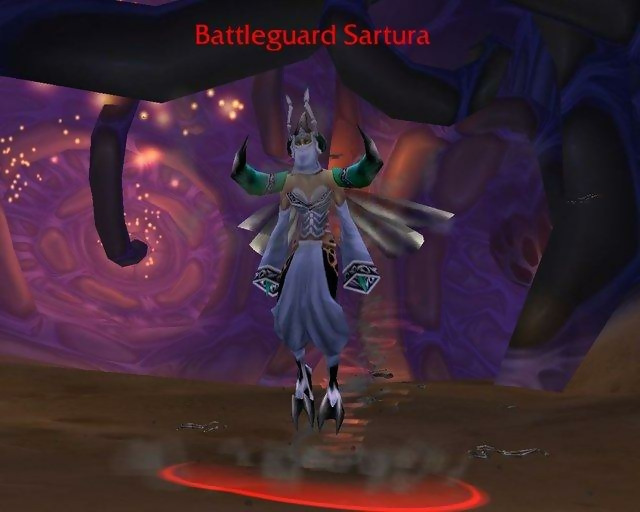
Sartura is another story because she is trickier to deal with. There is a lot of raid damage that will happen, particularly if you have a melee-heavy raid group. To start the fight off, there are three extra adds (Sartura’s Royal Guard) that should be focused and killed before damaging the boss.
Both the main boss and her three adds all use Whirlwind. This will hit all raid members within 10 yards of either Sartura or her royal guards. The boss version of this ability hits quite hard (up to 3,500 damage), while the guard version will only deal up to 1,500 damage. Either way, this can quickly become deadly if any of the adds are near each other and/or the boss.
To deal with this effectively, you should have an offtank pull each add towards the edge of the room while your main tank drags the boss to the center of the room. However, you should have the offtanks initially grab aggro by having a hunter use Distracting Shot first from a distance so multiple Whirlwinds don’t kill any tanks before you get a chance to position the adds. The offtanks can grab threat once all four targets are a fair distance apart from one another.
Another thing to know about is that the guards will also use a knockback ability, but this isn’t much of an issue if the tanks are careful to keep their back to a wall. Whenever any target in the room uses Whirlwind, threat is completely reset, so it is important for damage to slow around this period so that tanks can hold aggro. After an add dies, the offtank should move in to help with Sartura herself.
The final thing to be aware of is that there is a hard enrage that starts after 10 minutes. This will pretty much one shot everyone in the raid once it happens. One piece of advice for this fight is that all four enemies can be stunned. You should make sure to use any stuns available to the group to help mitigate damage for healers.
This fight is not particularly difficult, but once you understand how to execute the pull right, there shouldn’t be a big problem taking her down. Just remember to keep adds at the edge of the room, focus them one at a time, and use stuns whenever available.
Fankriss the Unyielding
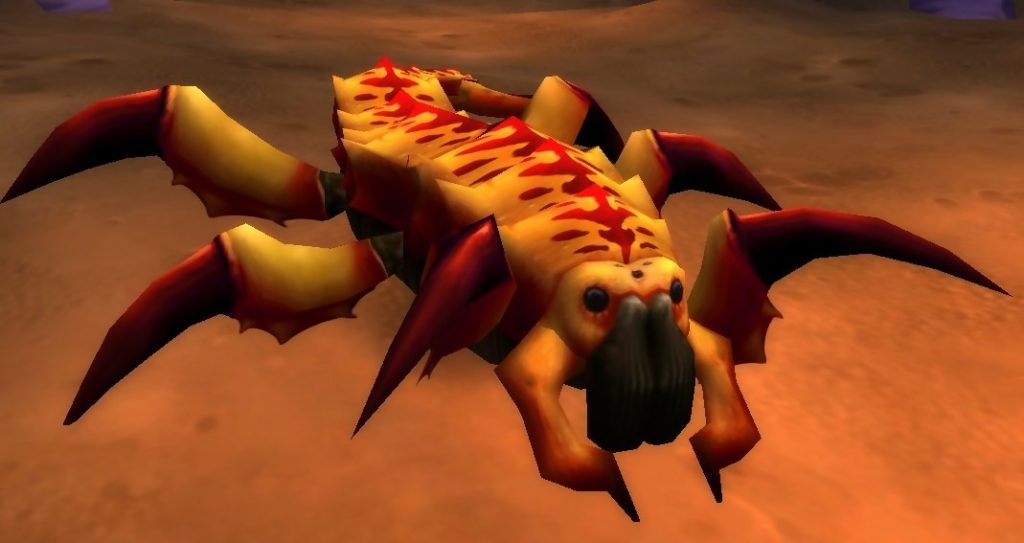
Now Fankriss is a much easier fight altogether because it is a pretty straightforward encounter. The boss only has one ability to watch out for, which is Mortal Wound. This is a stacking debuff that will reduce incoming healing by 10% for each stack. To combat this, you should have two tanks focusing on the boss at all times. Have them switch off between 3-5 stacks so the debuff will fall off.
You will need another 3 tanks for this fight because there are several adds that spawn during the fight. There are three distinct points where bugs will appear from, which you should have one offtank at each entrance. There are two different types of mobs that will spawn, but your tanks only need to pick up the Vekniss Drones.
These drones will not be killed, but the Spawns of Fankriss must be killed ASAP. Whenever these appear, all DPS members much immediately switch damage off the boss and kill the spawns instead. These little bugs naturally hit hard by default, but they will also go Berserk and one shot anyone they hit. Adds can be stunned and snared, so use anything you can to mitigate damage that they can do.
Once all spawns are dead, then DPS can return to attacking Fankriss. This encounter is very simple if you remember to switch off tanks on the boss and kill spawns immediately.
Princess Huhuran
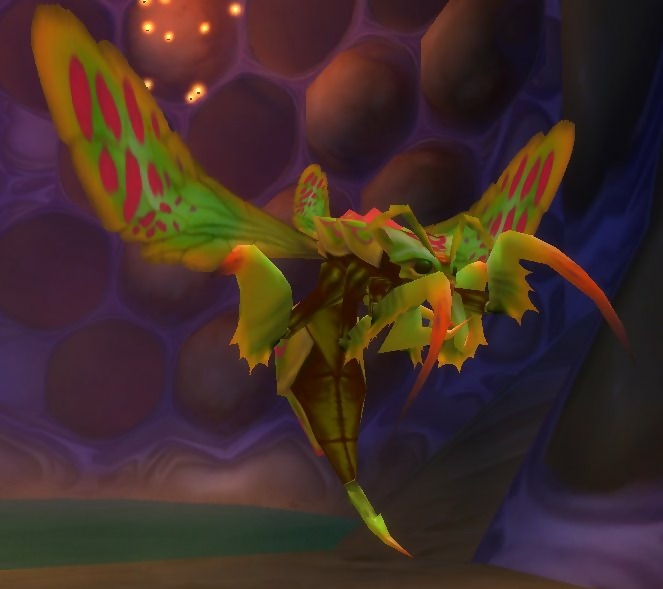
Huhuran is a real problem because there is a hard requirement for nature resistance. As a matter of fact, your raid group is likely to get stopped here for several lockouts unless you have 15 players with a minimum of 200 nature resistance. The reason for this is that Huhuran will enter a permanent berserked state at 30% health and will repeatedly spam her Poison Bolt Volley ability on top of attacking twice as fast.
Poison Bolt Volley will deal roughly 2,000 damage before resistances, so you can see why nature resistance is a hard requirement when it is literally used every 3 seconds after 30% health. The targeting for this ability is the 15 closest players to the boss. This means that your tanks by default will need high amounts of nature resistance, 300 is optimal.
Because of this, you can only kill Huhuran with 15 players (including tanks) that have at least 200 nature resistance. Assuming that requirement is met, you will have a chance of killing her. Now there are a few other mechanics to keep in mind, the first of which is her stacking poison that she will use on her focus target (the main tank).
This is called Acid Spit. This deals damage every 2 seconds and can quickly become lethal if not managed well. You should have at least three tanks available to handle Huhuran because this poison will last 30 seconds. Try to avoid having more than 10 stacks of the poison on any tank at a time to avoid death.
Another mechanic to keep an eye on is Frenzy. The boss will use this periodically, so hunters must be ready to quickly use Tranquilizing Shot. If not dispelled, Huhuran will freely use her Poison Bolt Volley.
Ironically, the boss also has the ability of Wyvern Sting. This is fairly similar to the hunter shot, but it a 15 yard AoE ability and lasts for 12 seconds. This should never be dispelled unless it hits an offtank because the resulting damage will eat too much of healer’s mana.
The last ability to keep an eye out for is an AoE poison, Noxious Poison. This is randomly targeted and will deal around 3,000 damage across 8 seconds while also silencing. Because of this, you should have the whole raid group spread out until the boss reaches 35% health so the least amount of raid members get hit by it.
As daunting as this sounds, the fight isn’t impossible to deal with until you reach 30% health. Once this happens, the second phase of the encounter begins and you will need to have the 15 members with more than 200 nature resistance move in close to the boss so that they are the only targets hit by Poison Bolt Volley.
All cooldowns should be saved for phase two because the rest of the fight is a pure DPS race. There is so much damage being pumped out to the 15 targets being hit, so you need to minimize the amount of time in this phase to successfully kill the boss.
It is very helpful to have Greater Nature Protection Potions handy for these 15 raid members to help reduce incoming damage. Additionally, separating the 15 soakers into 4 groups is recommended so that you can put a priest into each group for Prayer of Healing. Any druids in the raid group should make sure to save and use Innervate for the priests focusing on healing the PBV soakers.
As you can see, Huhuran is incredibly difficult to kill. With enough perseverance, coordination, and nature resistance, she definitely can and will die. Remember to dispel Frenzy, swap tanks at 10 stacks of poison, don’t remove Wyvern Sting unless it hits an offtank, stay spread out above 30% health to minimize Noxious Poison splashes, and have your 15 PBV soakers become the closest targets once she reaches 30% health.
The Twin Emperors: Vek’lor and Vek’nilash
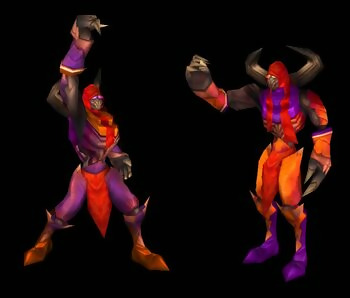
The Twin Emperors poses another tough fight, but unlike Huhuran, there are not any explicit requirements for nature resistance. In contrast, this fight requires a funky tanking lineup and precise technical play to down both emperors. To begin with, there are two emperors in this fight; Vek’lor and Vek’nilash. They both share a health pool, meaning that damaging one of them will hit the other emperor as well.
What makes this fight especially unique is that Vek’nilash is immune to magic damage (but does take physical damage) and Vek’lor is immune to physical damage (but does take magic damage). This means that you will need to have your spell casters being the only source of damage on Vek’lor, while only melee and hunters damage Vek’nilash.
Sounds easy enough, but the two emperors will swap positions after every 35 or so seconds. This is significant because you absolutely must keep the two emperors far away from each other. Anytime the Twin Emperors are within 60 yards of each other, they will use Heal Brother, a massive instant cast heal that will make any damage you deal pointless.
To deal with this, you will need to keep the emperors on opposite sides of the room to prevent any healing from happening. This alone isn’t very difficult, but the fact that the emperors teleport makes this a little trickier. Considering that Vek’lor is immune to physical damage, you must have a warlock tank to hold aggro on him.
Having 2 warlock tanks is optimal so that swapping tanks is much easier to handle. Your warlocks should have around 8,000 health and more than 200 shadow resistance. If they have access to Soul Link, less SR is acceptable.
Whenever the emperors swap places, you’ll need to switch who is tanking in that position. If Vek’nilash is now in the area, you’ll need a warrior ready to swap in and be the nearest target to generate threat. If Vek’lor is appearing, you’ll need a warlock ready to step in and take aggro.
In addition to the emperors, there are also passive bugs that patrol the area. In this state they aren’t a problem, but they become an issue when the emperors use their special abilities on them. Vek’nilash will cast Mutate Bug, which will make a bug aggressive and deal 18x more damage! Vek’lor will cast Explode Bug, which will make the bug explode and deal around 3,000 damage in a 10 yard radius.
Both bug abilities will be used roughly every 10 seconds. You can’t do much about Explode Bug, but any mutated bugs must be dealt with immediately. The best way to handle them is by having two offtanks stand in the center of the room, with two hunters nearby assigned to pulling the mutated bugs to them and therefore the offtanks.
The best way to approach the encounter is by splitting up the raid into five distinct groups; two healer groups (one for each emperor), one with offtanks and hunters, another group consisting of all melee, and the last group containing all spell casters.
You should pull the emperors to opposing sides of the room such that the casters can stand on the stairs and quickly run back and forth when teleports happen. The melee groups will constantly need to run back and forth across the room, making their job a little tougher. Healers can stay fairly stationary, forming a triangle above and between both emperors. Your offtank and hunter group should stand in the middle of the formed triangle.
Now that the fight is basically laid out, it is important to know that this is a timed encounter. After 15 minutes, both emperors will Frenzy, which is a guaranteed wipe. As long as your DPS groups are strong, this won’t be much of a problem.
As if all these mechanics weren’t enough, both emperors also have two of their own abilities that they will use. Vek’nilash (warrior tanked) will use Uppercut, which does a nice chunk of damage and knocks a raid member back (will not be used on a tank). He also uses Unbalancing Strike, which does almost lethal damage and makes the tank weaker for 6 seconds. Your warrior tank must immediately be healed to full after an Unbalancing Strike so that he doesn’t die, which will likely cause a wipe.
Vek’lor (warlock tanked) has three abilities of his own. Shadow Bolt is his main ability, which is a direct cast on the warlock tank. This has just a one second cast time and two of them can quickly kill your warlock tank without good shadow resistance. He will also use Blizzard, which is similar to the mage spell and is an AoE effect that slows ands does significant damage every second. Anyone caught in the spell must run away immediately! His last ability is Arcane Burst, which does nearby AoE damage and causes a knockback. It is important that nobody is near Vek’lor (other than the warlock tank) so nobody gets hit by this.
While all of this may sound overwhelming, the mechanics themselves are not too difficult to handle. What makes the fight hard is that there are so many of them. Having 2 well geared warlock tanks can also be a challenge in itself. After a few attempts, you’ll have a good understanding of how the fight actually plays out and where to place your groups.
Once your raid group understands how to handle the emperor swap, the rest of the fight is rinse and repeat. Don’t forget to pull and kill bugs (melee group should switch to them during emperor swap) because that can easily get lost during all the chaos.
C’Thun
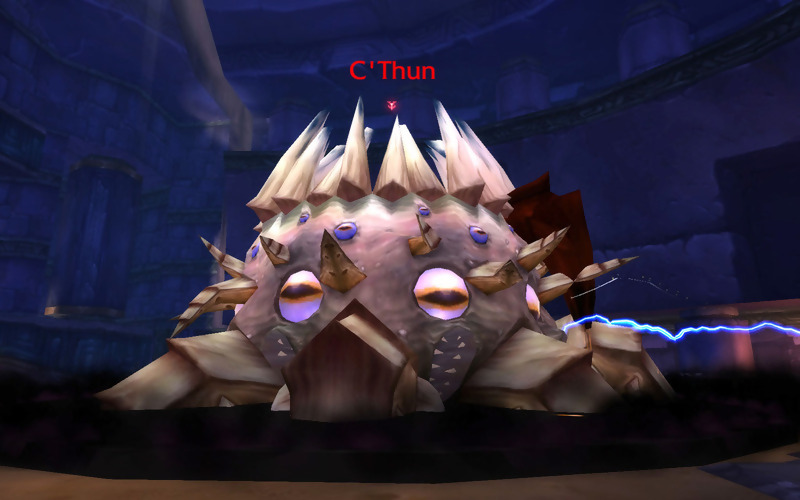
First of all, if you’ve made it this far, congratulations on reaching Classic WoW’s ultimate boss, C’Thun! This will be one of (if not the top) the toughest encounters in the game and will require an extremely skilled group of 40 raiders to defeat. There’s a lot to cover for this fight and it is very distinctly separated into two different phases, so the strategy will be split up into two sections below.
Before the fight even begins, you’ll need to know how to enter the room and where to position once inside. Not only is the entire fight difficult, but you can easily have raid members picked off before even getting situated inside the room. All players should use a Greater Nature Protection Potion before the pull, then get on their Qiraji mounts to prepare.
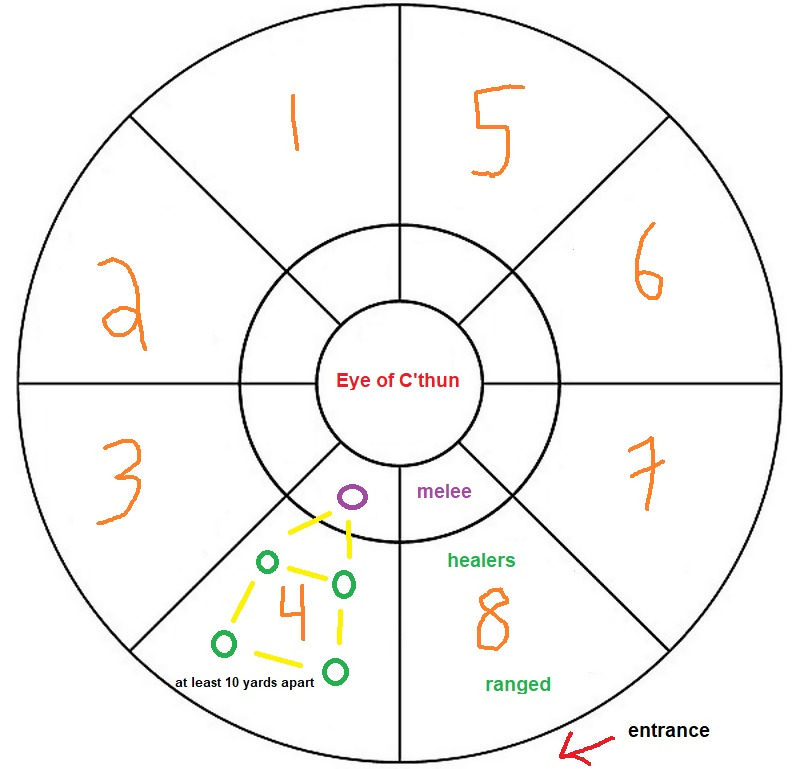
Half of the raid should enter the room from the left, while the other half enters from the right. Let tanks enter initially, then the rest of the raid should quickly follow suit. The 8 raid groups should split up around the room so that there are 2 spread out groups of 5 in each quadrant of the room.
This is easier to conceptualize by splitting the room into 8 and organizing raid groups so that each party has at least two healers, one melee (or tank) member, and a ranged member with the fifth member being another of the three. Once inside the room, the 8 groups must be spread out from one another to avoid damage from Eye Beam.
This is a very powerful ability that deals around 3,000 nature damage and chains to nearby raid members, but doubles whenever it jumps. Because of this, you should have all 5 party members in their respective areas of the room spread out 10 yards from each other so that they don’t get hit by chained Eye Beams. Melee members should be closest to the Eye of C’Thun, while the four healers/ranged will be spread out in a square behind them.
Take a look at the image below for a rough idea of how to position for phase one. All 8 portions of the room should be positioned like quadrant 4. You’ll want to reference this image for later when figuring out how to avoid Dark Glare, an instant beam of death that C’Thun will use, sweeping around the round 180º. When this happens, every group will need to run to the opposite side of the room to avoid the sweep and reform their spread-out formation. (Example: people in quadrant 1 will need to run to quadrant 8, quadrant 6 will run to quadrant 3).
Phase One
Once you have the positioning laid out and the pull perfected, you can actually start to make some progress on this eyesore of a boss. With the proper positioning, no more than one person should be hit by Eye Beam. This is important because C’Thun will literally use this ability every 3 seconds.
During every 45 second interval, Eye Tentacles will also be spawned. These will appear closest to where melee are positioned and will use Mind Flay, which deals a decent amount of shadow damage every second while also slowing their target. Anytime Eye Tentacles spawn, every DPS in the raid group must switch and focus on them immediately. Another set of them will spawn in 45 seconds, so you definitely don’t want two of them freely channeling on the raid.
Another type of tentacles spawn randomly during phase one; Claw Tentacles. These are nowhere near as bad as Eye Tentacles, but they will melee anyone nearby them. Not only do they spawn at random intervals, but they also can appear anywhere in the zone. Your raid group should also kill these, but casters should focus on them because it is easier for them. Whenever they appear, there will be Ground Ruptures. These will knockback anyone nearby and deal around 1,500 damage.
The other thing to watch out for during this phase we mentioned above – Dark Glare. If you are caught by this, you will absolutely die. C’Thun will use this ability every 90 seconds. He will create a dark cloud in front of his eye and wherever he is facing will be where the beam starts. The raid group directly in that area of the room must immediately start running counter-clockwise towards the opposite side of the room.
Refer to the image from earlier to understand where you should run during Dark Glare. Every group in the raid should now be on the opposite side of the room and should assume their formation to stay 10 yards apart. Everyone should stay in this position until the next Dark Glare, at which point all raid groups should return to their original location in the room.
While running away from the Dark Glare, make sure that you are far away from the actual beam. If you get hit by an untimely Claw Tentacle spawn, you can easily get knocked into the beam and die. Phase one is not really the hard part of the fight, so it is important that as few raid members die as possible during this point.
Remember to quickly focus on Eye Tentacles, run away from Ground Ruptures, have casters hit Claw Tentacles, and run away from Dark Glare at all costs to get through phase one. Once the Eye of C’Thun loses all of its health, phase two will begin.
Phase Two
During phase two, C’Thun himself will make his appearance. He doesn’t actually deal any damage, nor does he take any from your attacks and spells. Instead, you will need to focus on killing the tentacles that spawn throughout the phase. Keep the same formation that you ended phase one in to ensure that Eye Beam is not chained via the larger tentacles.
Eye Tentacles continue to spawn throughout this phase and they are again the number one priority for everyone to kill whenever they appear. There are also Giant Eye Tentacles that appear during this phase. These have the ability to use C’Thun’s Eye Beam ability. Despite this, they are not as important to kill as the smaller Eye Tentacles.
The Giant Eye Tentacles can also be silenced and stunned, which makes them a little easier to manage. When all Eye Tentacles are dead, the next kill priority is the Giant Eye Tentacles. These will spawn randomly just like the Claw Tentacles from phase one.
Speaking of Claw Tentacles, there are also Giant Claw Tentacles that appear during this phase. These are much stronger than the smaller Claw Tentacles because they do twice as much damage. This applies to their Ground Rupture and basic attacks, which can easily almost kill a cloth wearer.
In addition, they will cast Ground Tremor, which knocks all targets down in a small area and also stuns them. These are the lowest priority on the kill list after Giant Eye Tentacles. Giant Claw Tentacles need to be picked up by the tanks. Everyone else should stay away from them so they don’t get knocked down.
While your raid group is busy killing tentacles, a few raid members will be sucked into C’Thun’s belly. Inside there are a pair of Flesh Tentacles. These are the only way to actually weaken C’Thun during this phase, so whoever is sucked inside must focus on doing the most amount of damage that they can. Flesh Tentacles only deal melee swings, so casters can DPS without needing to worry. Melee members will need to be a little safer so they don’t die from them.
As important as it is to deal damage to the Flesh Tentacles, you cannot stay inside the stomach forever. You will receive a stacking disease called Digestive Acid. A single stack does 150 damage every 5 seconds, which is insignificant by itself. Any raid member should leave the stomach before they receive 10 stacks, at which point they will be taking more damage than it is worth for them to stay in the stomach.
Whenever you leave the stomach, the disease will immediately disappear. It is important for your raid group to understand who can actually stay in the stomach and who should immediately leave. At least one healer should be in the stomach to keep players alive, but they will need to leave once getting close to 10 stacks. Tanks should immediately leave the stomach as they aren’t needed in here.
The best way to deal damage during this phase is to maximize the number of casters inside the stomach while minimizing melee DPS. Optimally, there will always be at least one healer inside the stomach at all times. Whenever a player needs to leave, they should run in between the Flesh Tentacles to get transported back to the main room.
Once the Flesh Tentacles in the stomach are killed, C’Thun will become weakened for 45 seconds and vulnerable to damage on the surface. When this happens, the raid group must continue to focus on killing tentacles before hitting the boss. No tentacles will spawn during a weakened phase.
No damage should actually be dealt to C’Thun unless there are no tentacles alive. The one exception to this if there is a Giant Claw Tentacle alive, at which point it can be ignored while DPS focus on the boss. The priority in a weakened state is still Eye Tentacles, followed by a Giant Eye Tentacle, and then a weakened C’Thun.
There is no time limit for this fight, so it is imperative that tentacles are always prioritized before damaging the boss. This will be an extremely long fight, but it is absolutely doable. Remember to kill Eye Tentacles, stay spread out to avoid chaining Eye Beam, don’t stay in the stomach for more than 10 stacks of Digestive Acid, and slowly chip away at C’Thun to kill one of the best fights ever designed!
Optional Bosses
The Bug Trio: Yauj, Vem, and Kri
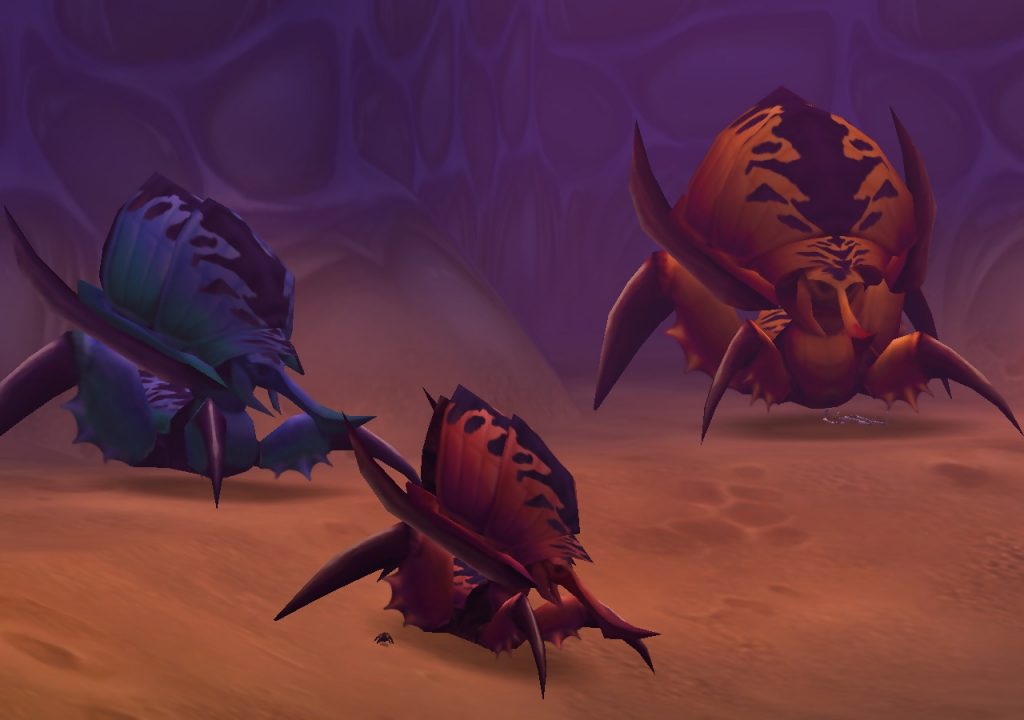
Before discussing tactics for this fight, it is important to know that there are multiple ways to approach the encounter. This is fairly significant because the loot you receive will depend on what order you will kill the bosses in. Ranging from most deadly to least deadly, Lord Kri is the toughest, Princess Yauj is in the middle, and Vem is the weakest of the three.
This means that the easiest way to approach the fight is by killing them in that order (Kri > Yauj > Vem), but you don’t necessarily have this choice if you want loot from the other two boss drop tables. If you want loot from Yauj, you’ll need to kill Vem before her (Kri > Vem > Yauj). The hardest way of completing this fight is by killing Kri last, which changes the order to (Yauj > Vem > Kri).
Regardless of what order you decide to kill the bugs, you need to keep them all separated from one another. Upon death, each bug has a unique effect that will affect the fight. When Kri dies, a poisonous cloud will spawn that does heavy poison damage every second, but the cloud will disappear fairly quickly.
When Yauj dies, numerous Yauj Broods will spawn and attack your raid. Vem is the most impactful bug to kill because he will cause any remaining bugs to completely enrage. When this happens, they deal double damage and use their unique abilities much more often than normal for the rest of the encounter. With this in mind, it becomes fairly clear why Vem should never be killed first.
As far as boss abilities go, Vem is quite weak. He has access to Berserker Charge, which does decent damage and knocks a target away. He will also use Knockdown when he arrives, stunning and hitting 5 nearby targets. However, these are both easily mitigated by keeping Vem cornered behind an alcove so nobody is actually in his line of sight for him to charge to.
As a result, he will only focus on the tank he is attacking and will use Knock Away. Make sure this tank keeps their back to the wall and prevents the boss from ever being in line of sight of any other raid members. When Vem is the last bug standing, he will go Berserk and double his damage and drastically increase attack speed.
While Vem is pretty easy to deal with, Yauj is just downright annoying. She will repeatedly use an AoE version of Fear, which also will reduce threat on whoever is affected. Horde guilds should use Tremor Totems to mitigate this, while alliance guilds should make use of Fear Ward. The bigger issue here though is her Great Heal, which can be used on her or either of the other two bosses.
Interrupts must be on point for groups attacking Yauj to prevent her from healing too much of her own health. This becomes much more difficult, but just as important when she becomes enraged by the death of Vem.
Kri has a frontal cleave attack and will periodically use Thrash to attack twice. These aren’t too difficult to deal with, but it is his Toxic Volley attack that is the real issue here. This deals minimal damage on hit, but the problem is the stacking DoT effect that is also applied. As you can probably imagine, this can quickly get out of hand when he is enraged by the death of Vem.
This is why killing him last is definitely the hardest way of approaching the fight, simply due to the fact that there will be such a high demand to dispel the poison effect applied to raid members.
No matter what kill order you choose, remember to keep all three bosses separated, stay on top of interrupts for Yauj, and be diligent about removing the Toxic Volley poison. Don’t forget that killing Vem will make either remaining boss much deadlier.
Viscidus
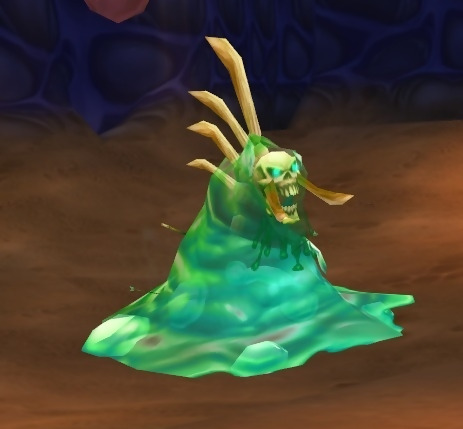
Viscidus is a fairly interesting fight due to how you actually deal damage to the boss. Before beginning, be aware that you can easily reset this fight by running out of the room, helping to reduce downtime between failed attempts.
There are two different phases to the fight that will repeatedly switch back and forth. The first phase is Viscidus in his regular form, during which he can attack and use abilities on the raid group. The other phase involves the boss being split into 20 blobs, each of which slowly make their way to the middle of the room and no damage is dealt to the raid.
During phase one, all melee members should stay out of the boss room. This is to reduce the amount of damage being dealt and to help reduce the load on healers. At this point, you should only have spellcasters actually attacking Viscidus in his main form. To begin the fight, damage should be dealt until the boss is at 95% health.
At this point, all mages in the group should begin using rank 1 of Frostbolt. Actual damage output to the boss is not terribly important, but the number of Frostbolts he receives does matter. The reason for this is that Viscidus will freeze up after being hit by a number of Frostbolts (not the damage dealt by them). As you can see, melee members can’t really help towards freezing the boss and this is why they should stay out of the room until Viscidus is frozen.
The abilities he will use include Poison Bolt Volley, which does decent damage and also applies a stacking poison on anyone in range. This is the main problem, which is why having less raid members nearby is beneficial to the healers. He will also spit a cloud of poison that deals decent damage every second, but can easily be escaped.
Once the boss does become frozen, all the melee members will need to run in and attack the boss to shatter him. Similar to the way he becomes frozen, it is not the amount of damage dealt, but it is instead how many hits he receives that will cause him to shatter. Because of this, all melee members should equip the fastest weapons they have (even basic quality vendor weapons will work) to make him shatter.
If Viscidus does not shatter, the raid should leave the room to reset the encounter. It is imperative to shatter the boss so that he splits into blobs for phase two. During phase two, there will be 20 blobs around the room, each with 10,000 health. Each blob that dies will remove 6% of the boss’ total health.
The best way to approach this fight is to ensure that there are three periods of phase two and to kill 6 blobs during each phase two. This will remove 30% of his health during each blob phase. With this in mind, you should have six dedicated groups of raid members that will each focus on a different glob in the area.
Killing five globs isn’t a huge problem, it will increase the number of freeze > shatter > blob smacking cycles you will need to complete. Melee members should run back out of the room after every blob phase to continue helping mitigate raid damage being dealt. Aim for 5-6 globs during each phase and repeat the freeze > shatter > blob smacking cycle until he falls down for good.
Remember to dispel Toxic Volley, use rank 1 of Frostbolt for freezing, use quick weapons to shatter Viscidus, and focus on killing 6 blobs during each phase two to take down this interesting boss.
Ouro
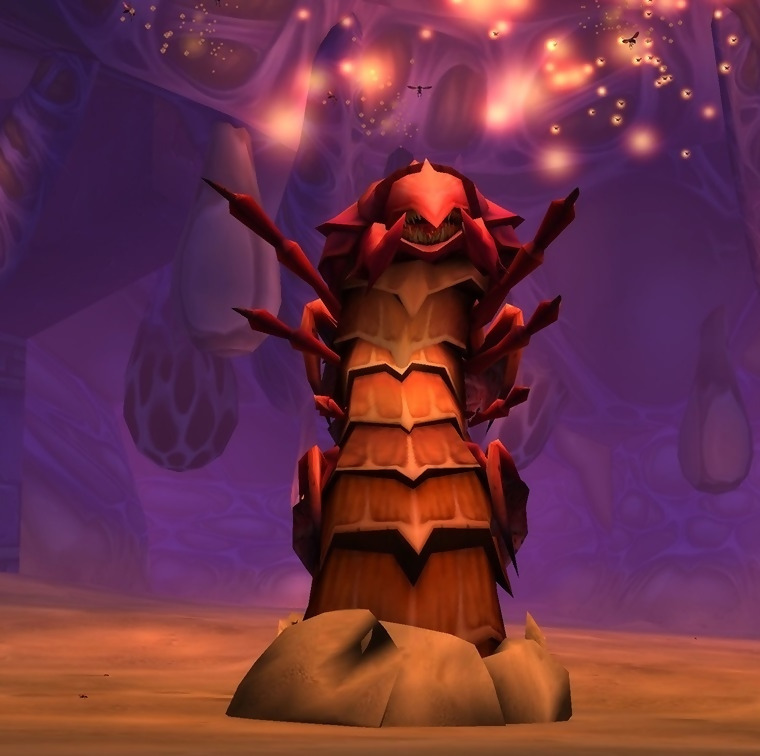
Ouro is the third and final optional boss within AQ40. As long as you properly position the raid group for this fight, it shouldn’t be an issue to tackle him as well. The boss alternates between being above ground and submerging. He will use different abilities depending on whether or not he is surfaced or underground.
The fight will begin with him above ground, where he will stay until there is either nobody directly around him or 3 minutes have passed. The goal is to keep him above ground as long as possible so the raid can actually attack him. This becomes tricky due to his Sweep ability. This hits all nearby targets and knocks them back while dealing roughly 3,000 damage. However, this does have the chance of being resisted, which can help lengthen the amount of time he spends above ground.
Sweep will occur every 90 seconds, which means that this will typically be how long you have Ouro above ground to deal damage. If you get lucky and an offtank resists this, then you will have a full 3 minutes to deal damage instead. Whenever a Sweep is about to happen, melee DPS should run away to avoid getting hit by it, letting the offtanks soak it instead.
To properly position for the fight, you should separate the raid into three groups. There should be one for casters, another for melee DPS, and a third for healers. The main tank should face the boss away from the raid, while the melee group will be to Ouro’s left side. Casters will be on the right side of the boss, while healers will be to the left of the boss and closer to to melee (but not actually in melee range).
You will want to keep a few healers in the melee group to keep the tanks alive, while you’ll need another pack of dedicated healers located significantly behind the caster group. The reason for this is that Ouro will use a Sand Blast ability. This is a very nasty attack that does roughly 4,000 AoE damage in a massive cone towards whoever has the second most amount of threat and also immobilizes them for a moment.
This person will definitely be an offtank, which means that you can impact who is ultimately hit by the blast. You should have offtanks positioned in front of the caster group so that the casters and offtanks are the only raid members hit by Sand Blast. The 3-4 healers behind the casters should be far enough away so that they don’t get hit by it, but are close enough to quickly heal all the casters that were hit.
Whenever a Sweep happens, if an offtank is able to resist the attack, they should immediately move to where the main tank previously was so that the boss is not facing the raid group. Inevitably Ouro will submerge at 3 minutes or 90 seconds if you are unlucky, which begins the second part of the fight.
When the boss is underground, he will spawn Quakes around the room based on where he is traveling. If any raid member gets hit by them, they will take around 1,500 damage for every second that they stand in the Quake. Everyone will need to watch their feet and be quick about avoiding his path to not take damage.
Once Ouro is done swimming underground, he will resurface and bring roughly 20 scarab mobs to the fight. These are fairly weak, but they will need to be quickly AoEd down so that random raid members are not picked off. Once the scarabs die, the groups should reassume their positions to where they were before the boss submerged.
The fight will continue like this until the boss reaches 20% health. At this point, he will frenzy and will no longer go underground, but will use both of his above ground and submerged abilities. This means that you will need to stay in the initial group positions while being careful to avoid Quakes on the ground.
Scarabs will also appear, but these should be mostly ignored. These should be crowd controlled via AoE effects like fearing and Frost Nova. After Ouro reaches 20% health, the fight becomes very chaotic and can quickly spiral out of control. Any DPS cooldowns should be saved for this phase to quickly power through it.
Remember to keep proper positioning to minimize Sand Blast damage, avoid Quakes, and save cooldowns for sub 20% to make this worm disappear for good.

